
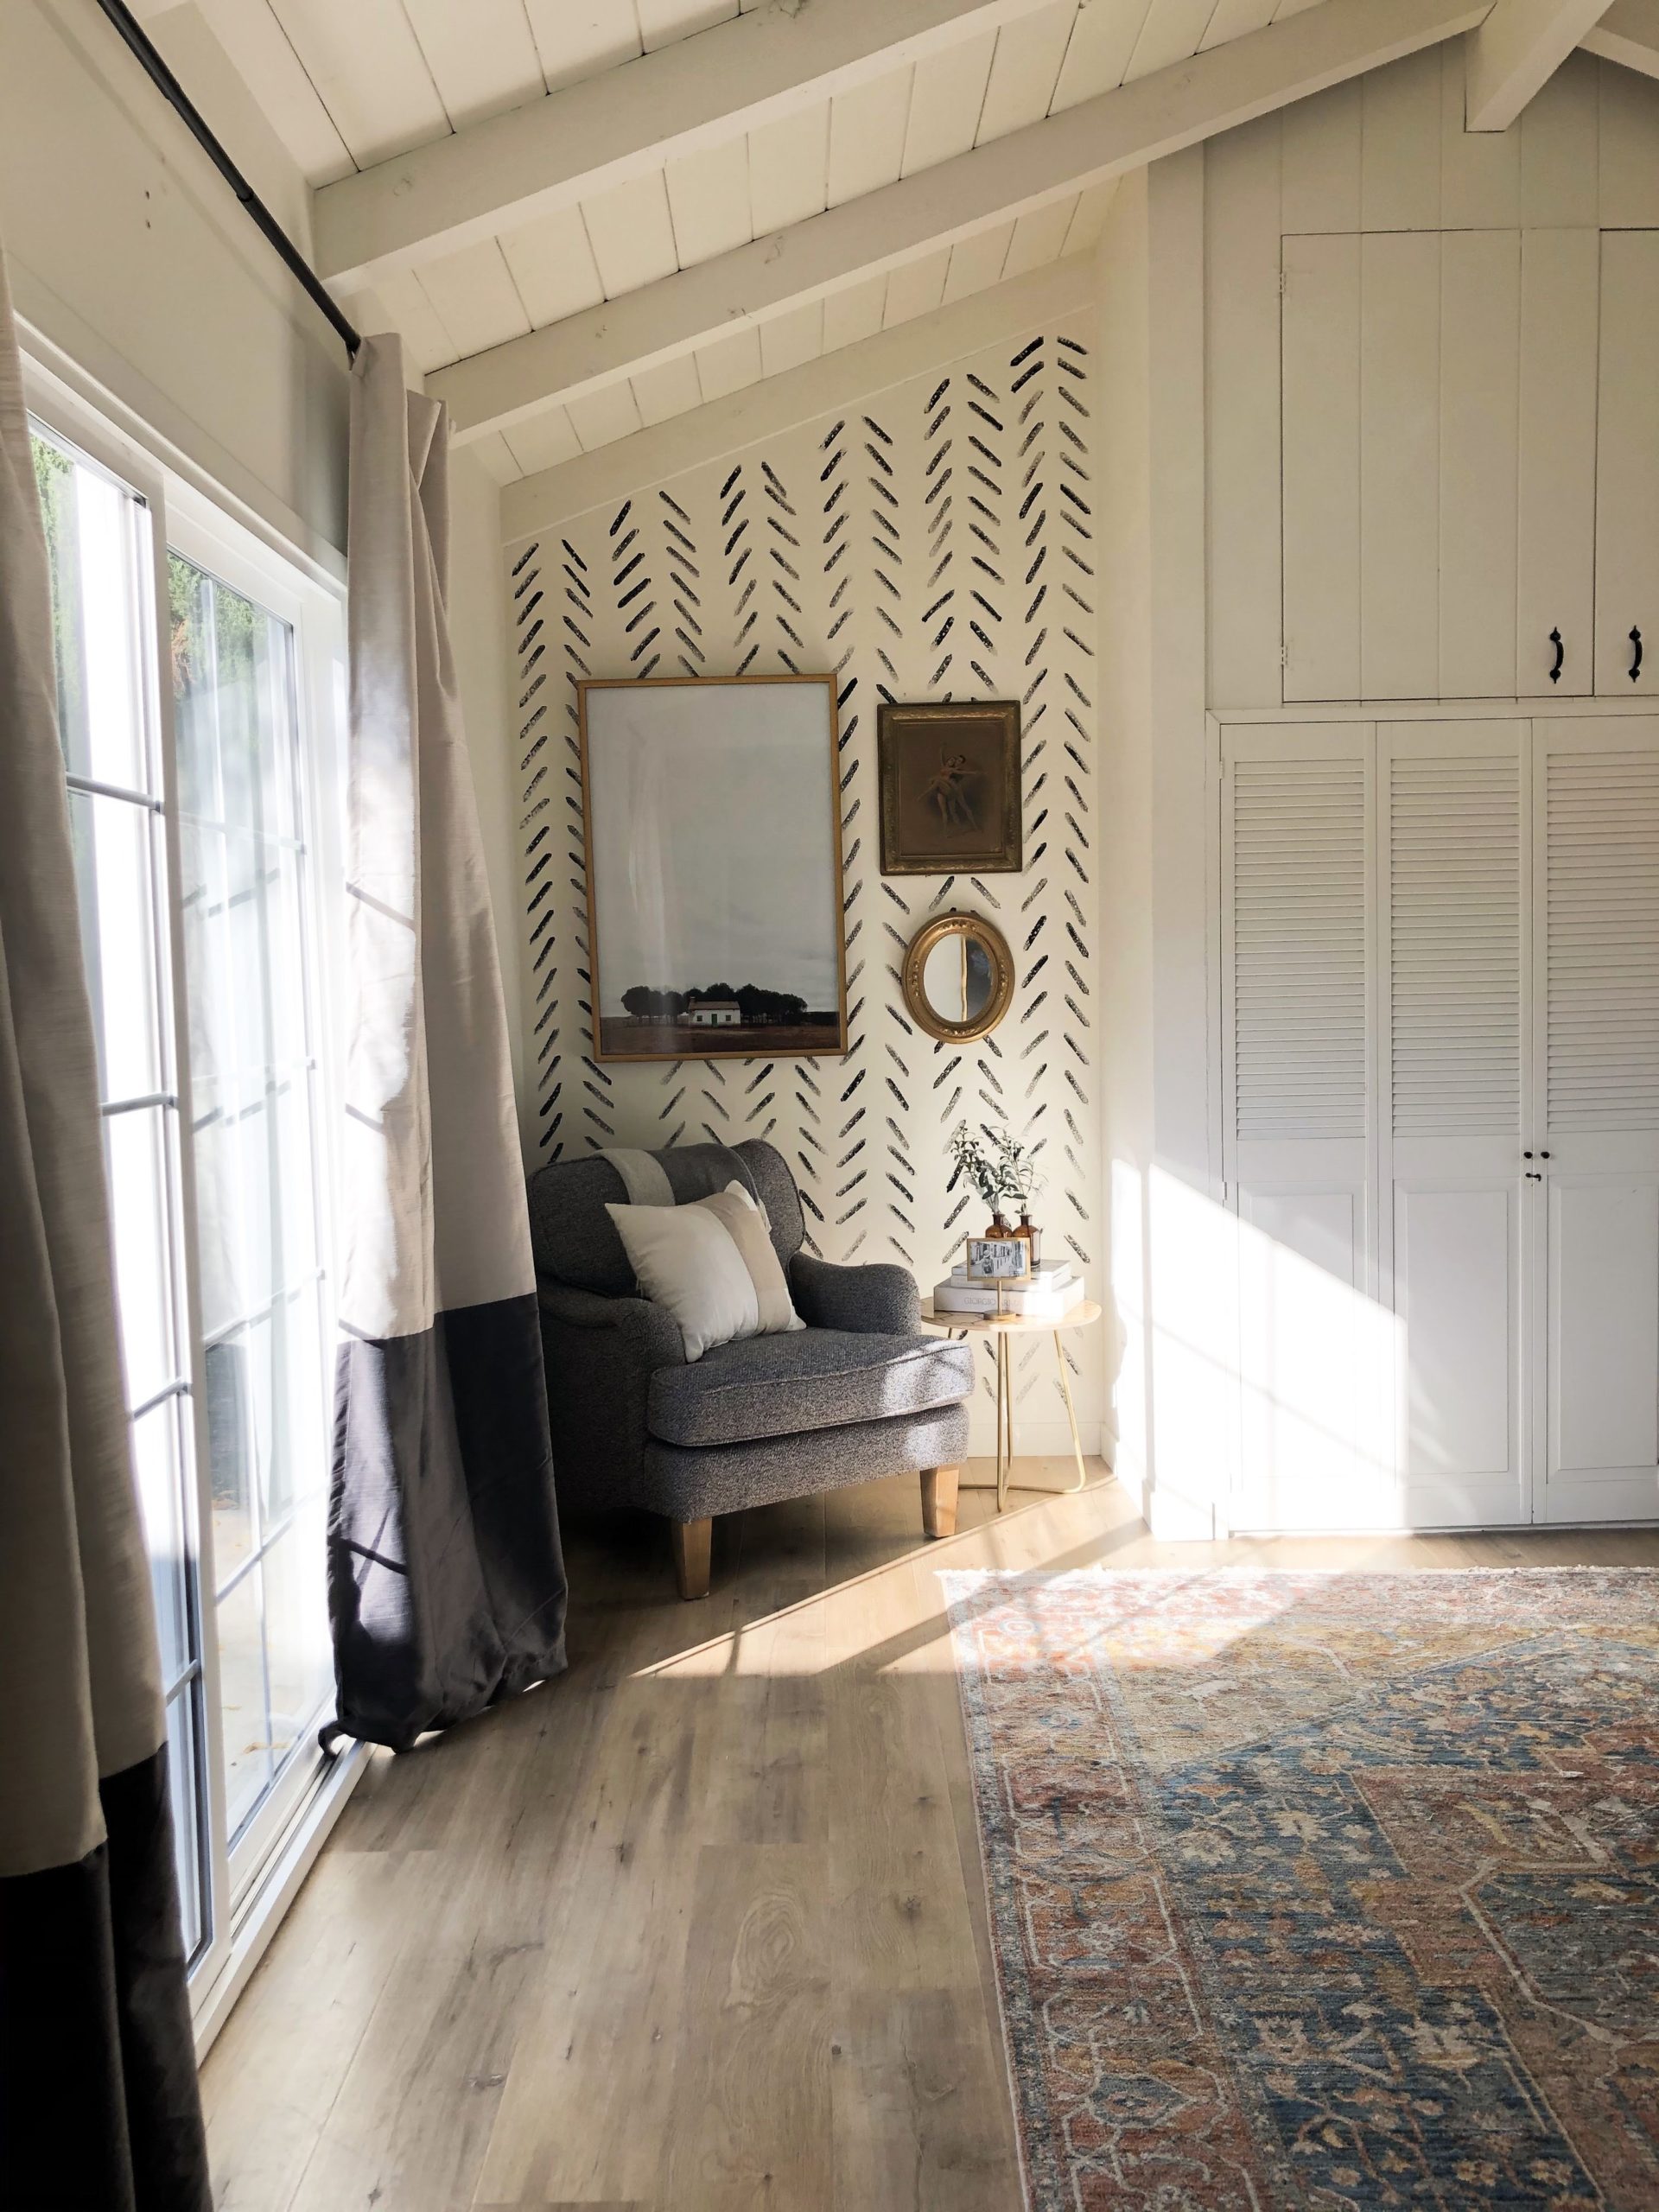


Not a weekend goes by when I’m not painting these days, and I have another super easy (and cheap!) DIY that I just finished this past weekend. Remember that Faux Wallpaper Dot Wall I did a few months ago? Well instead of a paintbrush, I used an old dish sponge. Yup, you read that correctly. There are all kinds of different sponge techniques that you can play around with, and below is the one I chose to use this weekend.
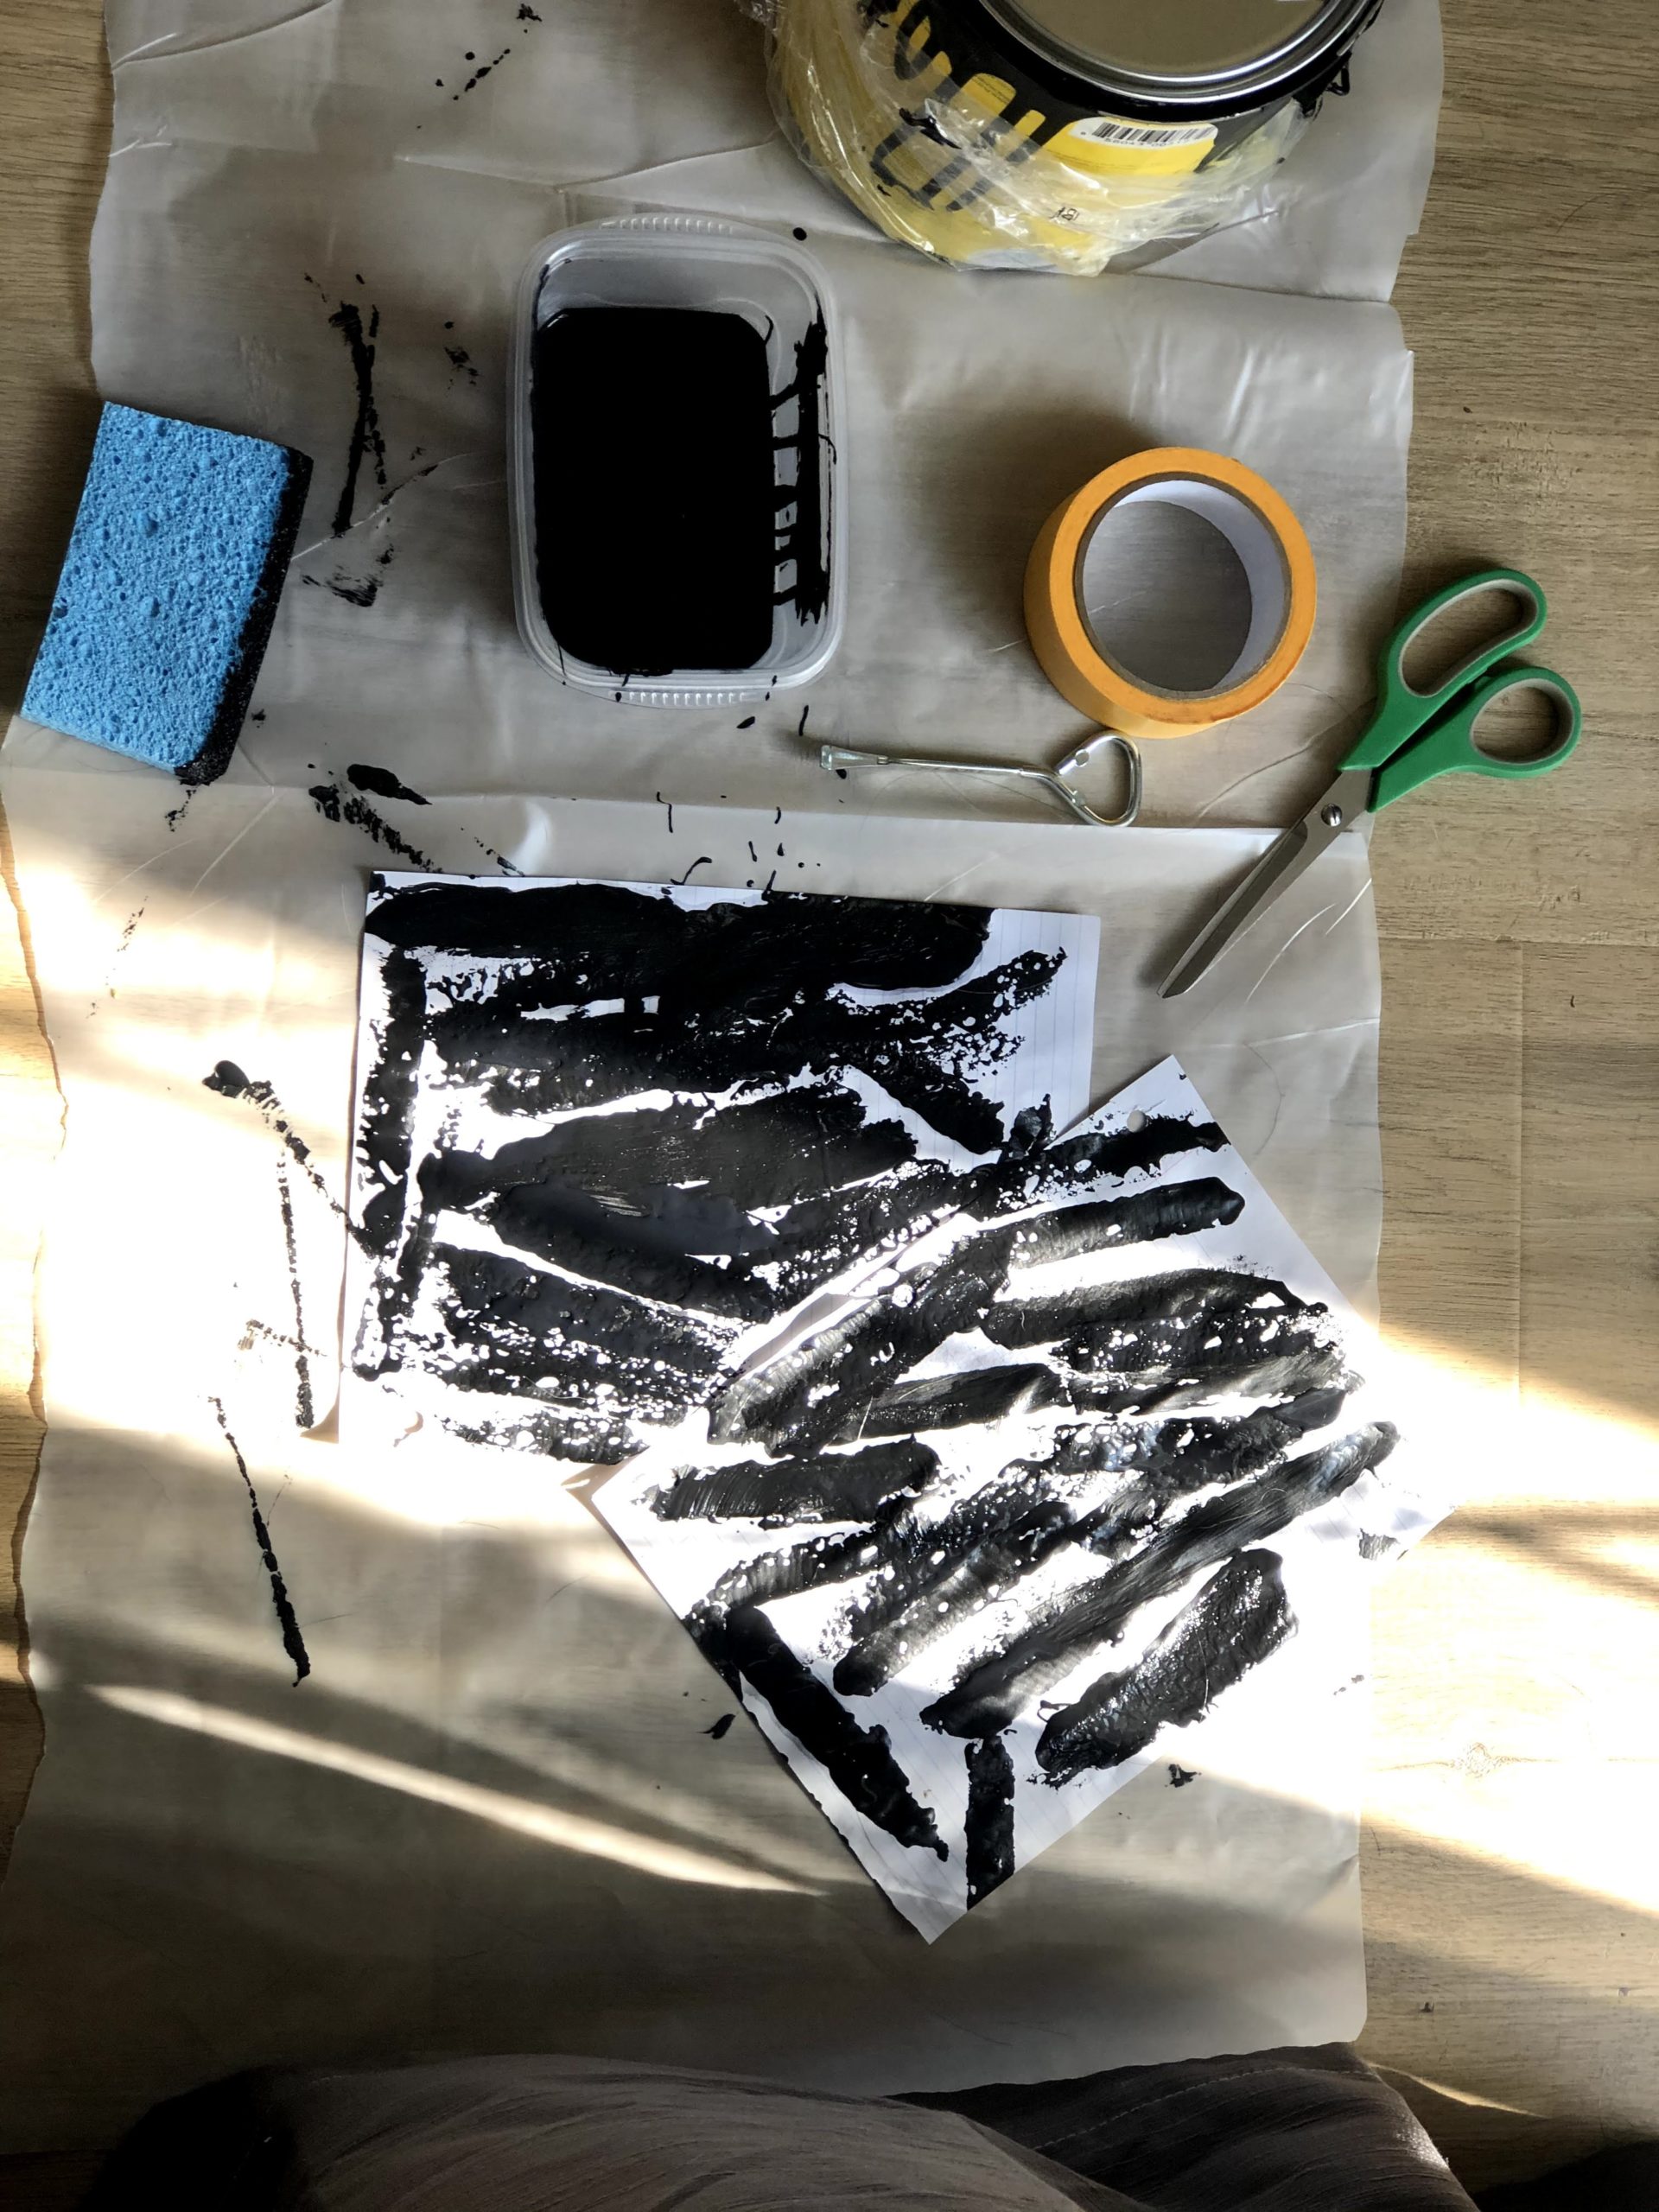
This is what you’ll need:
 Step 2:
Pour a small amount of paint into a tray, or in my case, I used a small tupperware that would fit my sponge. **You will not need much paint AT ALL. My wall was small but I barely used any. If you choose to do a larger wall, I’m confident you won’t need much either.
Step 3:
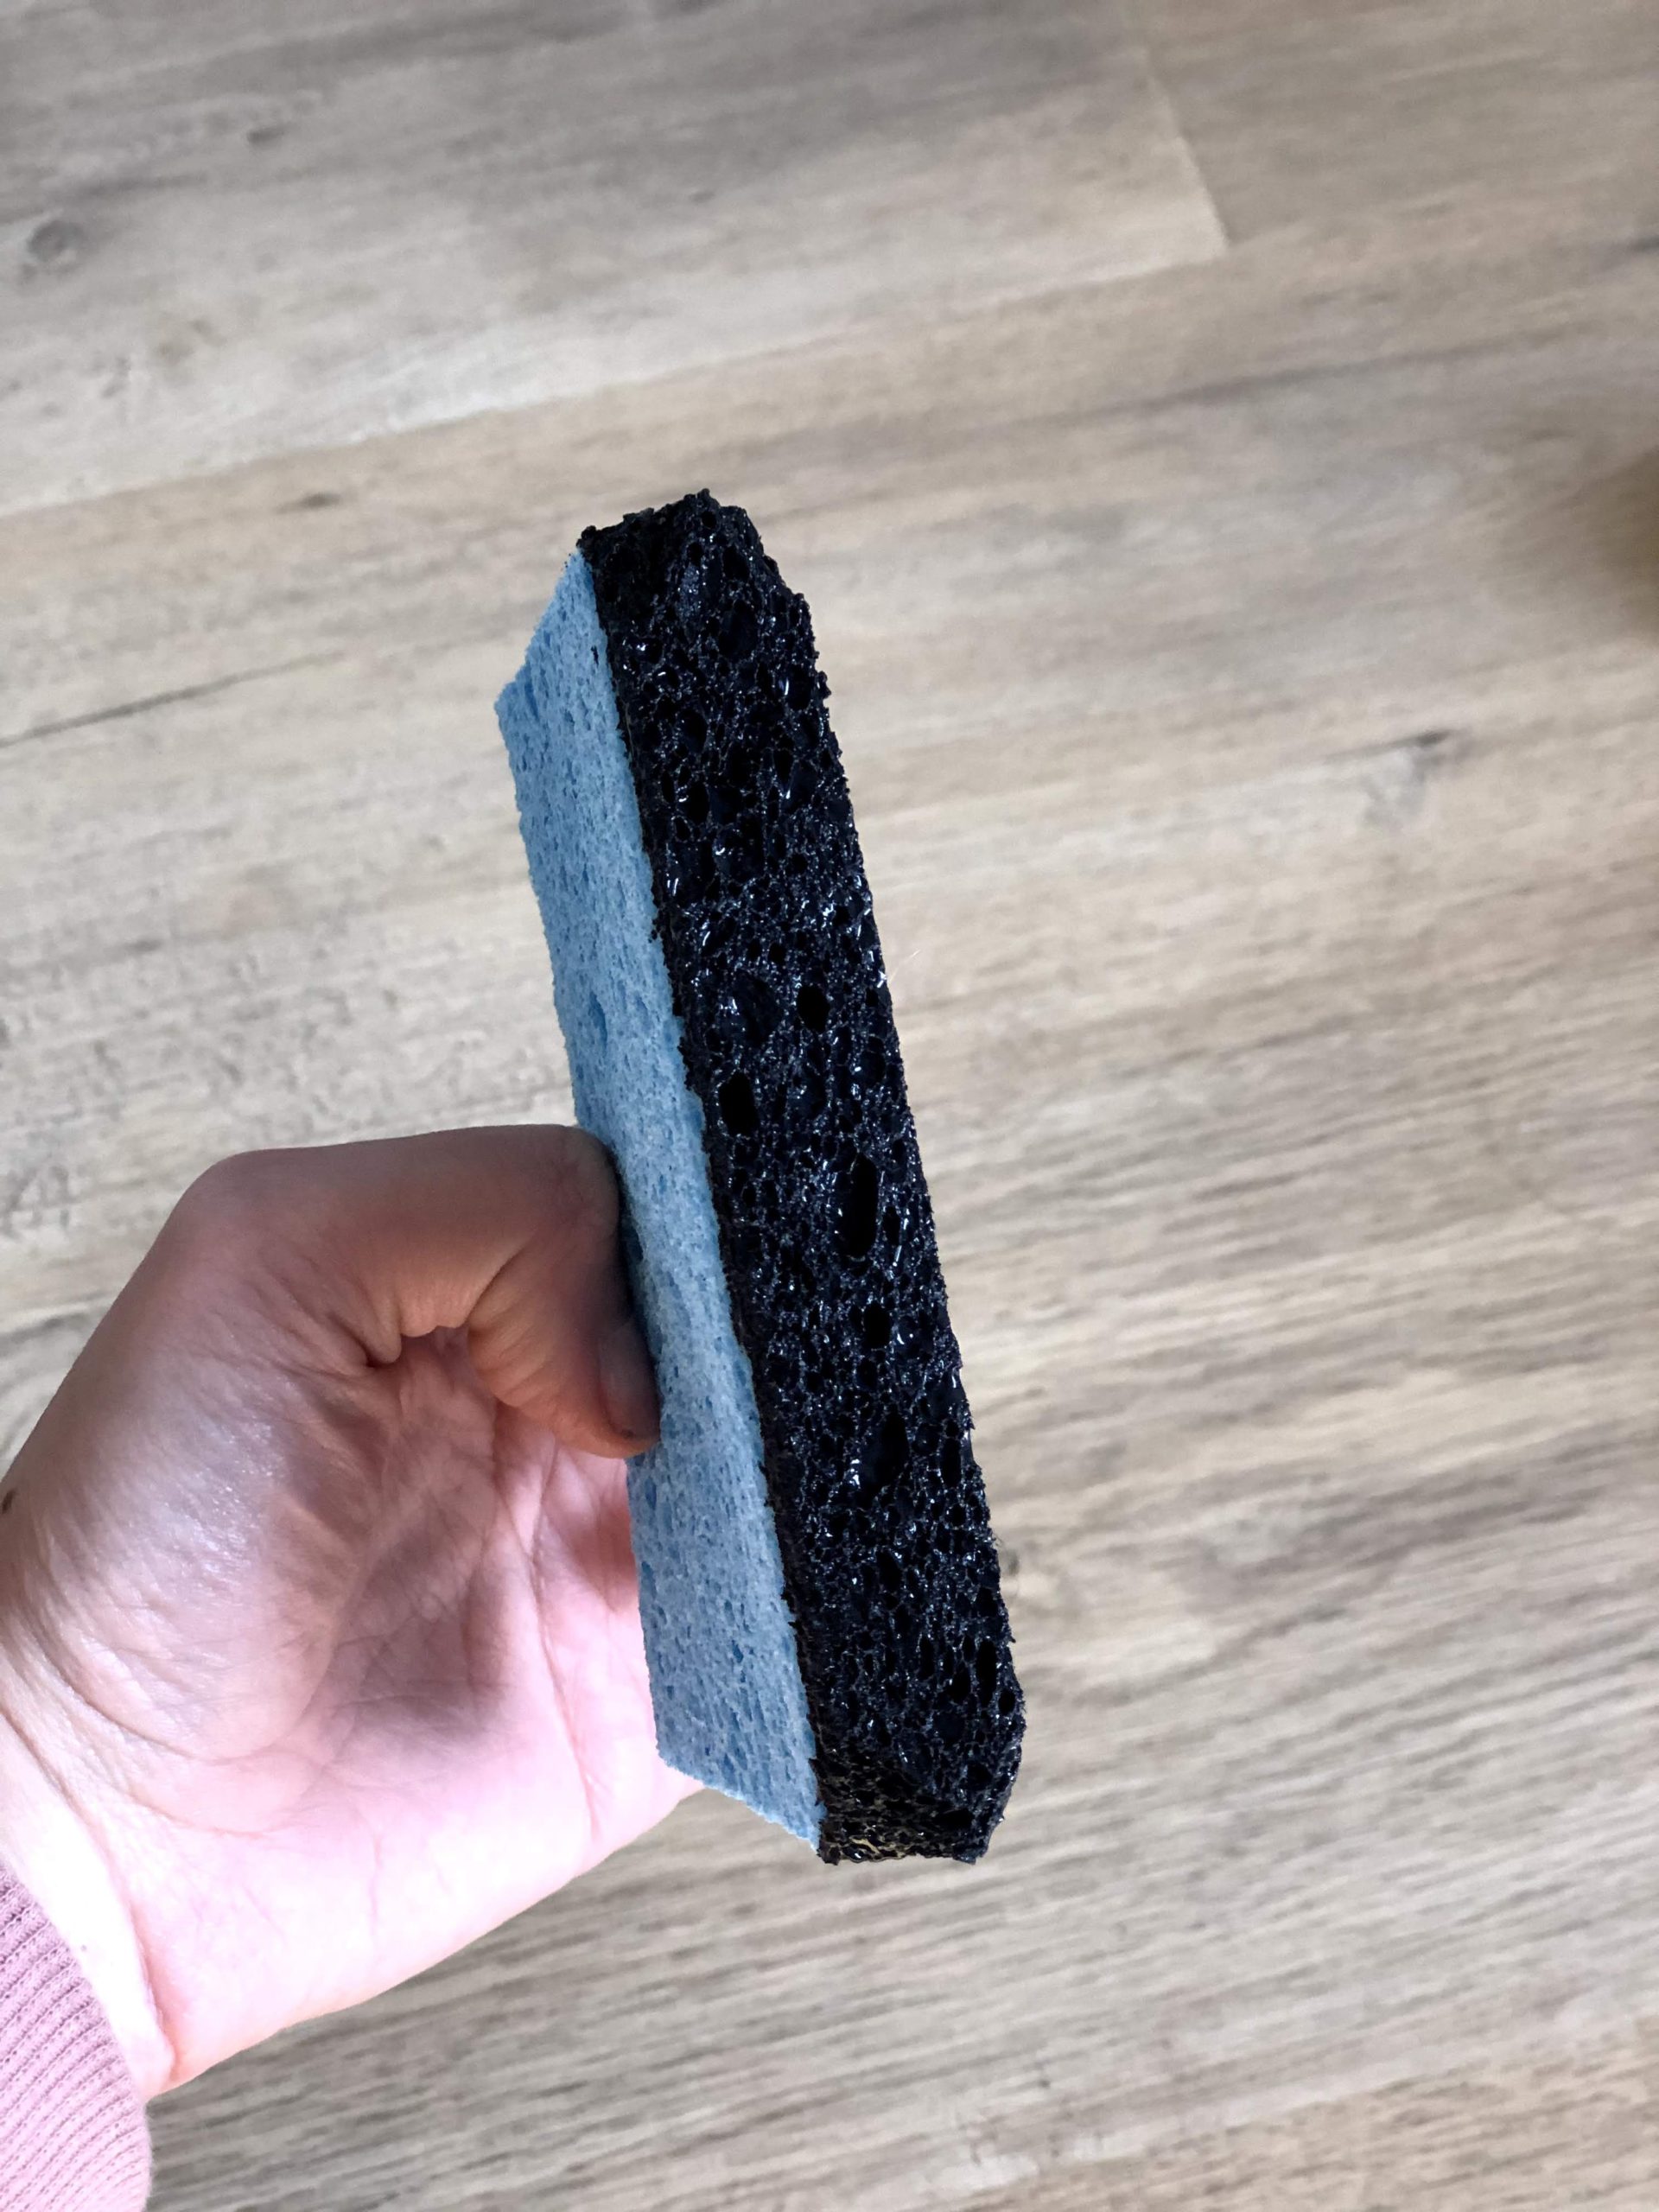
Cut the corners of the sponge off just to soften the edges.
Step 2:
Pour a small amount of paint into a tray, or in my case, I used a small tupperware that would fit my sponge. **You will not need much paint AT ALL. My wall was small but I barely used any. If you choose to do a larger wall, I’m confident you won’t need much either.
Step 3:
Cut the corners of the sponge off just to soften the edges.
 Step 4:
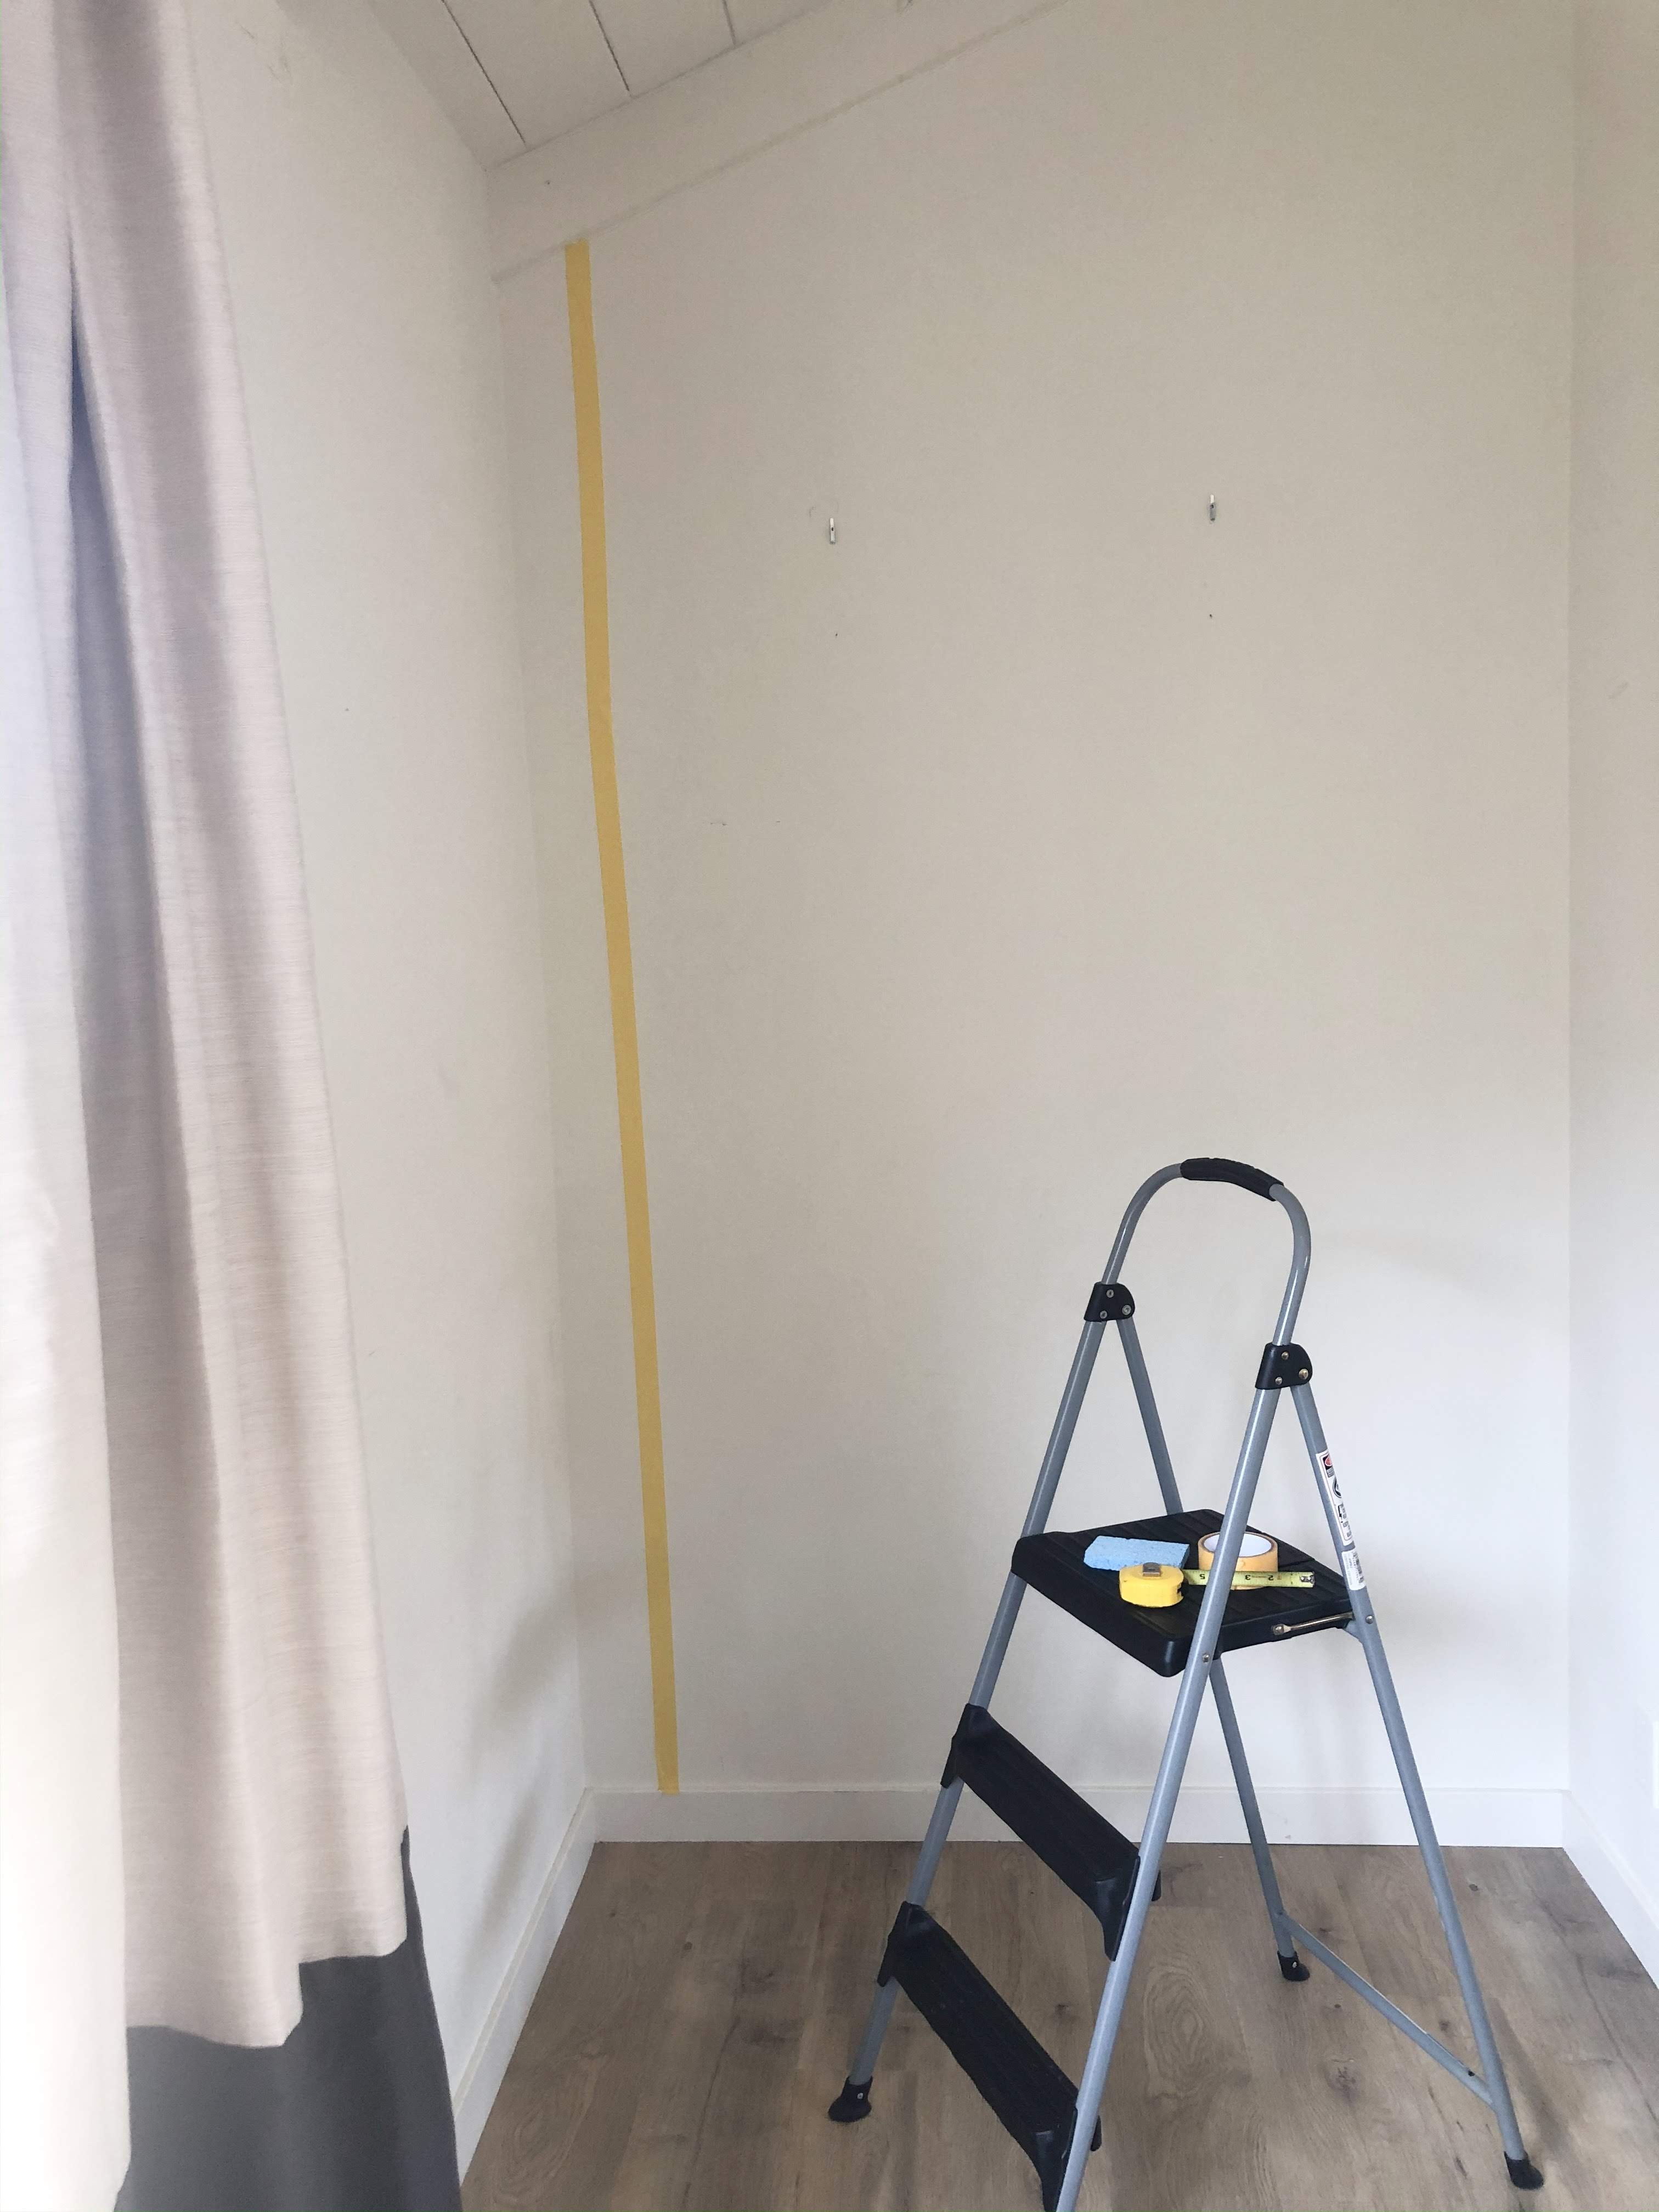
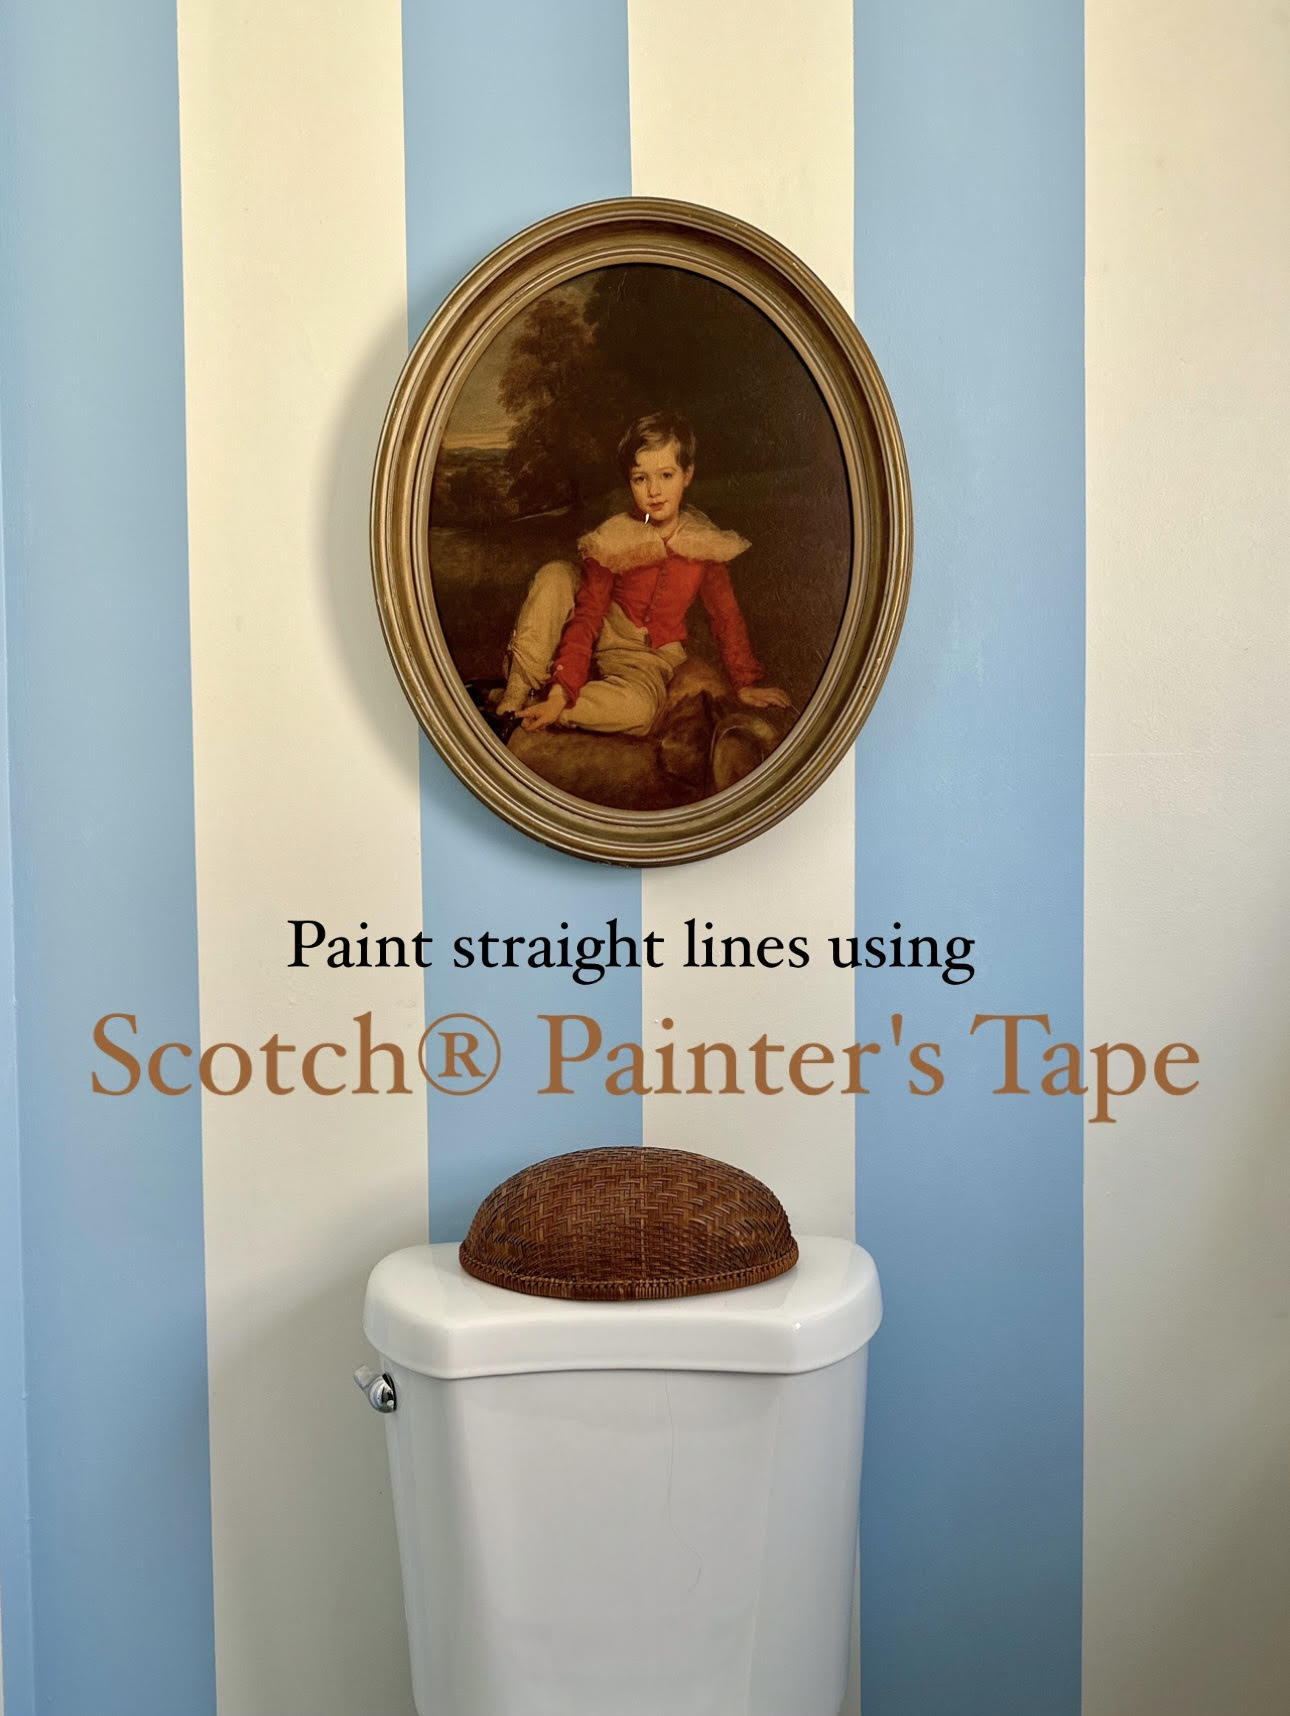
Place the tape on the wall you want to paint. You can probably measure it, but for me, I eyeball everything. I always aim for straight-ish around here.
Step 4:
Place the tape on the wall you want to paint. You can probably measure it, but for me, I eyeball everything. I always aim for straight-ish around here.
 Step 5:
Dip the sponge into the paint and be sure to use the extra piece of paper to dab all the excess paint–this is SUPER important because if you don’t, the paint will drip and will not be cute. Trust me, I speak from experience.
Step 6:
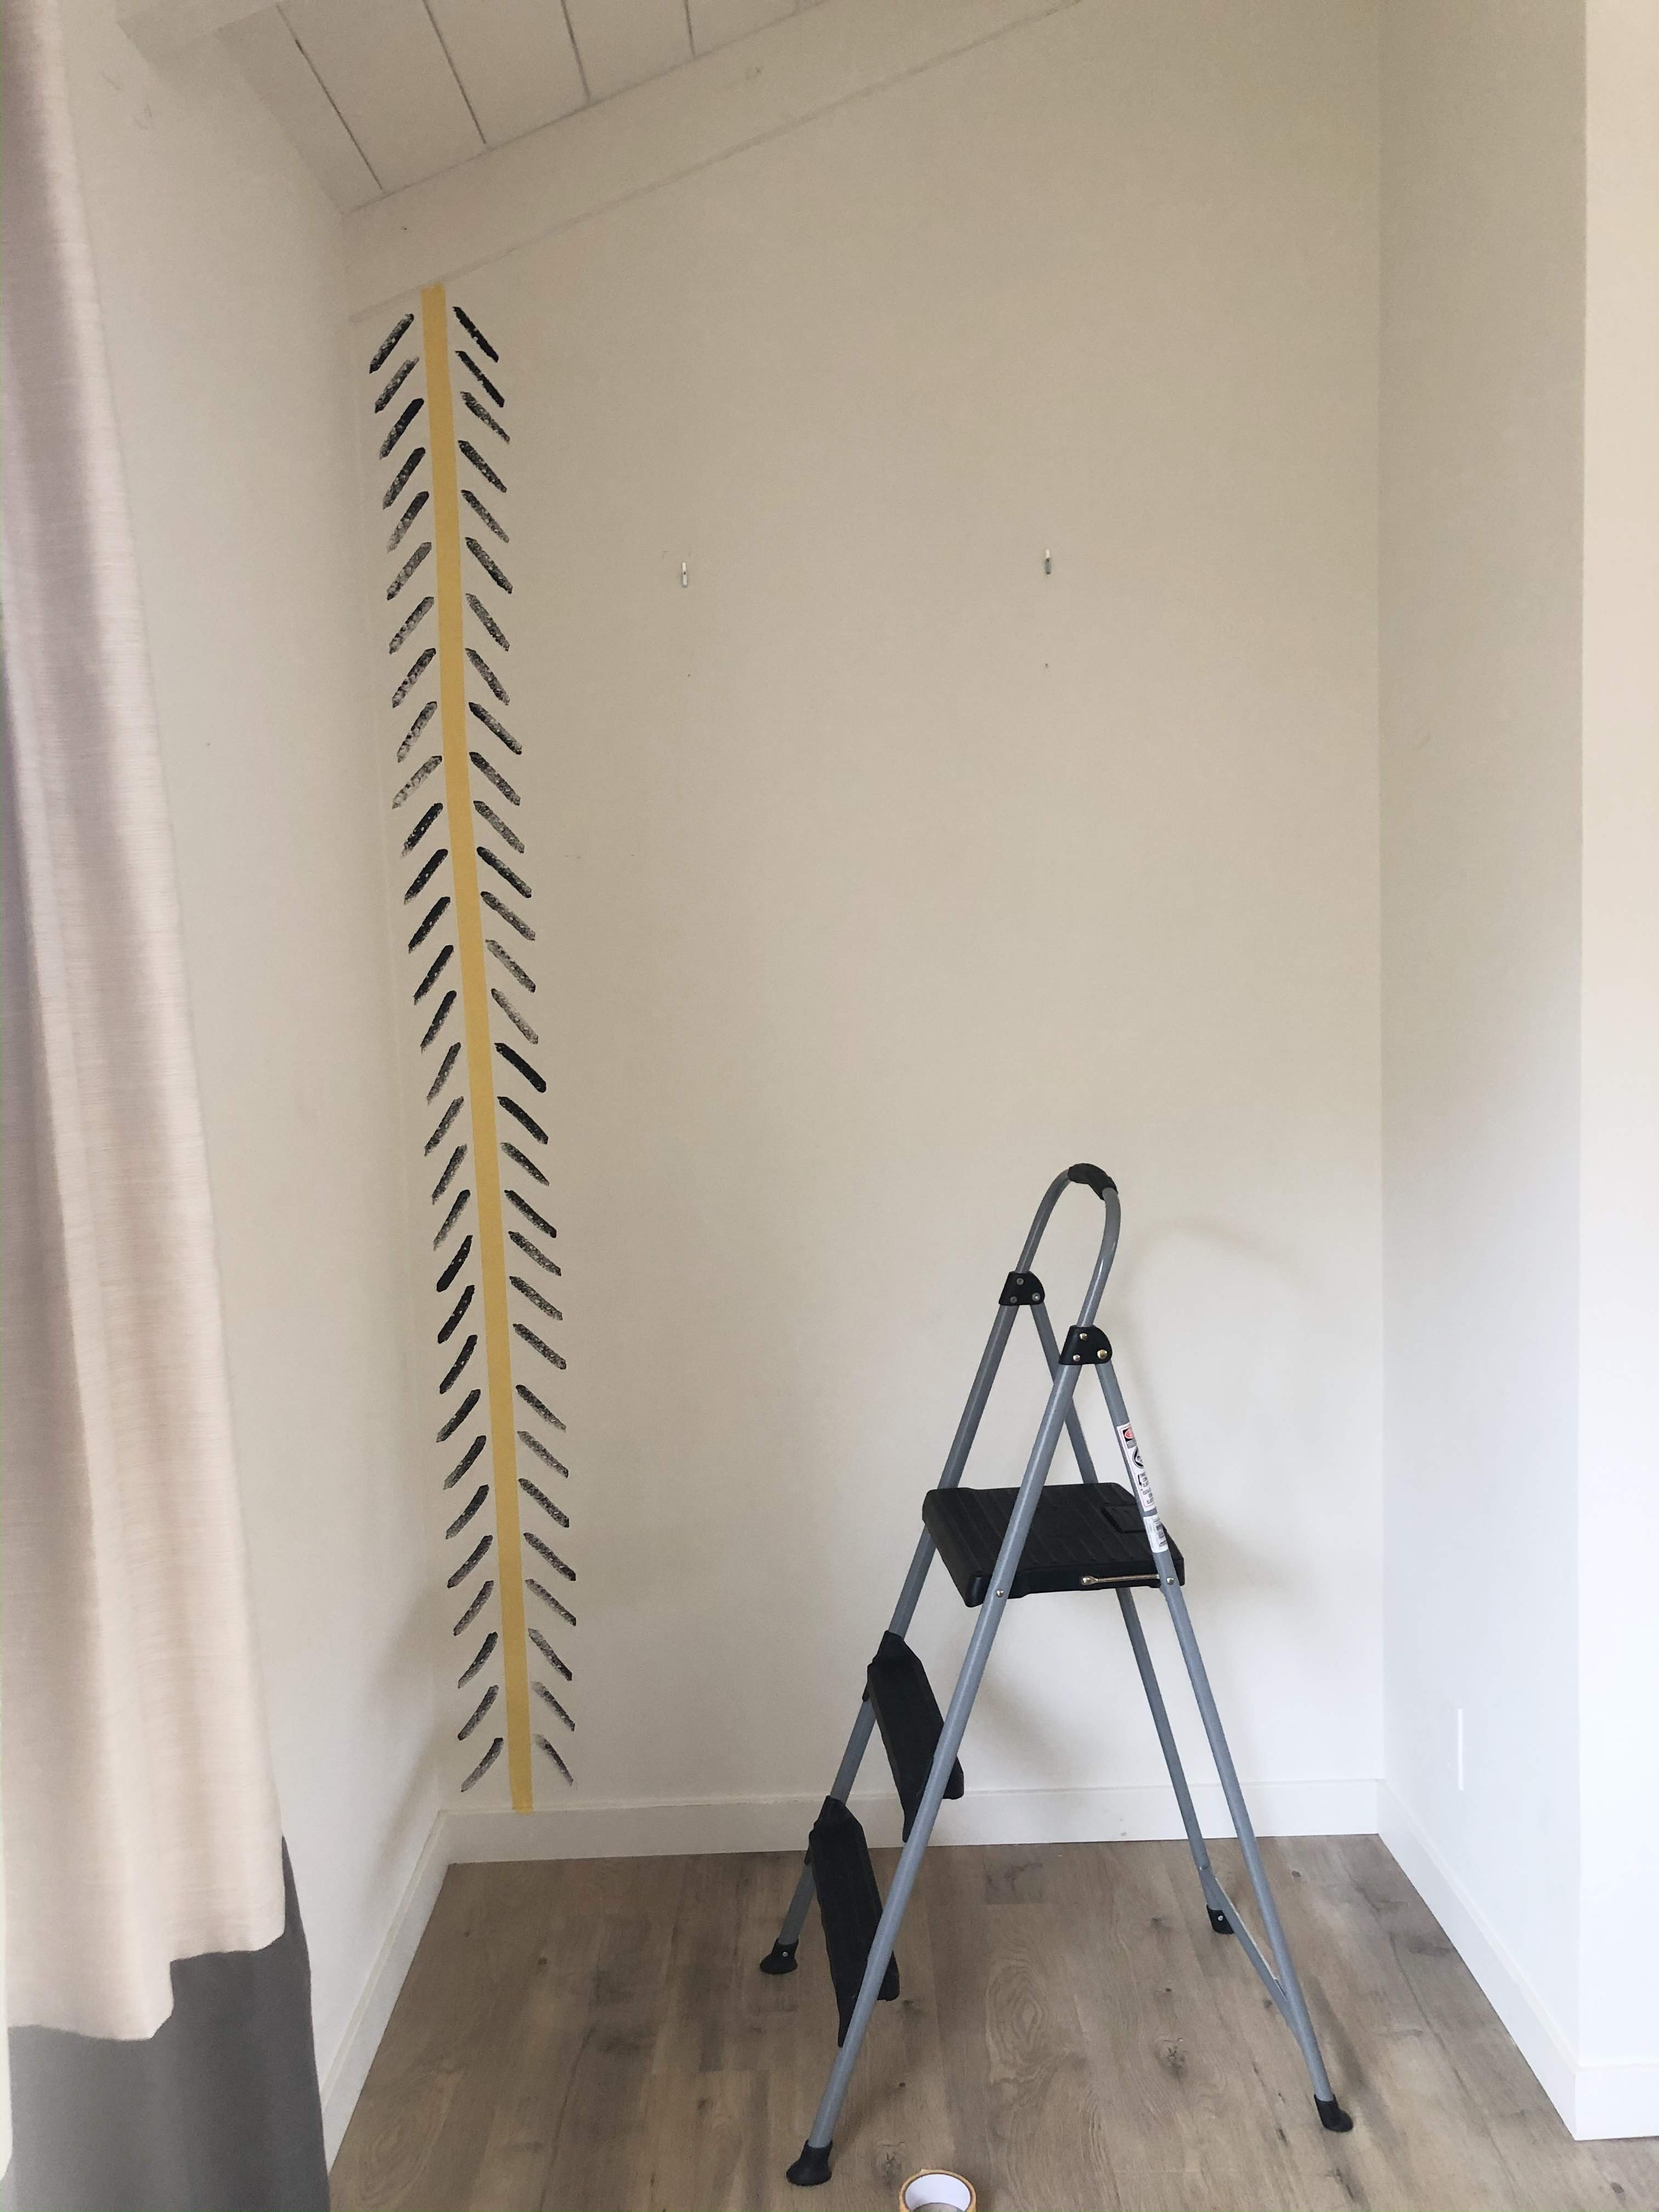
Start pressing the sponge on the wall to the left of the tape, and then to the right of the tape in the pattern shown below. It’s ok (and in my opinion looks better) to have some imperfections in size and color. You will see that some of mine are super dark, while others are very faded.
Step 5:
Dip the sponge into the paint and be sure to use the extra piece of paper to dab all the excess paint–this is SUPER important because if you don’t, the paint will drip and will not be cute. Trust me, I speak from experience.
Step 6:
Start pressing the sponge on the wall to the left of the tape, and then to the right of the tape in the pattern shown below. It’s ok (and in my opinion looks better) to have some imperfections in size and color. You will see that some of mine are super dark, while others are very faded.
 Step 7:
Repeat. I simply moved the tape over, and over, and over, and over…etc.
Step 8:
Enjoy! And embrace the imperfections. What do you think? Small budget, HUGE impact.
Step 7:
Repeat. I simply moved the tape over, and over, and over, and over…etc.
Step 8:
Enjoy! And embrace the imperfections. What do you think? Small budget, HUGE impact.
 It looks WAY better in person, and on video. Be sure to check me out on Instagram if you want the video version of this tutorial. And please, sign up for my email updates below. I promise I won’t spam you. We can be best buds.
Love,
Deema
Feedback? Comment below, or email me: (Deema Tabbara Lopez) at prettyonfridays@gmail.com
Follow me on Instagram
Sign up for Newsletter updates
Follow me on Pinterest
It looks WAY better in person, and on video. Be sure to check me out on Instagram if you want the video version of this tutorial. And please, sign up for my email updates below. I promise I won’t spam you. We can be best buds.
Love,
Deema
Feedback? Comment below, or email me: (Deema Tabbara Lopez) at prettyonfridays@gmail.com
Follow me on Instagram
Sign up for Newsletter updates
Follow me on Pinterest
- Paint (I used Blackest by Clare Paint)
- Painter’s Tape
- Dish sponge
- Scissors
- Paint tray, or small disposable container (I used a small tupperware)
- scratch paper
- Drop cloth
Step 2:
Pour a small amount of paint into a tray, or in my case, I used a small tupperware that would fit my sponge. **You will not need much paint AT ALL. My wall was small but I barely used any. If you choose to do a larger wall, I’m confident you won’t need much either.
Step 3:
Cut the corners of the sponge off just to soften the edges.
Step 4:
Place the tape on the wall you want to paint. You can probably measure it, but for me, I eyeball everything. I always aim for straight-ish around here.
Step 5:
Dip the sponge into the paint and be sure to use the extra piece of paper to dab all the excess paint–this is SUPER important because if you don’t, the paint will drip and will not be cute. Trust me, I speak from experience.
Step 6:
Start pressing the sponge on the wall to the left of the tape, and then to the right of the tape in the pattern shown below. It’s ok (and in my opinion looks better) to have some imperfections in size and color. You will see that some of mine are super dark, while others are very faded.
Step 7:
Repeat. I simply moved the tape over, and over, and over, and over…etc.
Step 8:
Enjoy! And embrace the imperfections. What do you think? Small budget, HUGE impact.
It looks WAY better in person, and on video. Be sure to check me out on Instagram if you want the video version of this tutorial. And please, sign up for my email updates below. I promise I won’t spam you. We can be best buds.
Love,
Deema
Feedback? Comment below, or email me: (Deema Tabbara Lopez) at prettyonfridays@gmail.com
Follow me on Instagram
Sign up for Newsletter updates
Follow me on Pinterest


[…] like! If you’re interested in another way I’ve used a sponge technique, check out my DIY Sponge Paint Wall. And please, sign up for my email updates below. I promise I won’t spam you. We can be best […]
[…] DIY Sponge Paint Wall–Small Budget, Huge Impact […]
[…] about what other ways I could do a faux backsplash in the kids bathroom. I had already used the sponge technique a few times, and I wanted to try something a little different. I had seen so many DIYers use Sharpie on walls […]
[…] my bed, but wanted it to be subtle. I didn’t want to paint it, and I had already tried a sponge technique on the other side of the room. I found this wallpaper at Anthropologie that I really liked, and I […]
[…] Deema at Pretty On Fridays did a super easy feature wall using paint and a sponge! It is a fast and affordable project you can easily do on a weekend. You can check out her tutorial HERE. […]
Used your tutorial for an accent wall in my bathroom! Turned out super cute and was quick and easy! Thank you!!
Oh yay!!! Would love to see it! Come show me on Instagram!
Thank you for the tutorial, this looks so great! Did you cut all four corners off of your sponge?
[…] Here’s one by Pretty on Fridays is so pretty as an accent wall in a master bedroom: […]