


I wanted to share a fun, cheap, and easy DIY I did this weekend that made such a dramatic transformation to my master bathroom. The real star of the show was the faux backsplash I did with a sponge, however, let me walk you through the entire bathroom refresh…
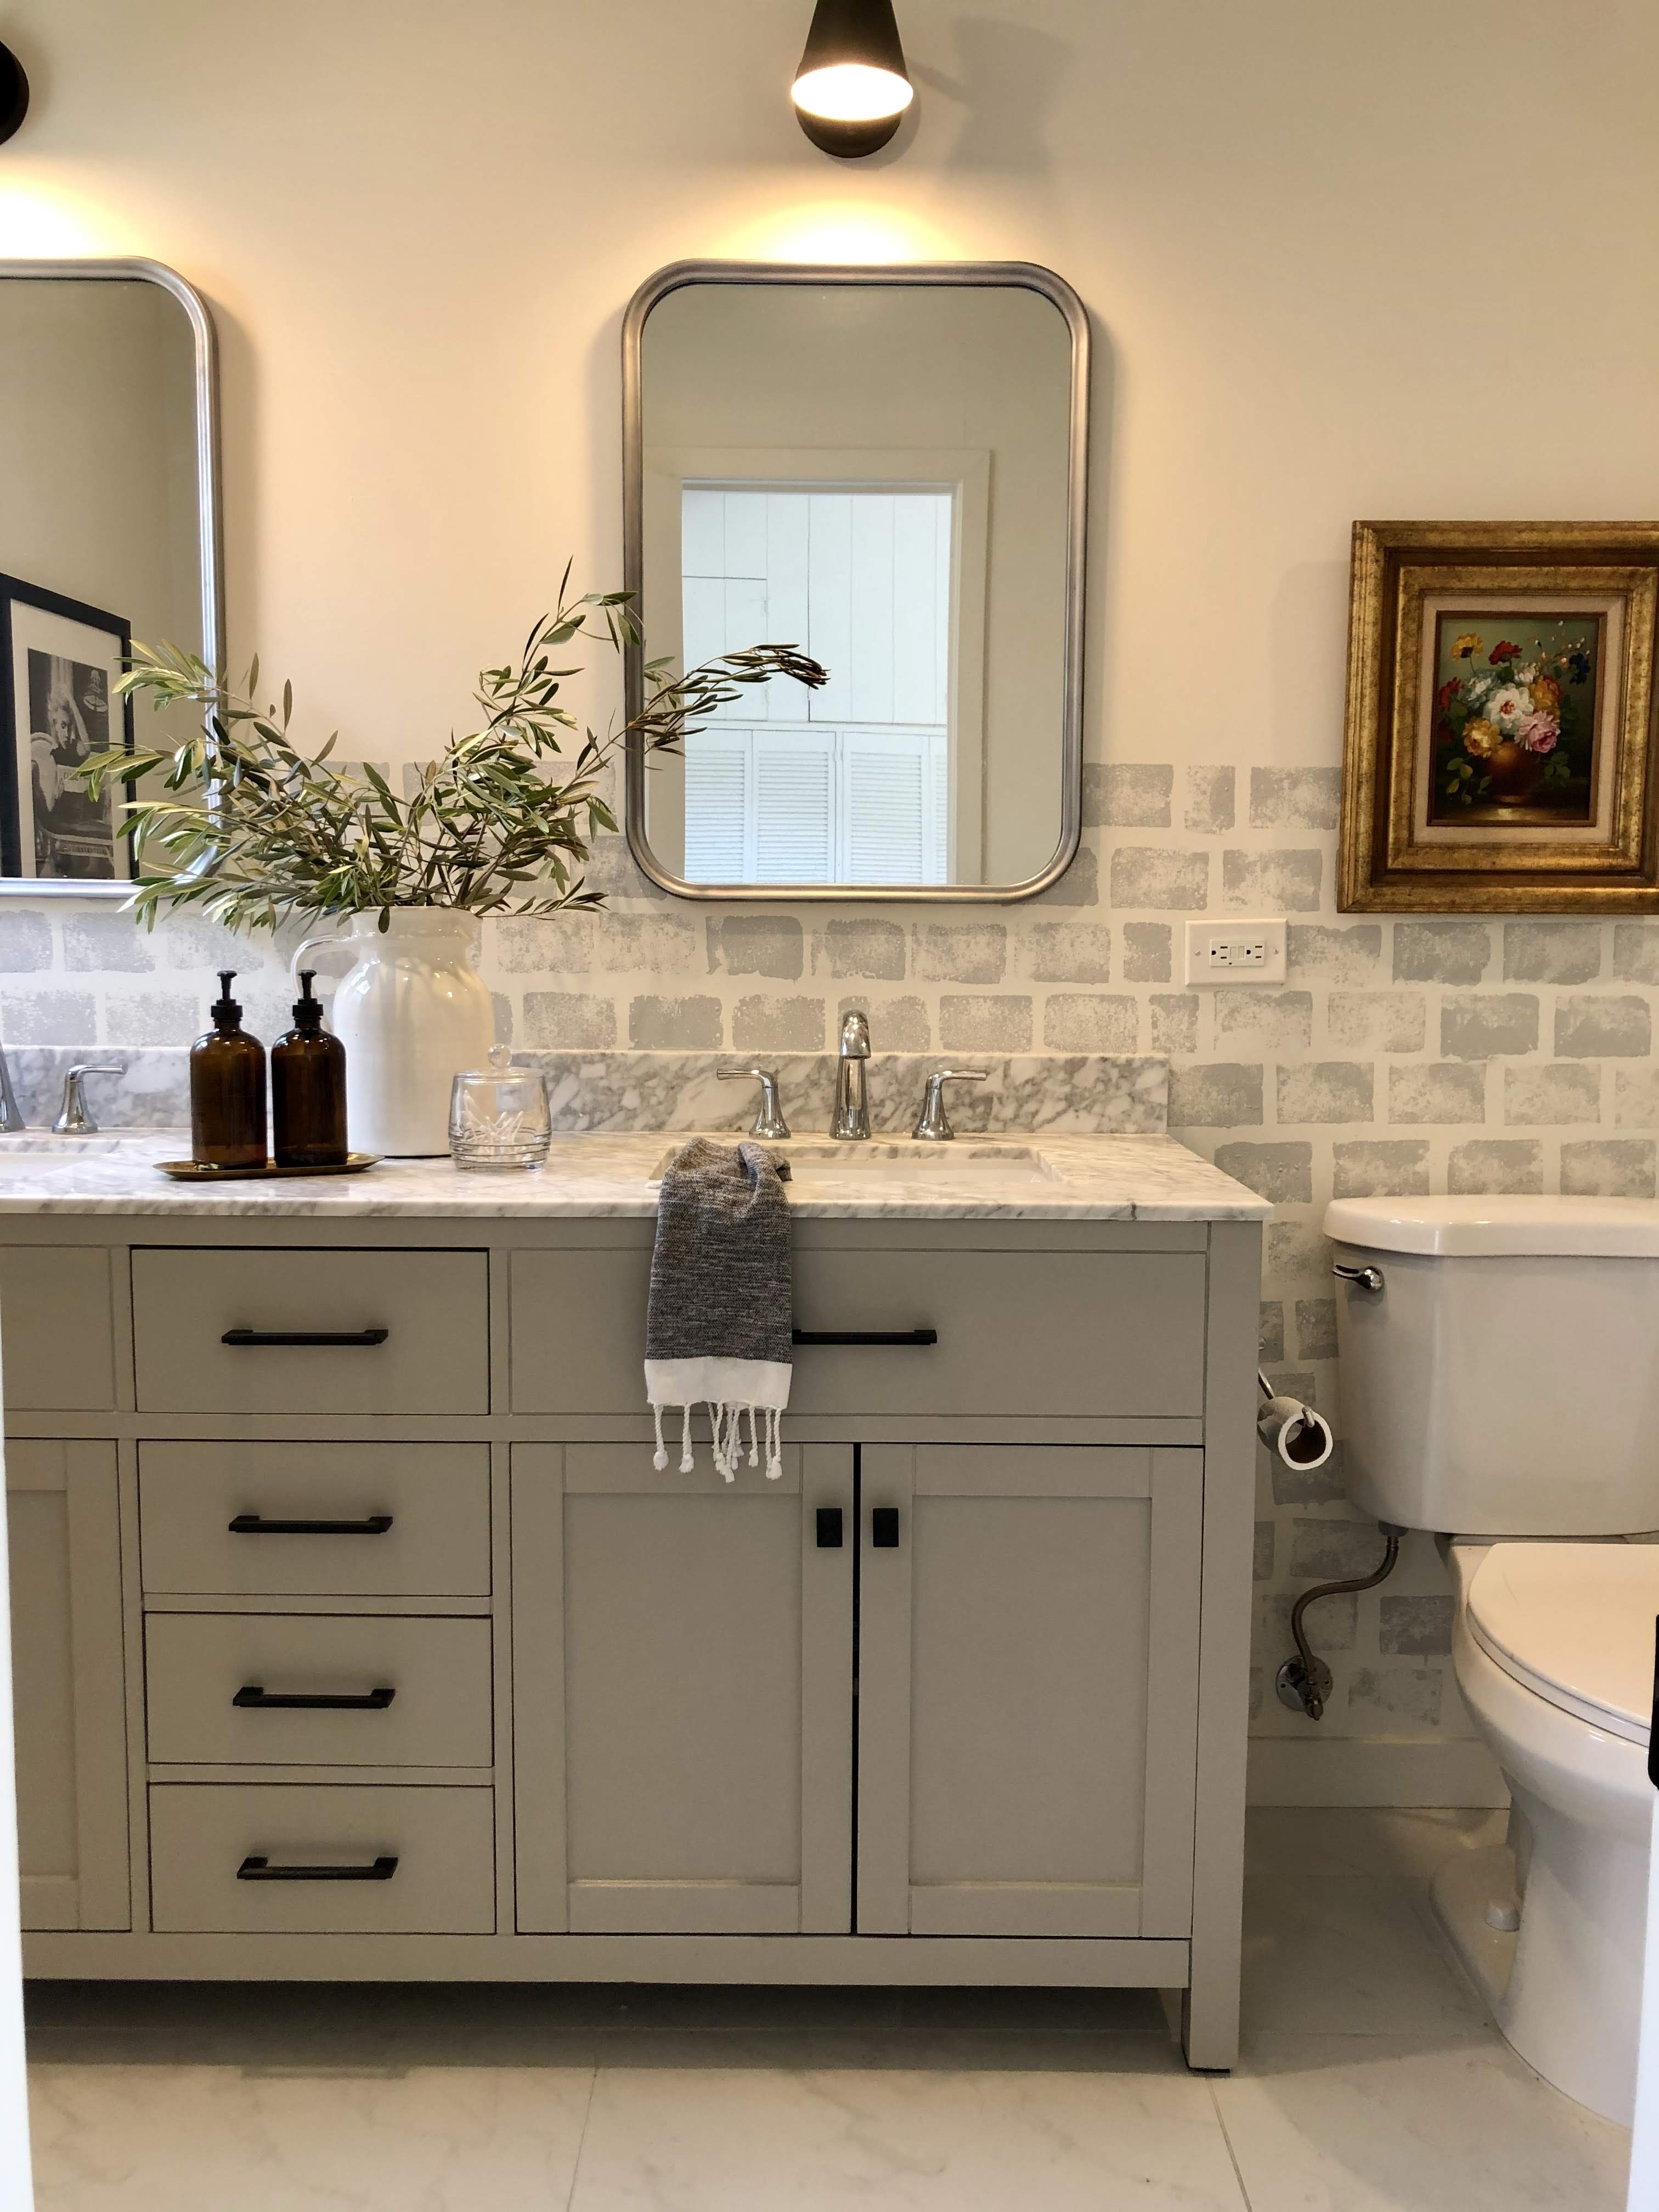
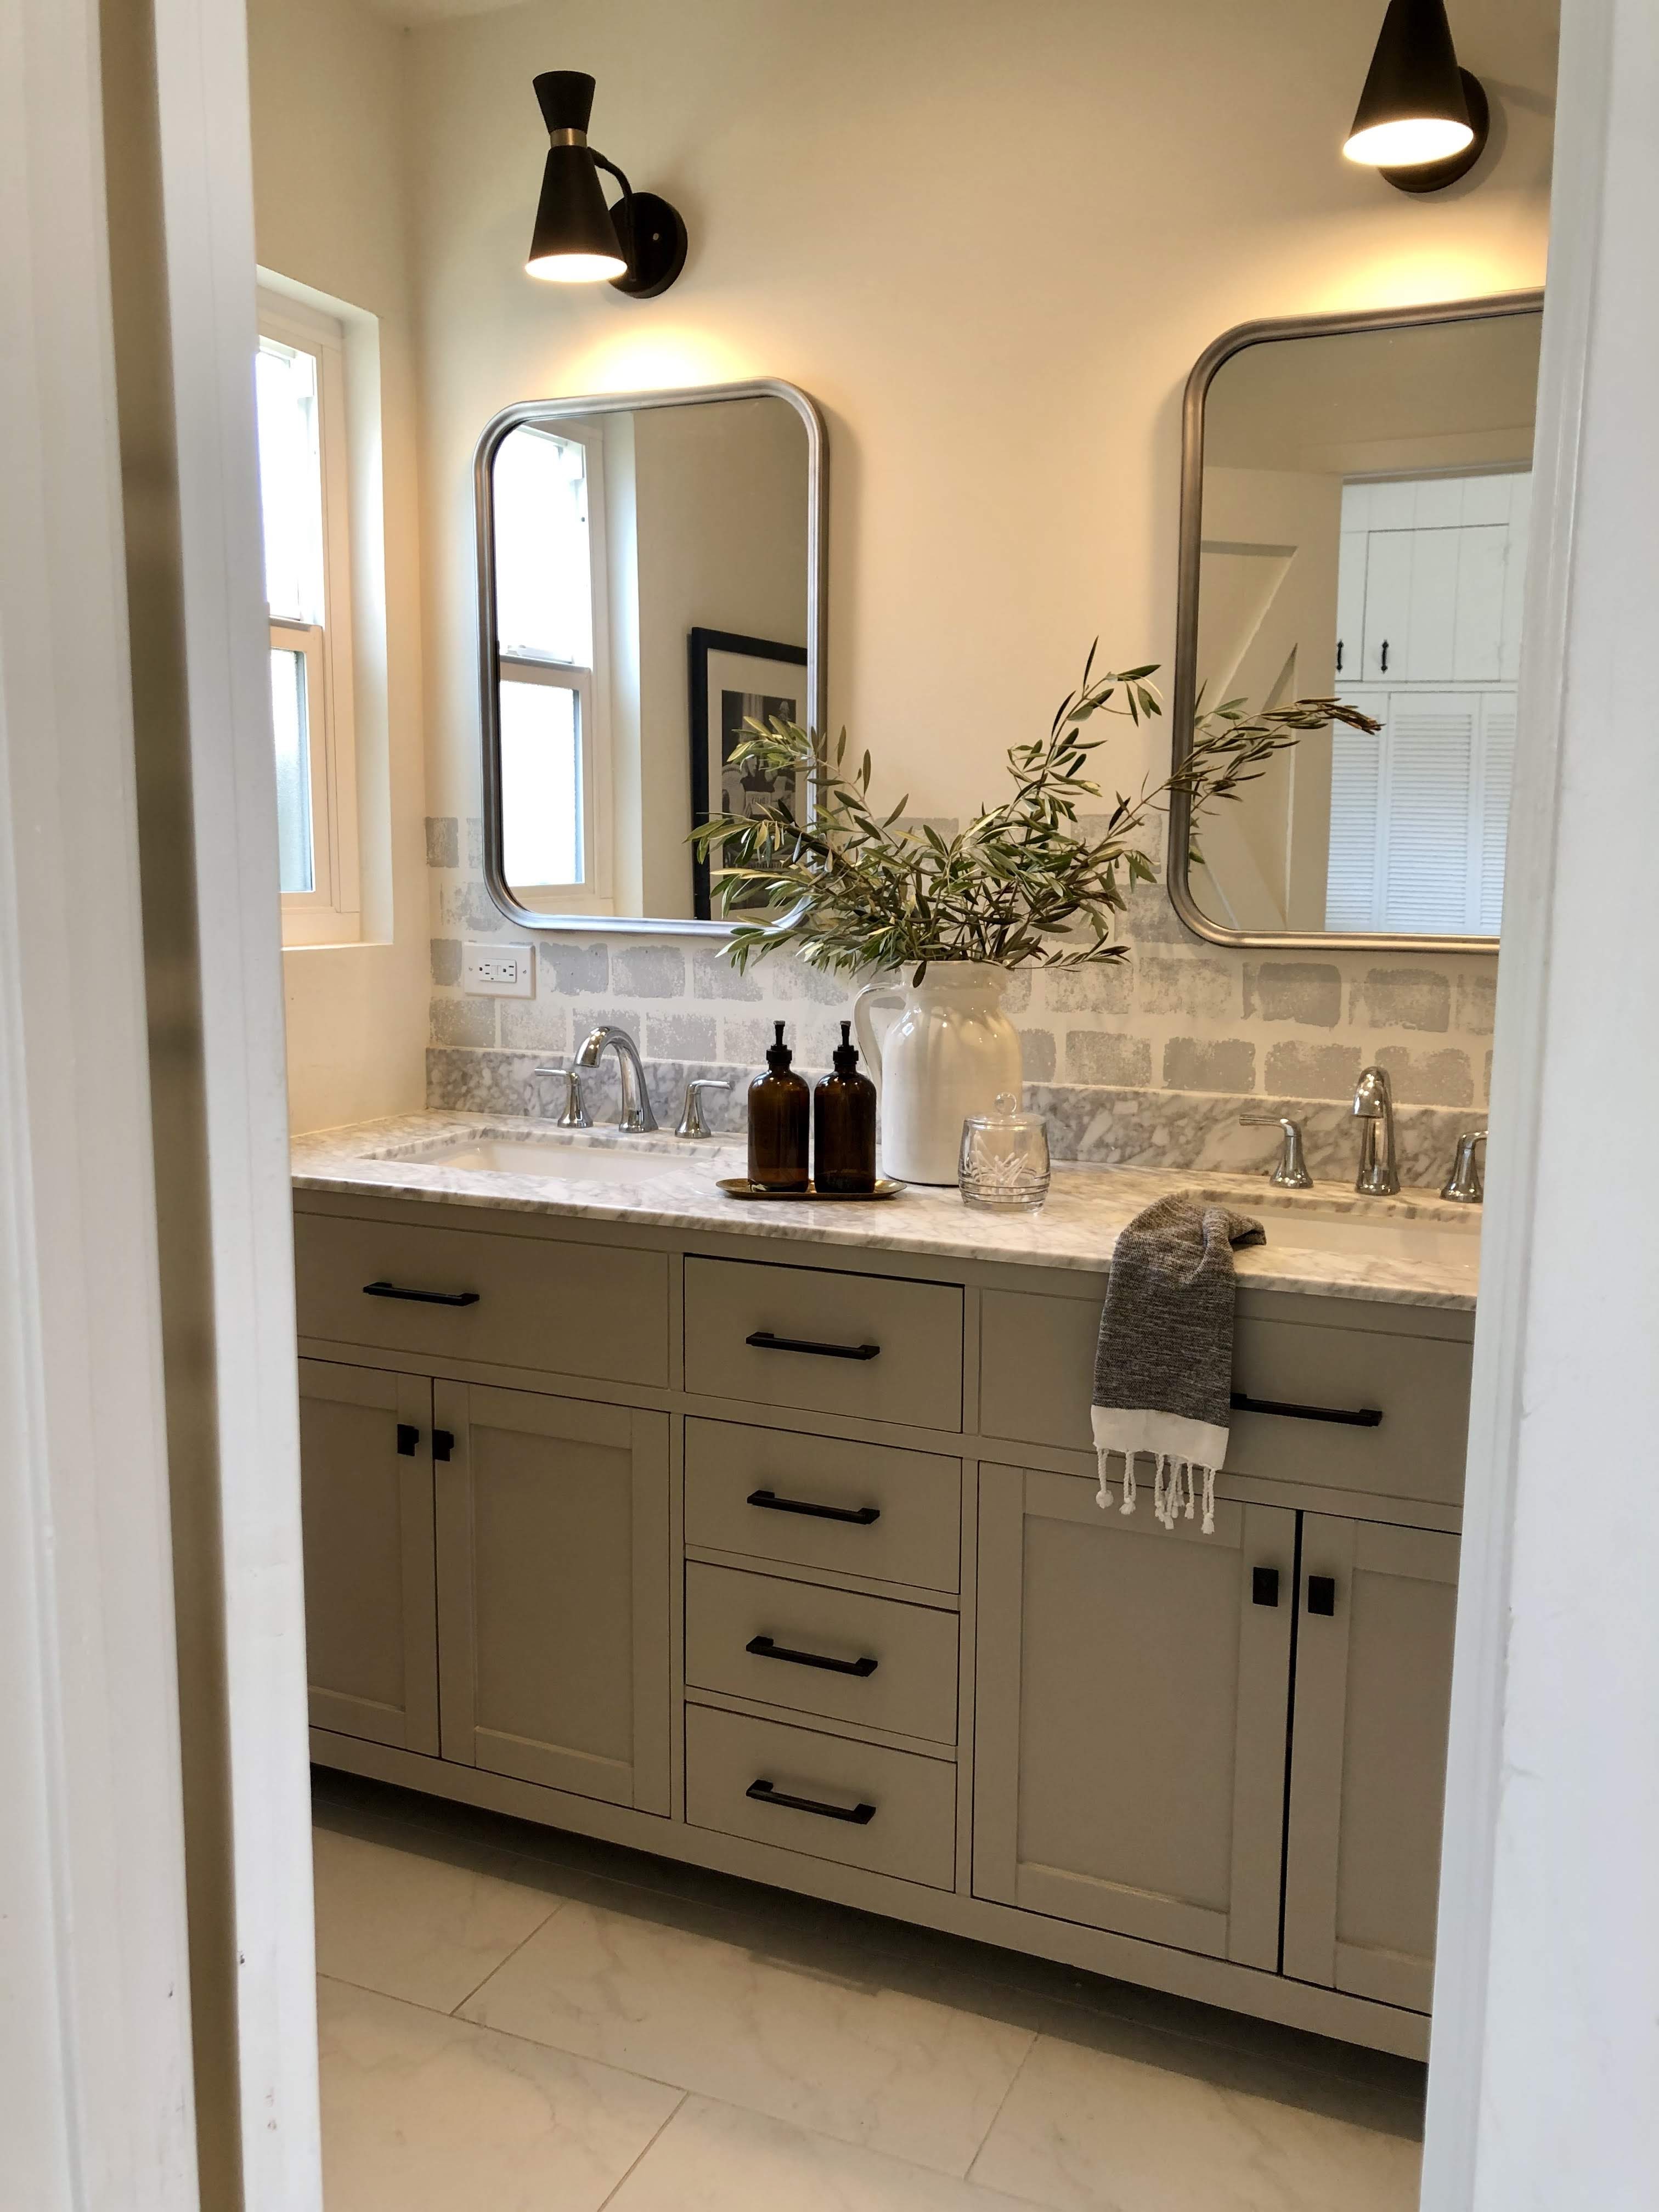
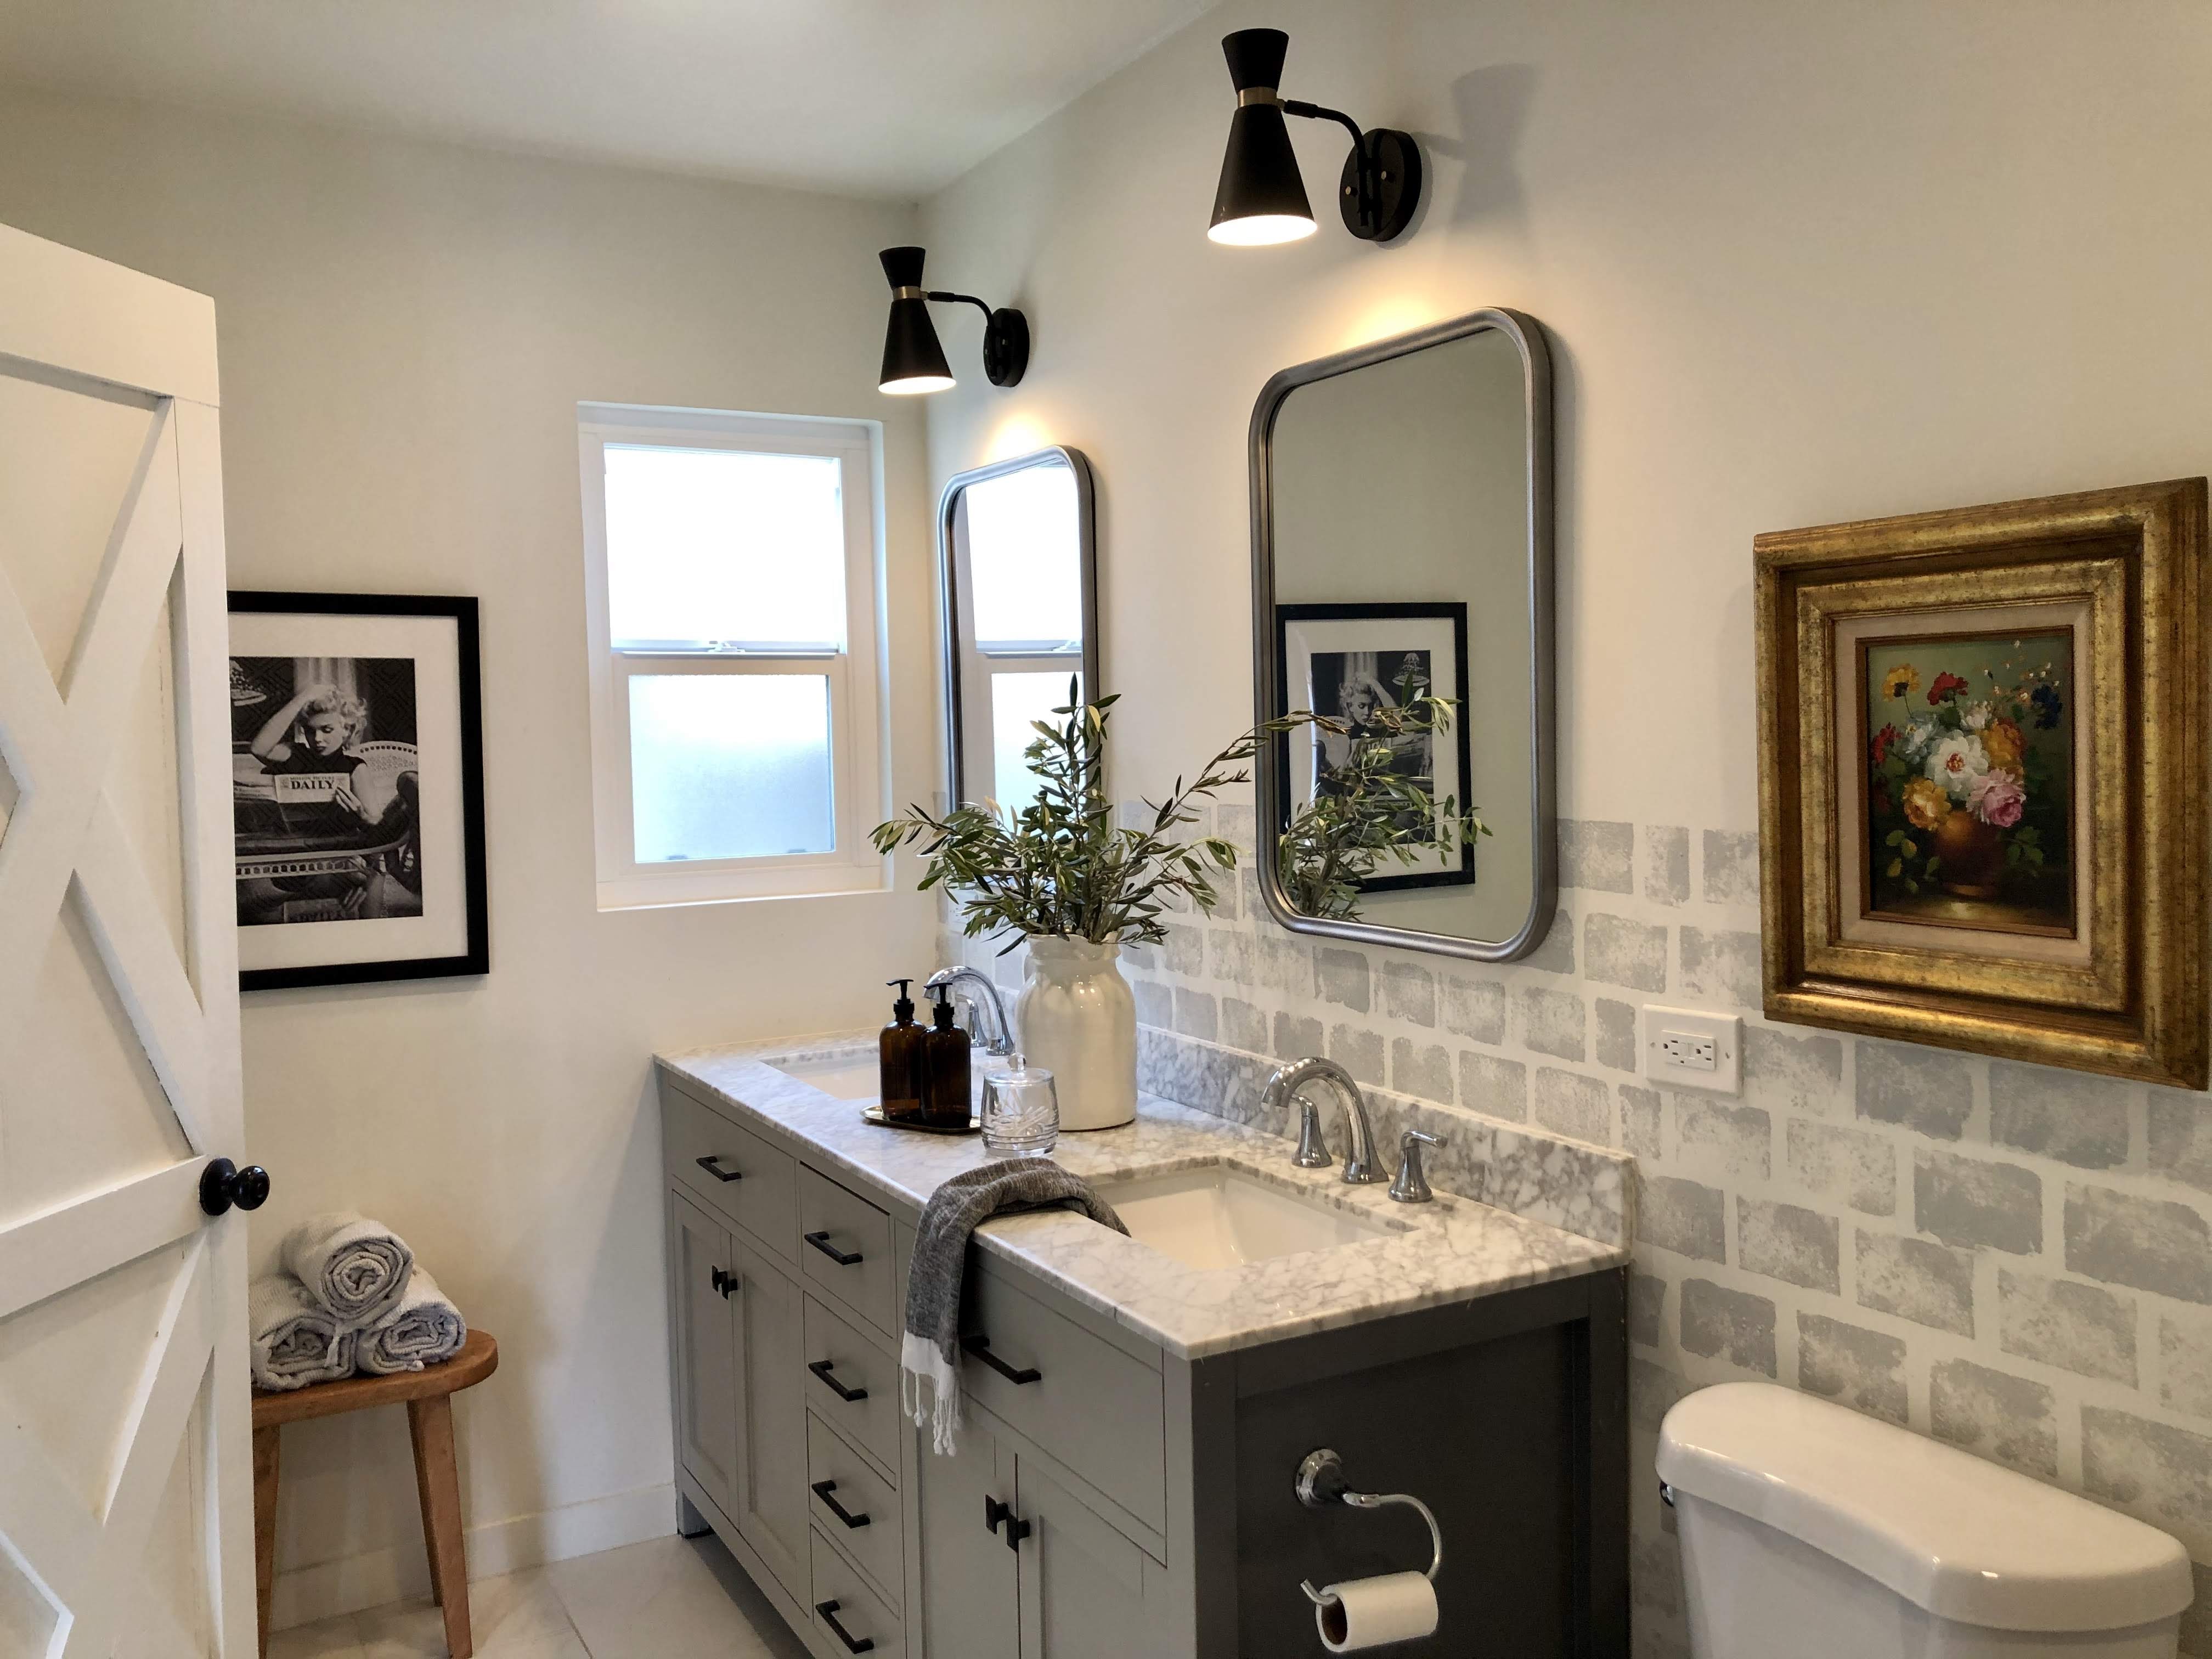
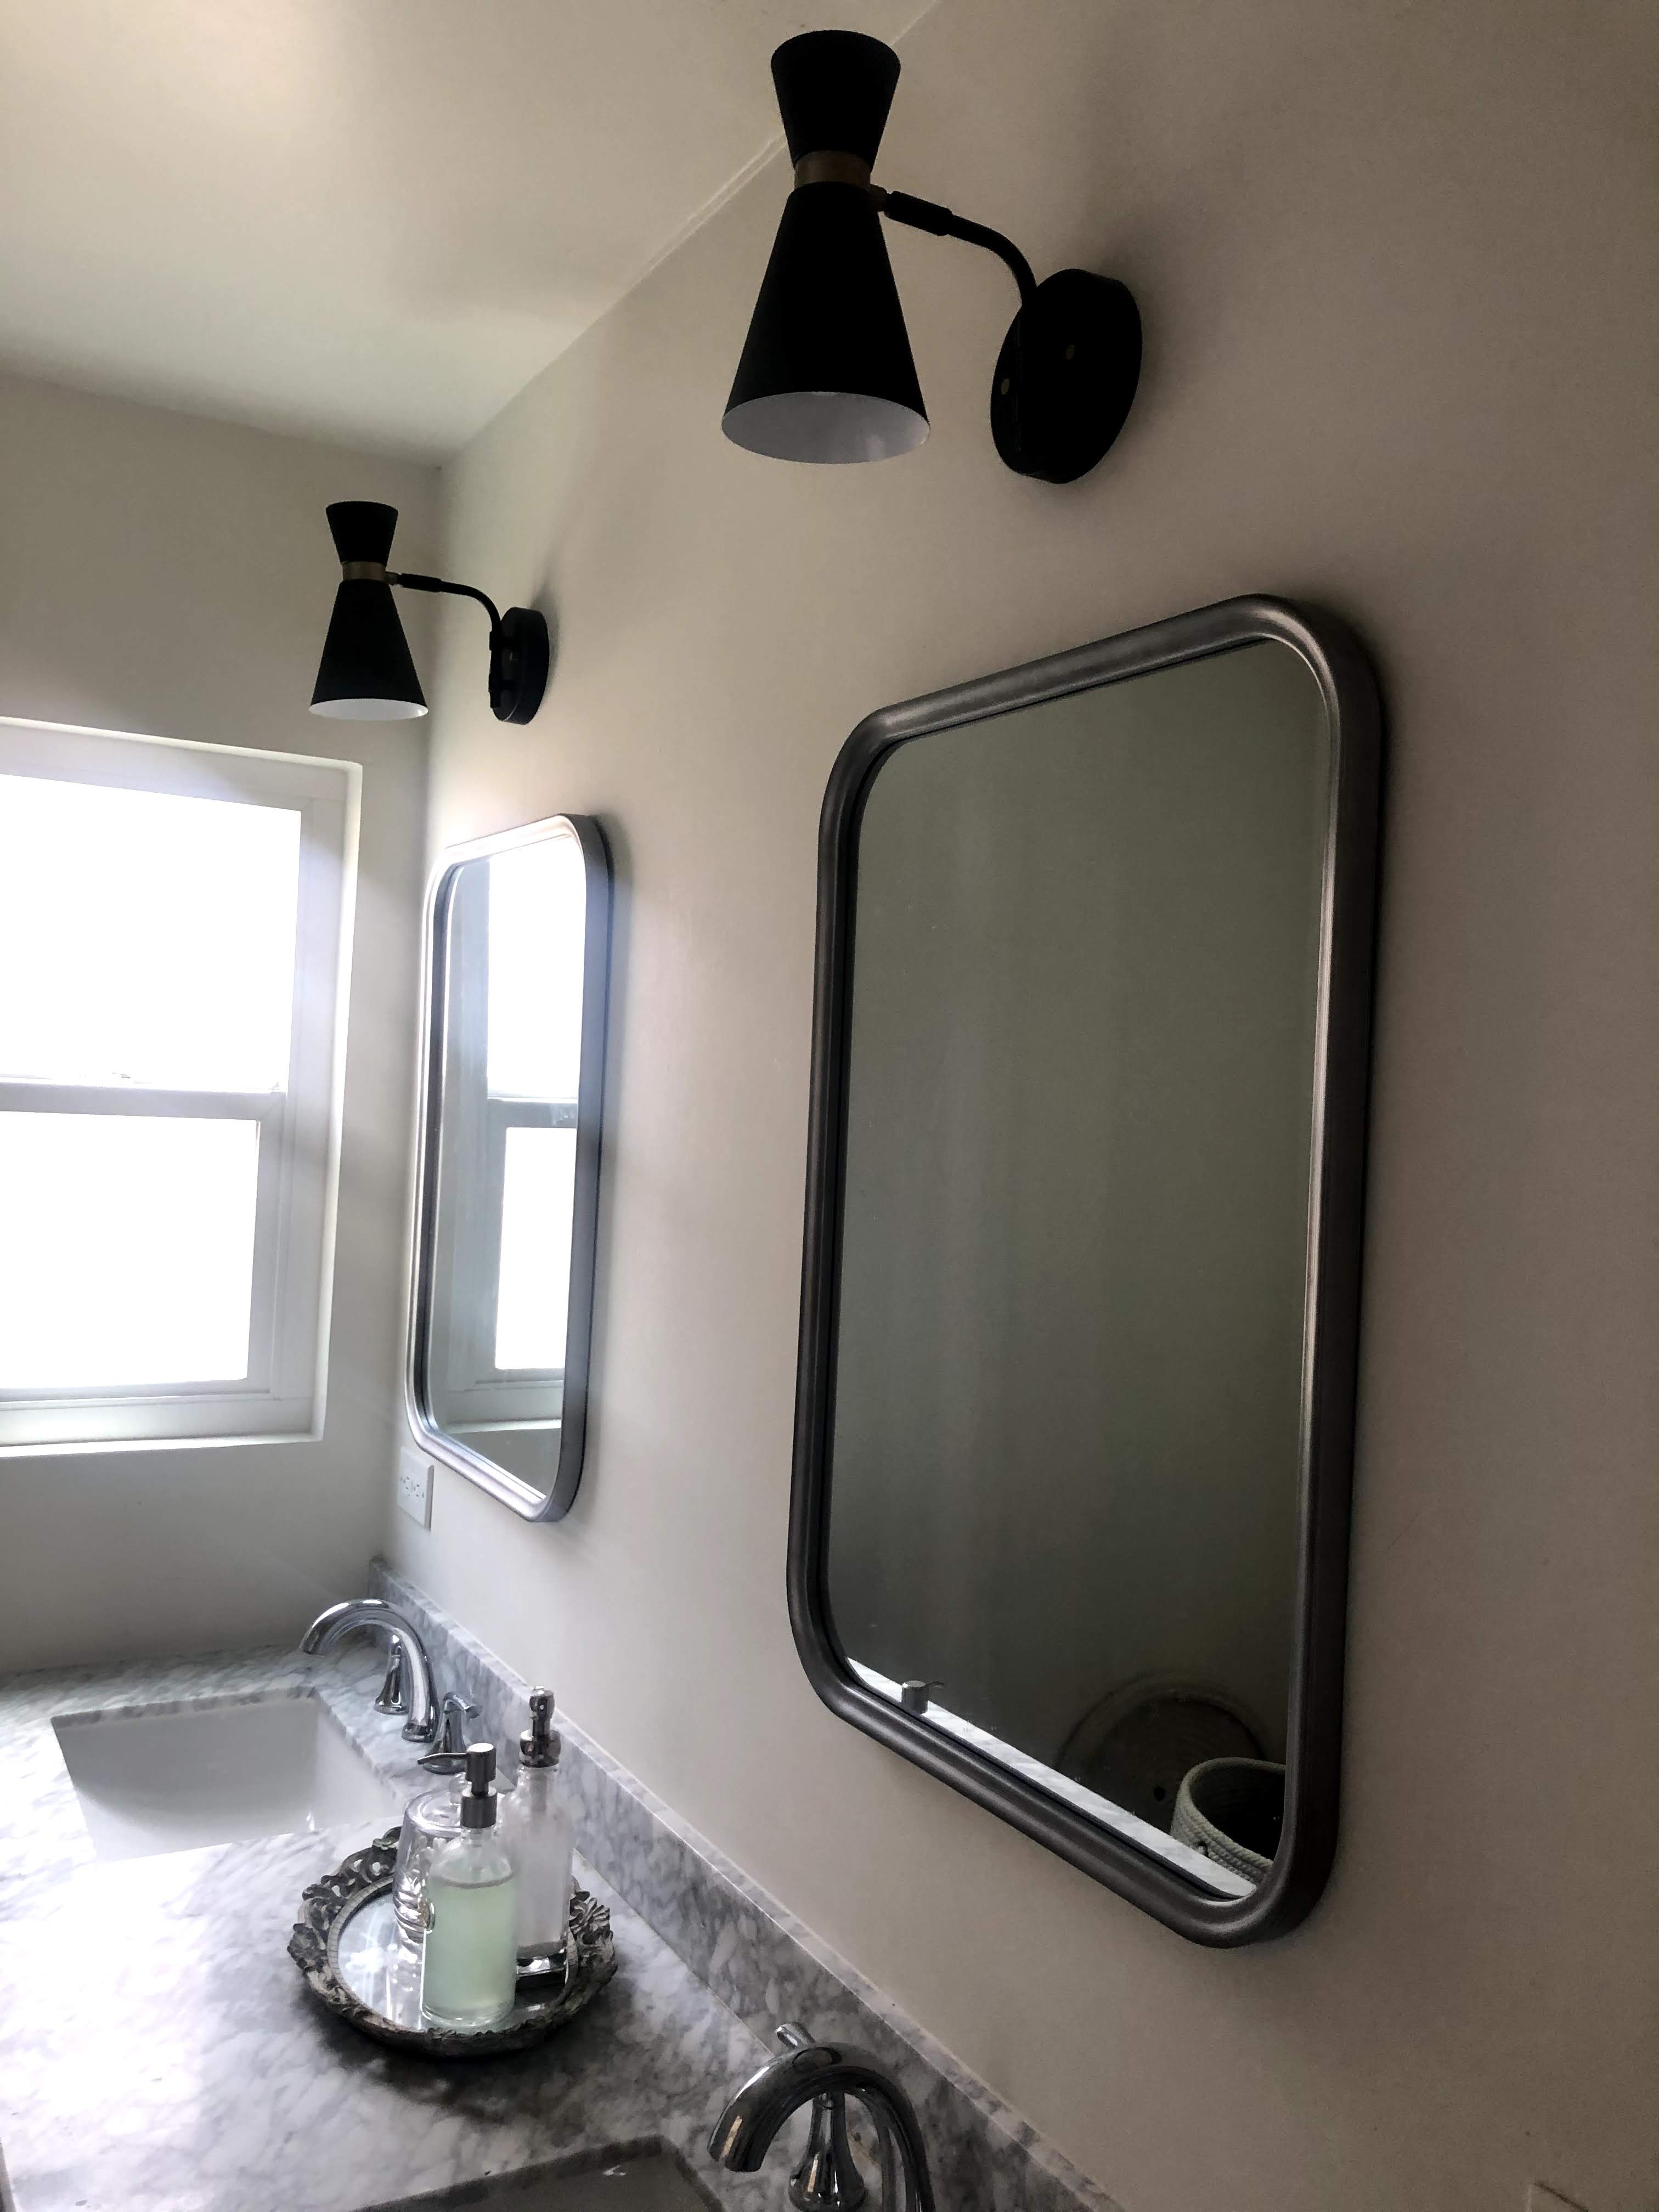 This is my master bathroom, it’s not awful, in fact, the previous owner had remodeled it. However, I always felt like the paint was “blah” and so was the entire bathroom. I really wanted to add some life to it.
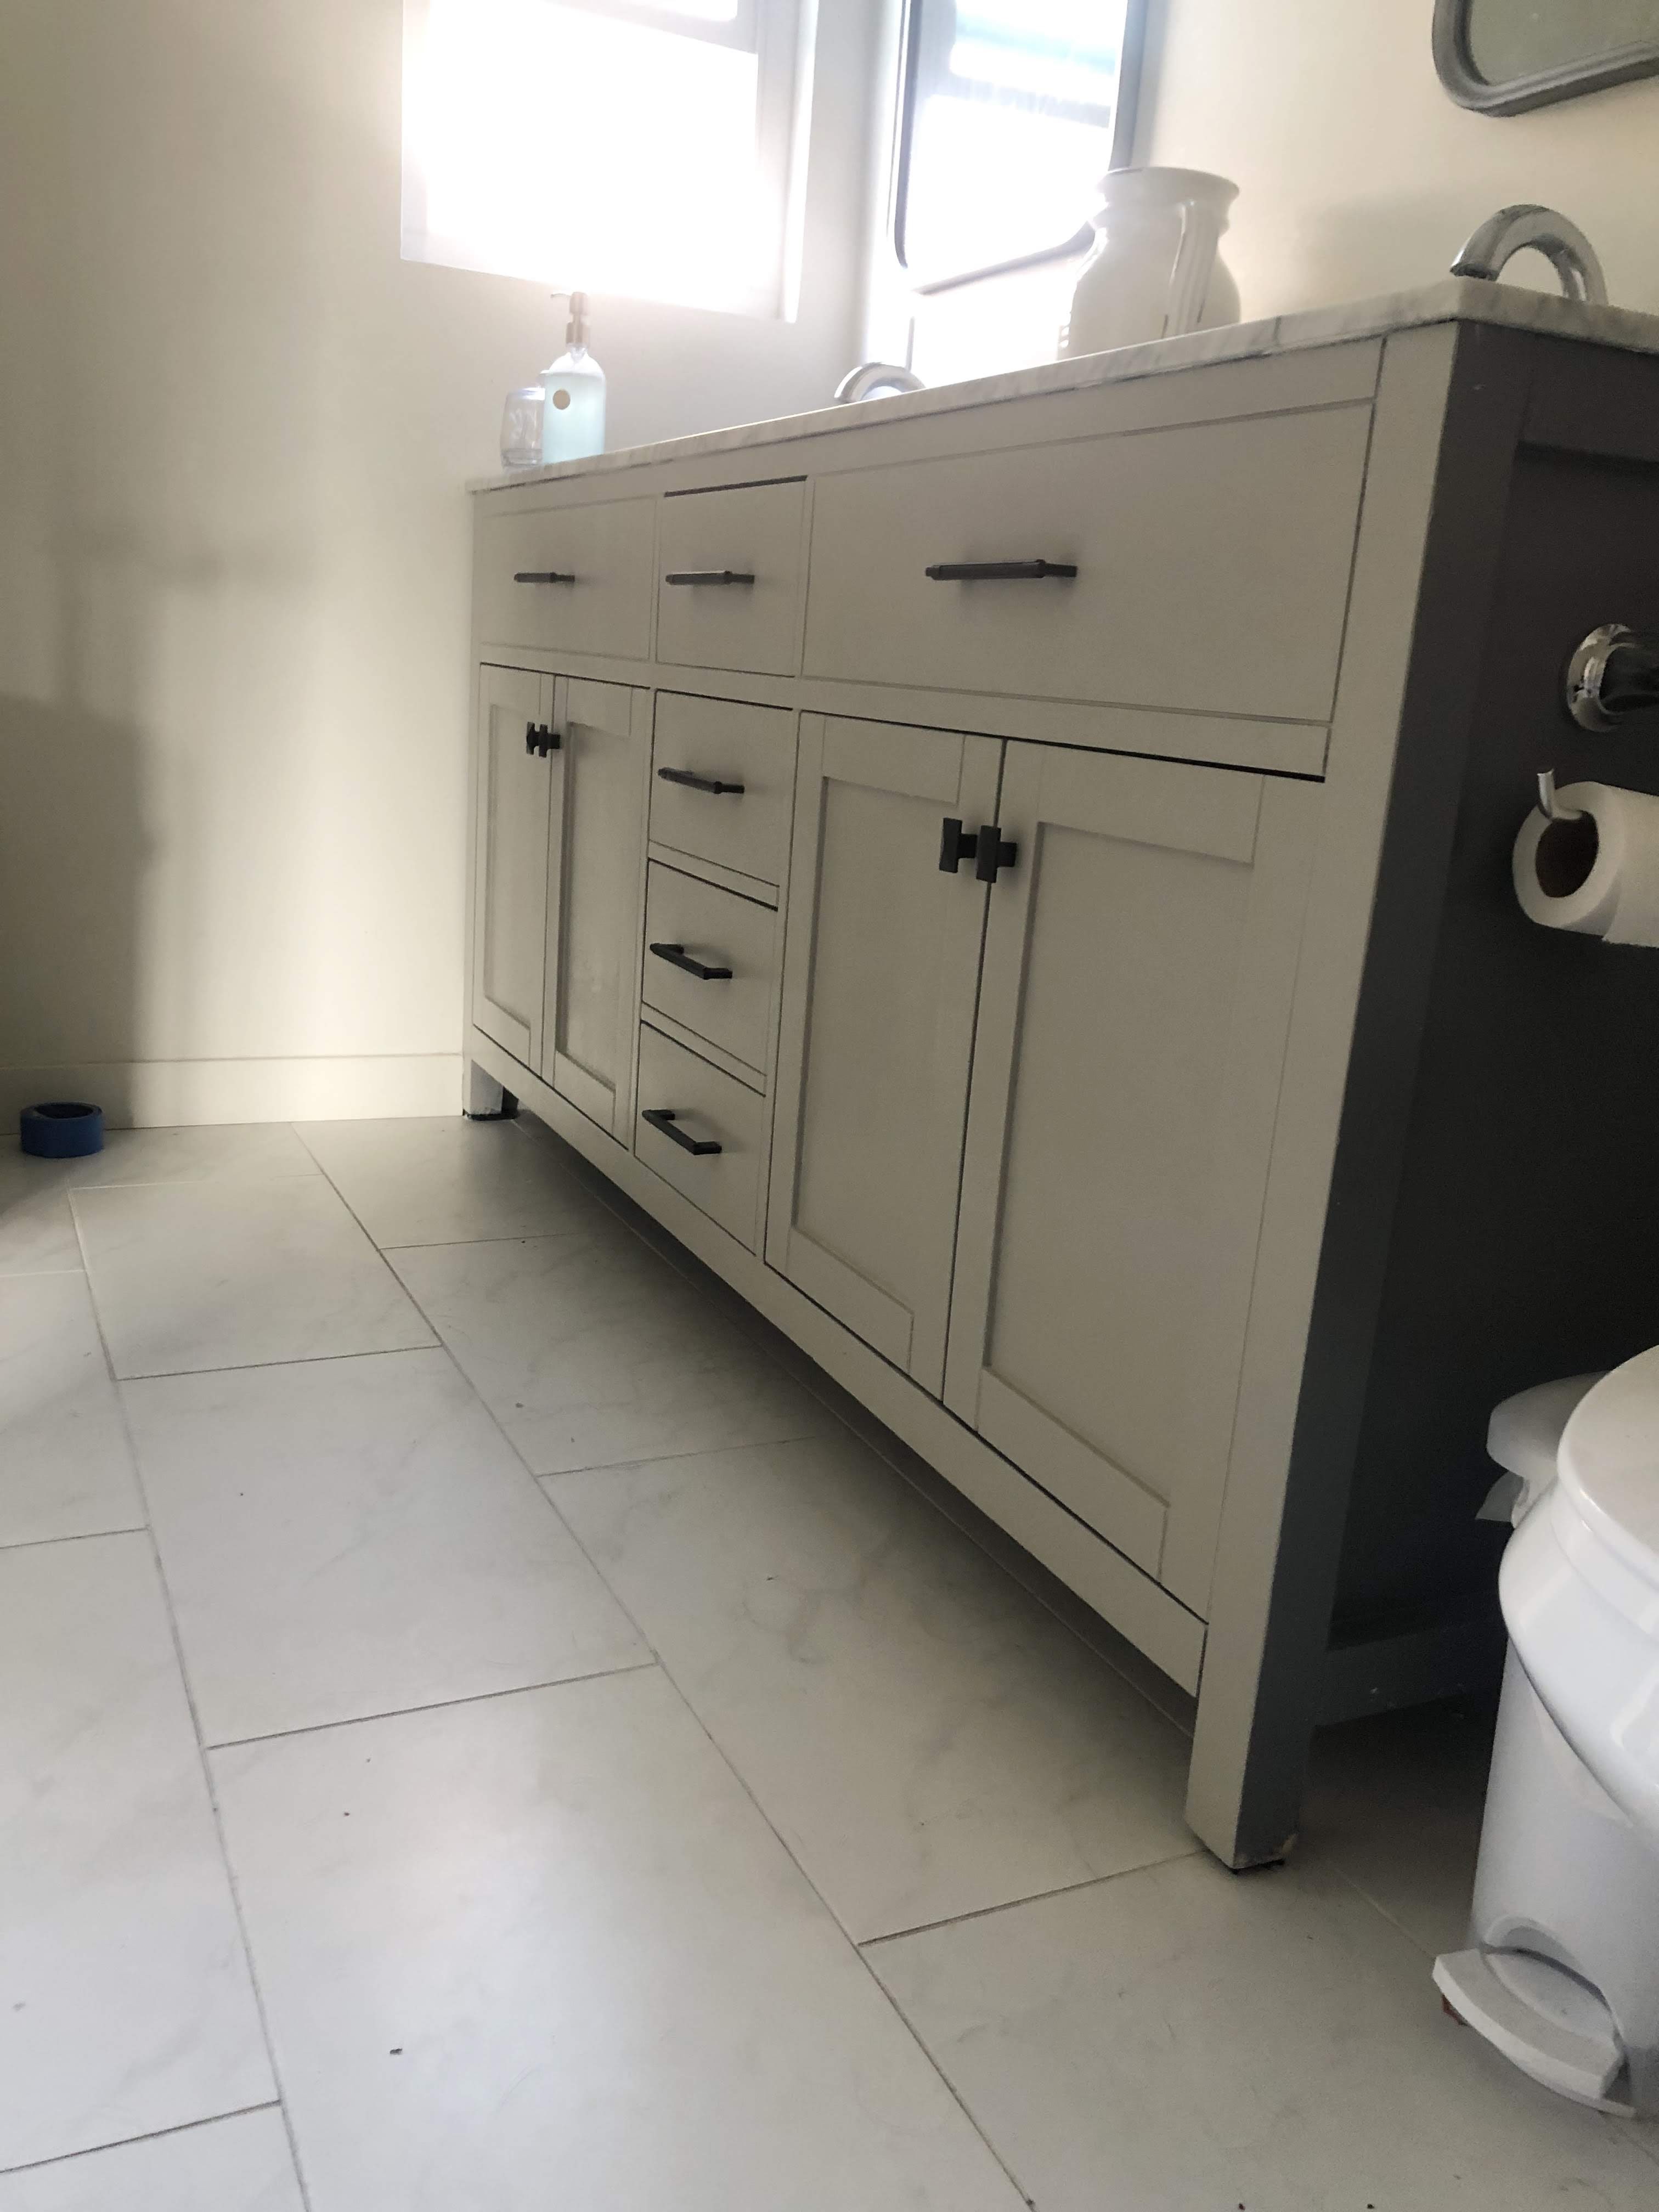
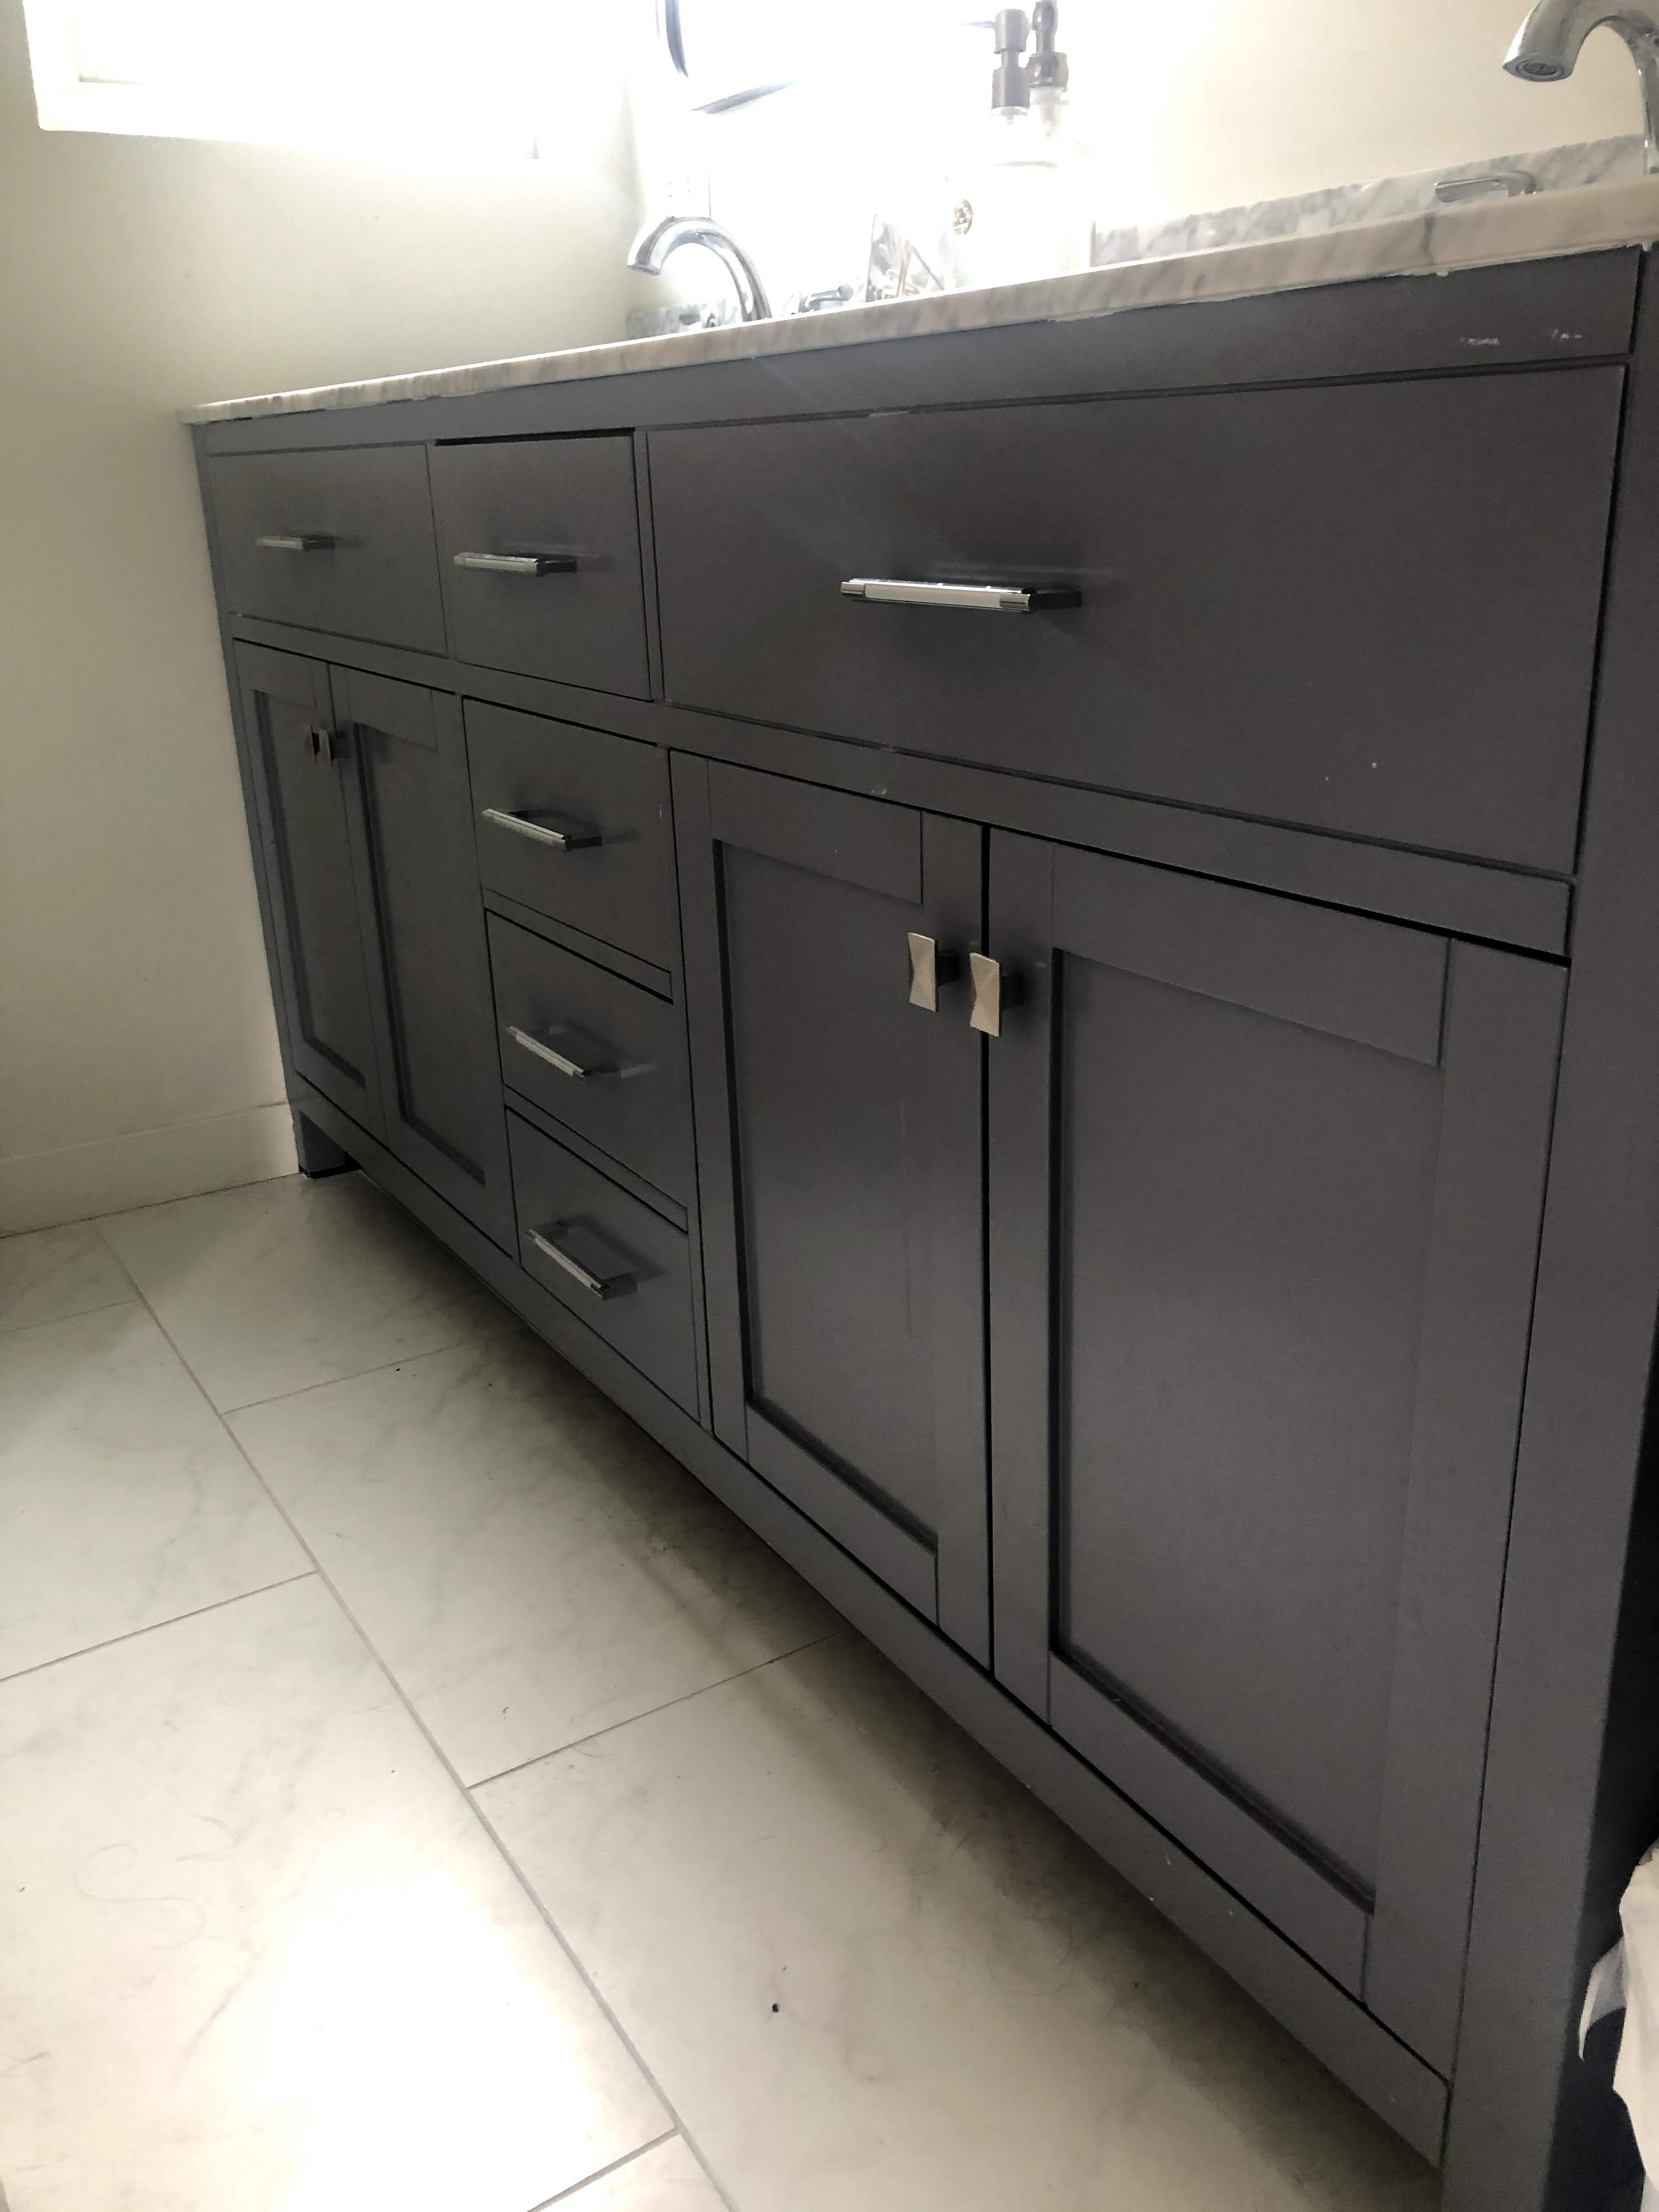 Because we’re all stuck at home during this quarantine, I used what I had in the house. I grabbed some leftover Greige Clare Paint that I had used in the kids room, and painted all the cabinets. I then took this dull silver hardware, and spray painted it black. (excuse the awful pics!)
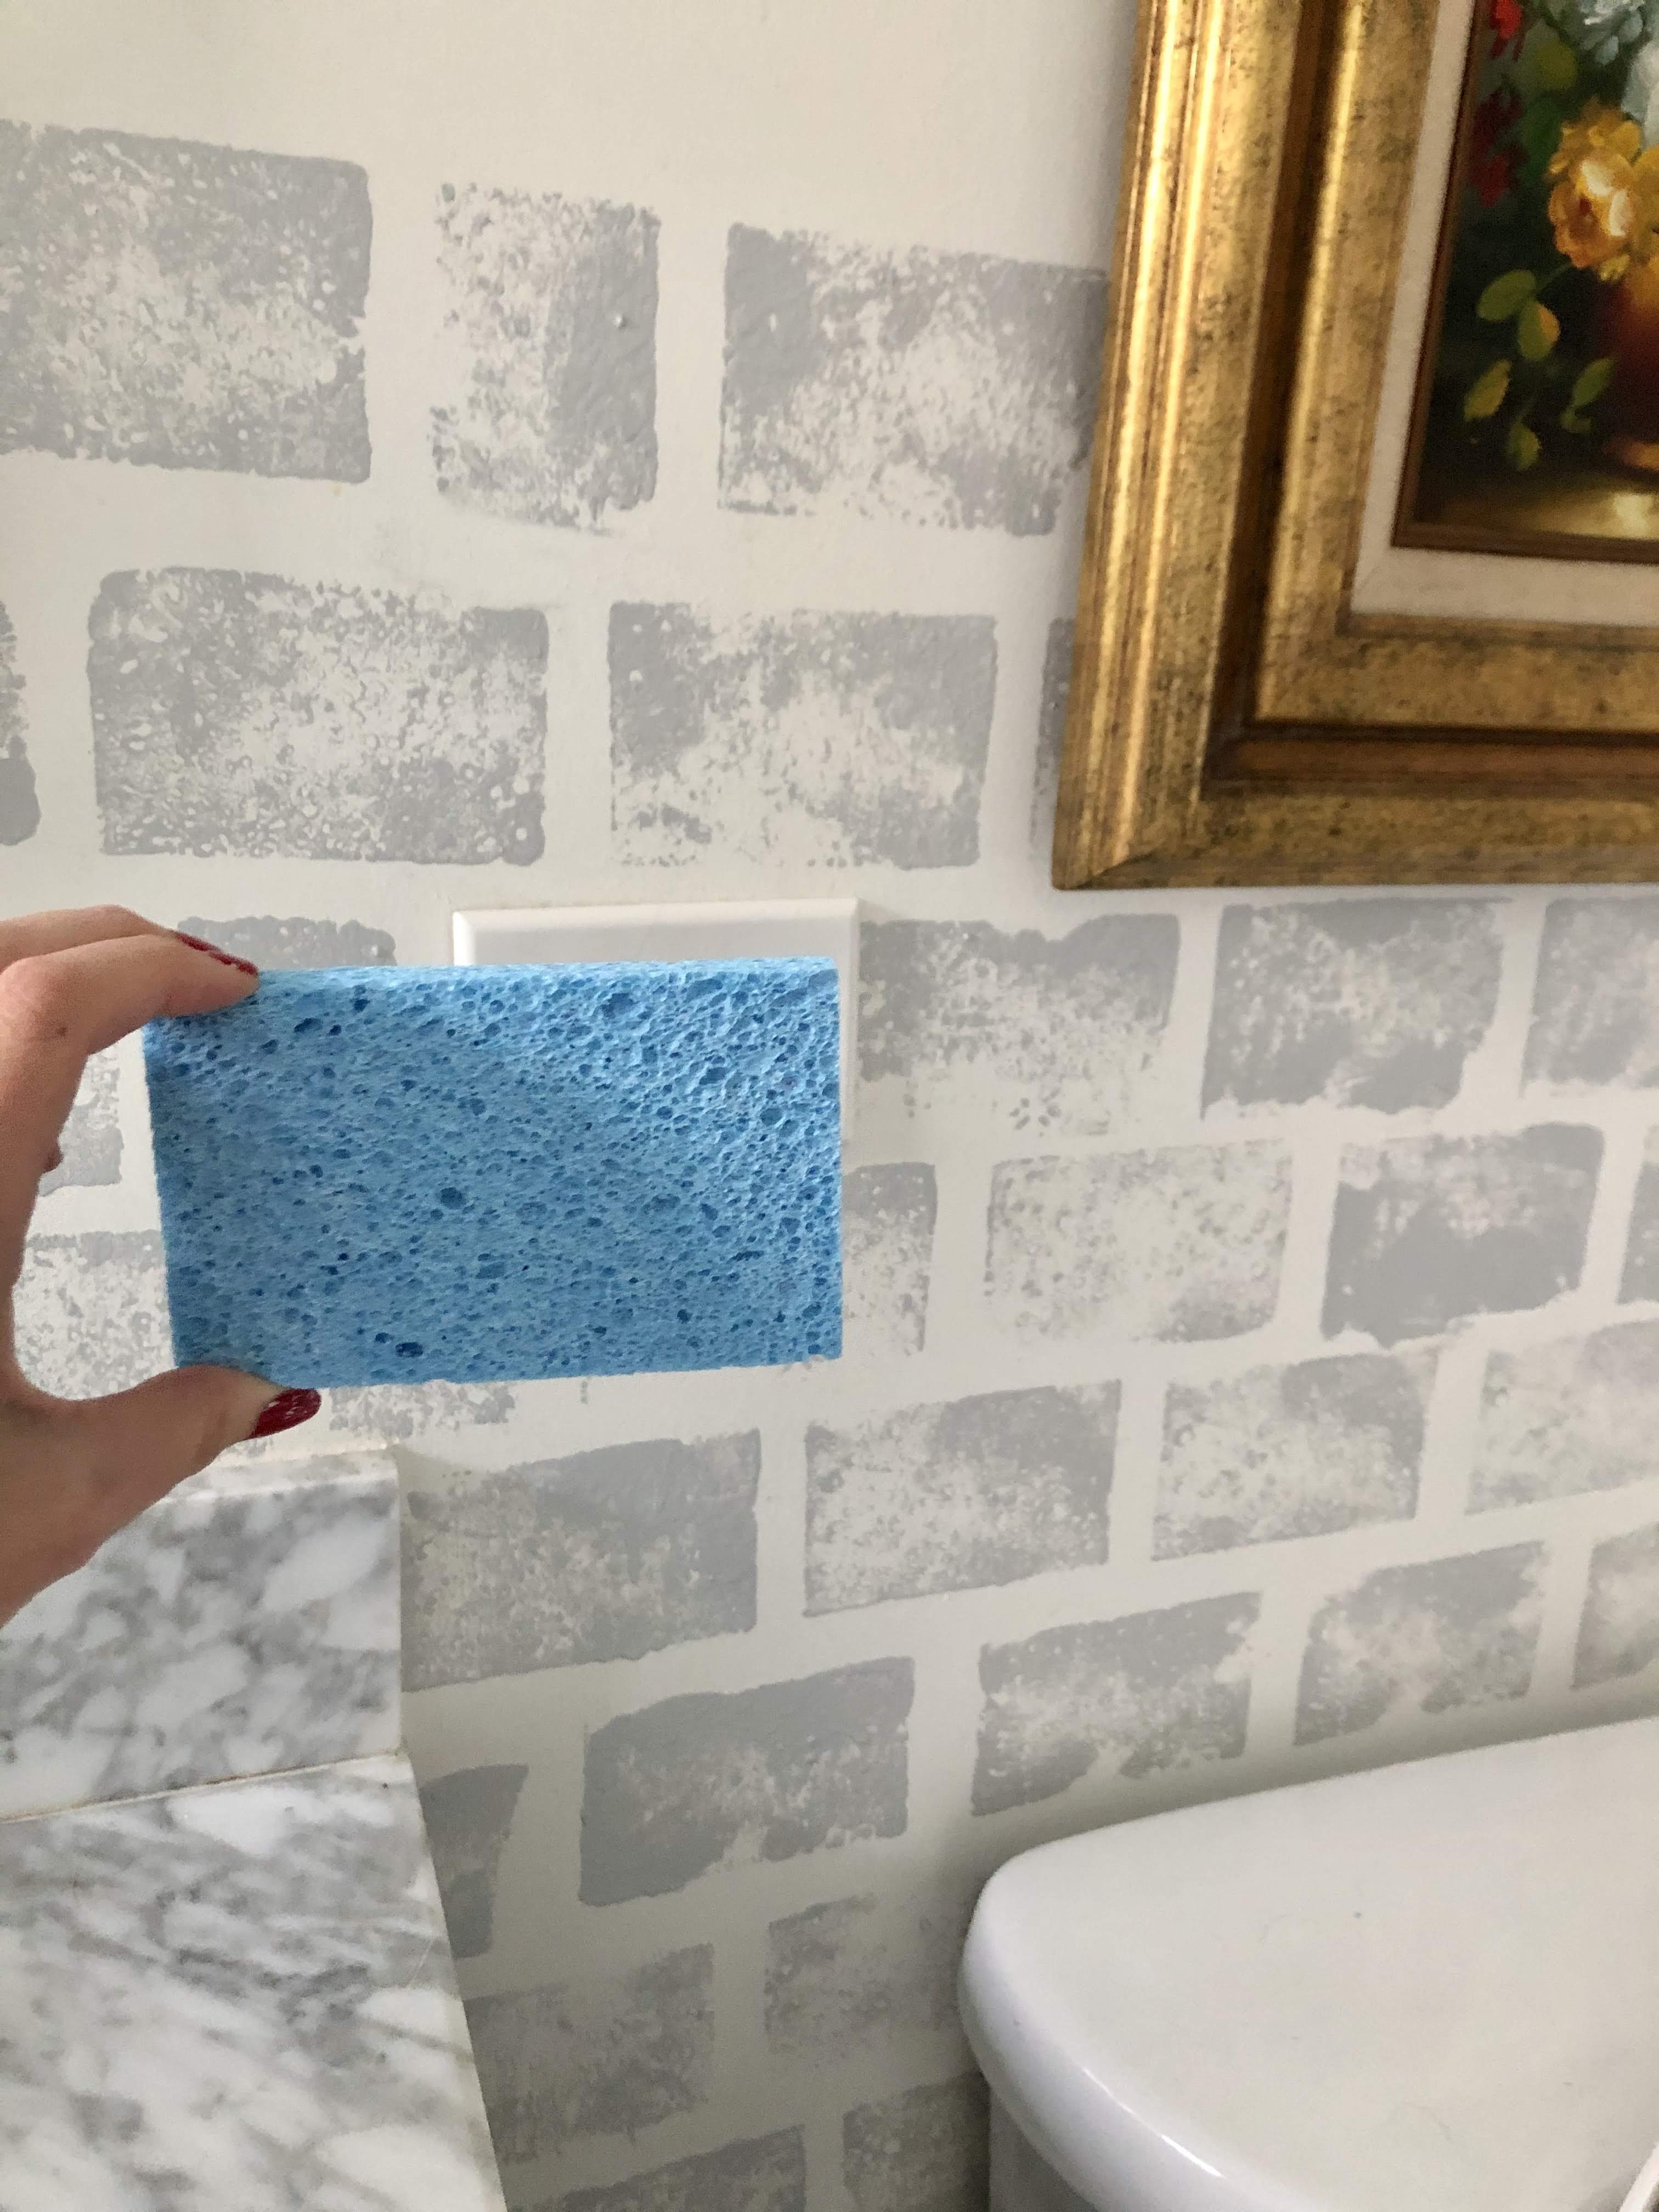
 Now for the fun part…I’ve always wanted a backsplash in here, but installing tile or stone is not on my list of current talents—I can imagine many of you are in the same boat. So what did I do? I grabbed a sponge, some leftover Seize The Gray Clare Paint, and I got to work.
Here’s what the sponge looked like (pretty much your standard dish sponge):
Now for the fun part…I’ve always wanted a backsplash in here, but installing tile or stone is not on my list of current talents—I can imagine many of you are in the same boat. So what did I do? I grabbed a sponge, some leftover Seize The Gray Clare Paint, and I got to work.
Here’s what the sponge looked like (pretty much your standard dish sponge):
 You can see the full video tutorial on my Instagram here, however below is the quick step by step guide + some tips:
 I’m awful at taking step by step pictures, and if you follow me on Instagram I have a video that will be much more helpful. However, below are some helpful tips–this really was as simple as it seems!
 Tips:
Tips:
 So what do you think? Not too shabby for a cheap alternative to a real backsplash right? I hope you try it too! And send me a DM on Instagram and show me what it looks like! If you’re interested in another way I’ve used a sponge technique, check out my DIY Sponge Paint Wall. And please, sign up for my email updates below. I promise I won’t spam you. We can be best buds.
Love,
Deema
Feedback? Comment below, or email me: (Deema Tabbara Lopez) at prettyonfridays@gmail.com
Follow me on Instagram
Sign up for Newsletter updates
Follow me on Pinterest
So what do you think? Not too shabby for a cheap alternative to a real backsplash right? I hope you try it too! And send me a DM on Instagram and show me what it looks like! If you’re interested in another way I’ve used a sponge technique, check out my DIY Sponge Paint Wall. And please, sign up for my email updates below. I promise I won’t spam you. We can be best buds.
Love,
Deema
Feedback? Comment below, or email me: (Deema Tabbara Lopez) at prettyonfridays@gmail.com
Follow me on Instagram
Sign up for Newsletter updates
Follow me on Pinterest
This is my master bathroom, it’s not awful, in fact, the previous owner had remodeled it. However, I always felt like the paint was “blah” and so was the entire bathroom. I really wanted to add some life to it.
Because we’re all stuck at home during this quarantine, I used what I had in the house. I grabbed some leftover Greige Clare Paint that I had used in the kids room, and painted all the cabinets. I then took this dull silver hardware, and spray painted it black. (excuse the awful pics!)
Now for the fun part…I’ve always wanted a backsplash in here, but installing tile or stone is not on my list of current talents—I can imagine many of you are in the same boat. So what did I do? I grabbed a sponge, some leftover Seize The Gray Clare Paint, and I got to work.
Here’s what the sponge looked like (pretty much your standard dish sponge):
You can see the full video tutorial on my Instagram here, however below is the quick step by step guide + some tips:
- Pour paint out in a dish large enough to fit a sponge
- Dip the sponge in paint and wipe off excess paint (You can also get a sheet of paper to dip the sponge in once before the wall to get excess paint off that way)
- Dip the sponge on the wall (multiple times before reapplying paint)–the imperfections will look great when some squares are faded and others aren’t
- Repeat–Pick the spacing you want between each “stone.” (but alternate like actual brick or tile would look, don’t stack them..see below)
I’m awful at taking step by step pictures, and if you follow me on Instagram I have a video that will be much more helpful. However, below are some helpful tips–this really was as simple as it seems!
Tips:
- Don’t use too much paint, always wipe off the excess before putting it on the wall.
- Have a Q-tip and a wet paper towel ready in case anything drips
- I cut a sponge in half for the ends of the wall, but I didn’t end up using it. Instead I would eyeball the size by bending the sponge–it may make more sense if you see my video on Instagram here.
- I didn’t measure, I eyeballed everything. I LOVE the imperfections and feel like it gives it a more vintage weathered vibe.
- Lastly, and this may be more personal taste, but I prefer using lighter paint colors when doing this. I’ve tried this method a few other ways, and have found that darker paint colors don’t look as nice–darker colors also highlight mistakes much more than lighter colors.
So what do you think? Not too shabby for a cheap alternative to a real backsplash right? I hope you try it too! And send me a DM on Instagram and show me what it looks like! If you’re interested in another way I’ve used a sponge technique, check out my DIY Sponge Paint Wall. And please, sign up for my email updates below. I promise I won’t spam you. We can be best buds.
Love,
Deema
Feedback? Comment below, or email me: (Deema Tabbara Lopez) at prettyonfridays@gmail.com
Follow me on Instagram
Sign up for Newsletter updates
Follow me on Pinterest


So Beautiful. ❤️
Ah thank you!!!!
I love your bathroom transformation! It turned out beautiful!
Aw thank you so much!!
[…] Faux DIY Backsplash Using Paint And A Dish Sponge […]
[…] I did my DIY Faux backsplash using a sponge for my master bath, I kept thinking about what other ways I could do a faux […]
This looks so good it adds a lot to the bathroom.
[…] Here’s even a backsplash tile idea using a sponge – so pretty!! […]