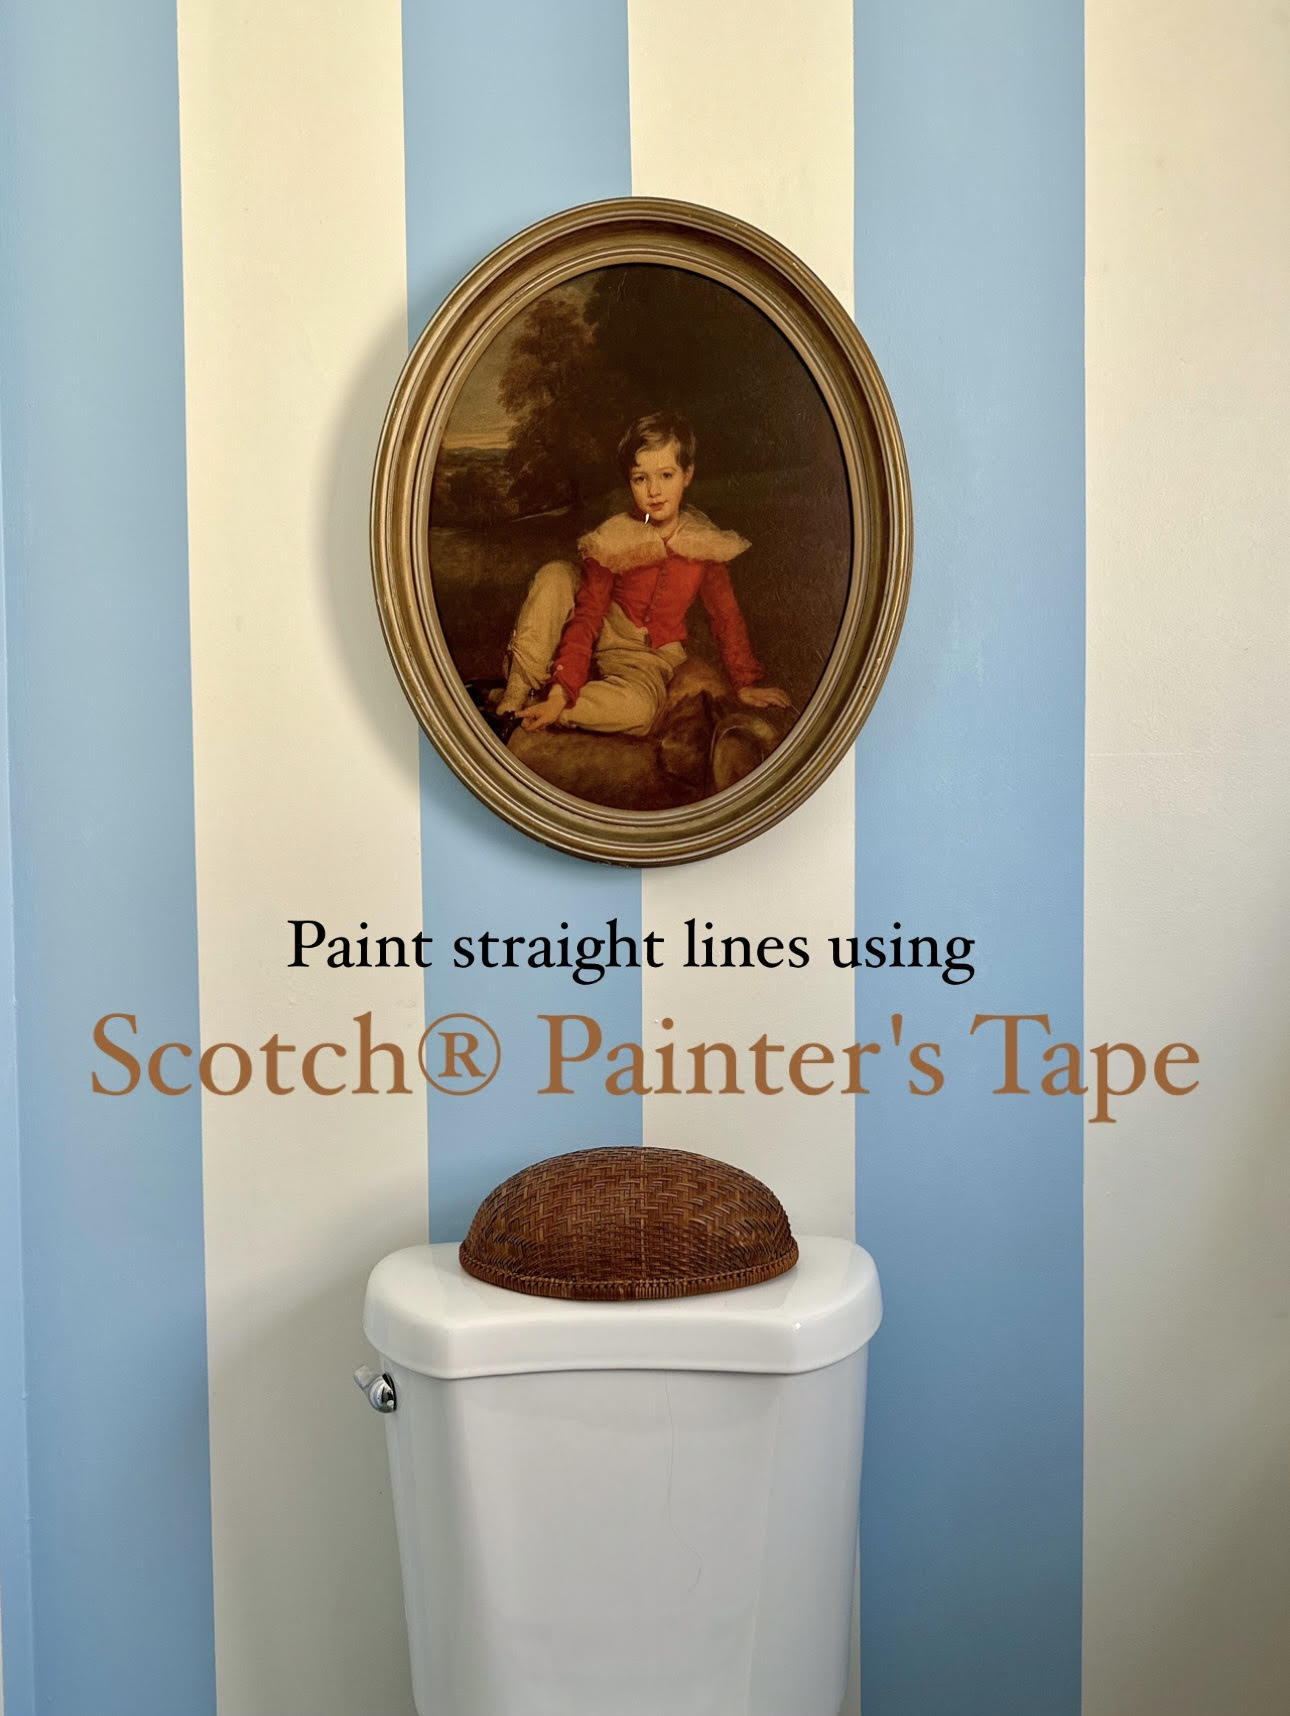


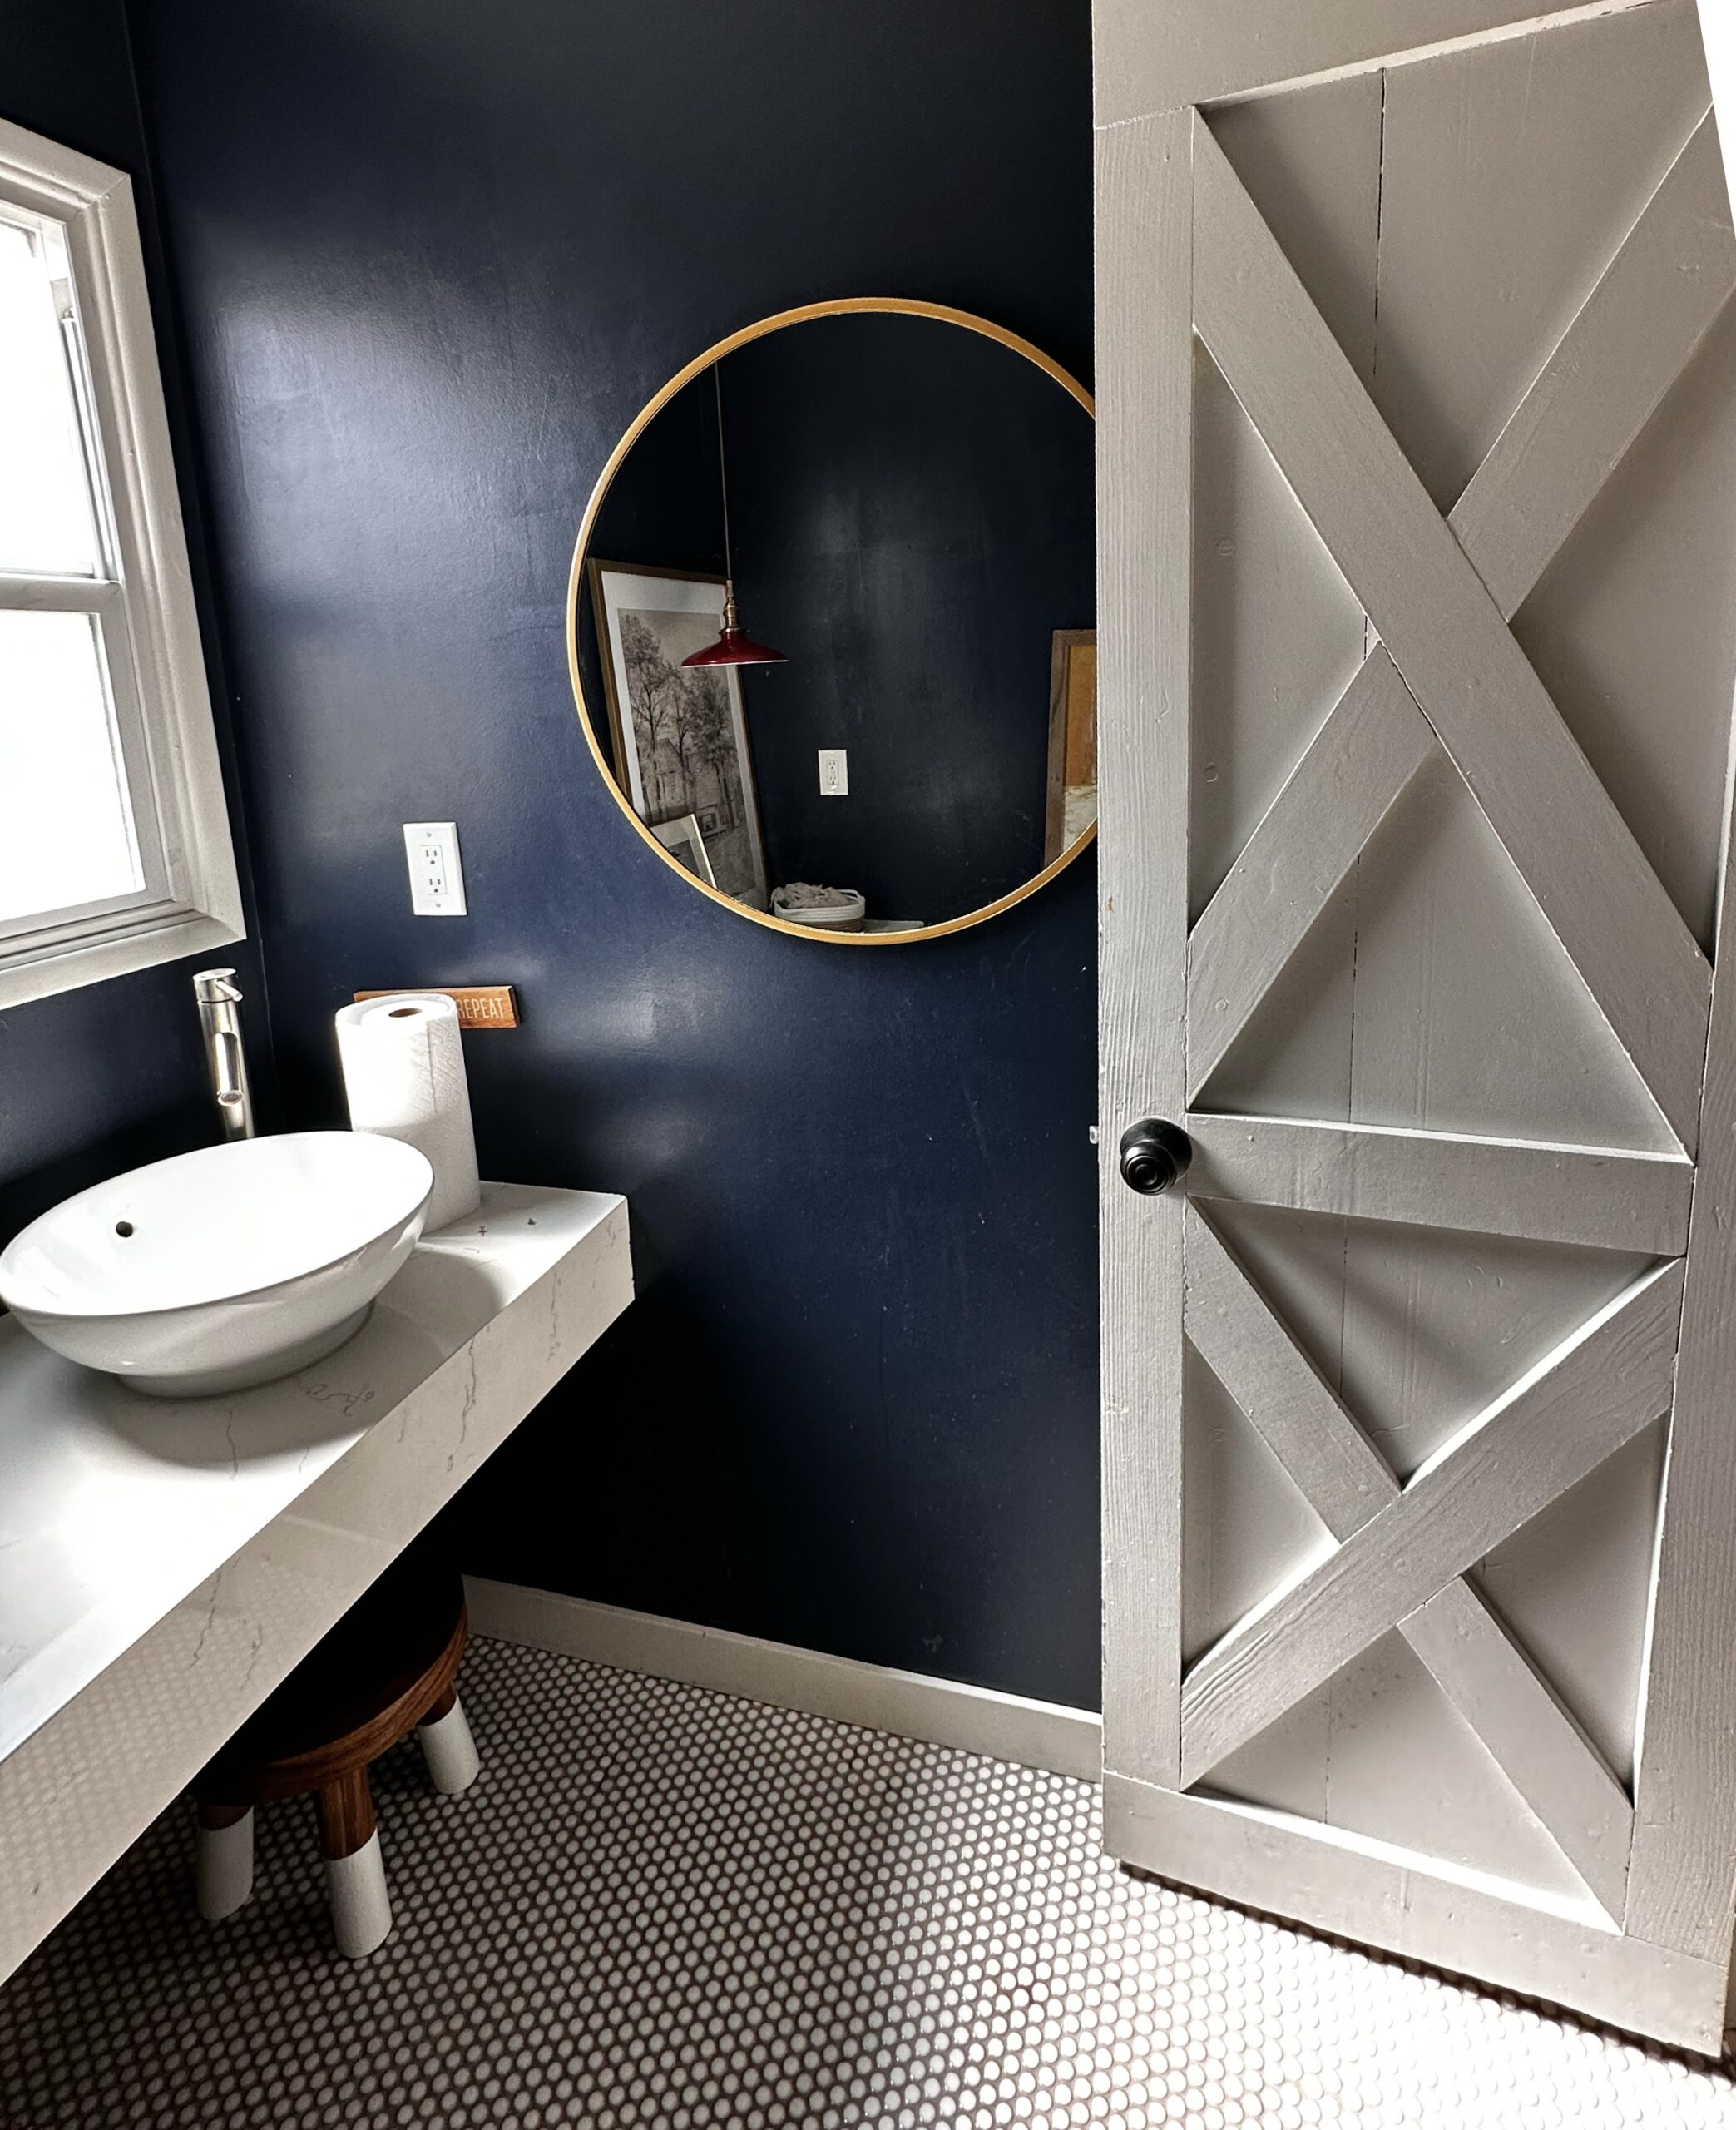
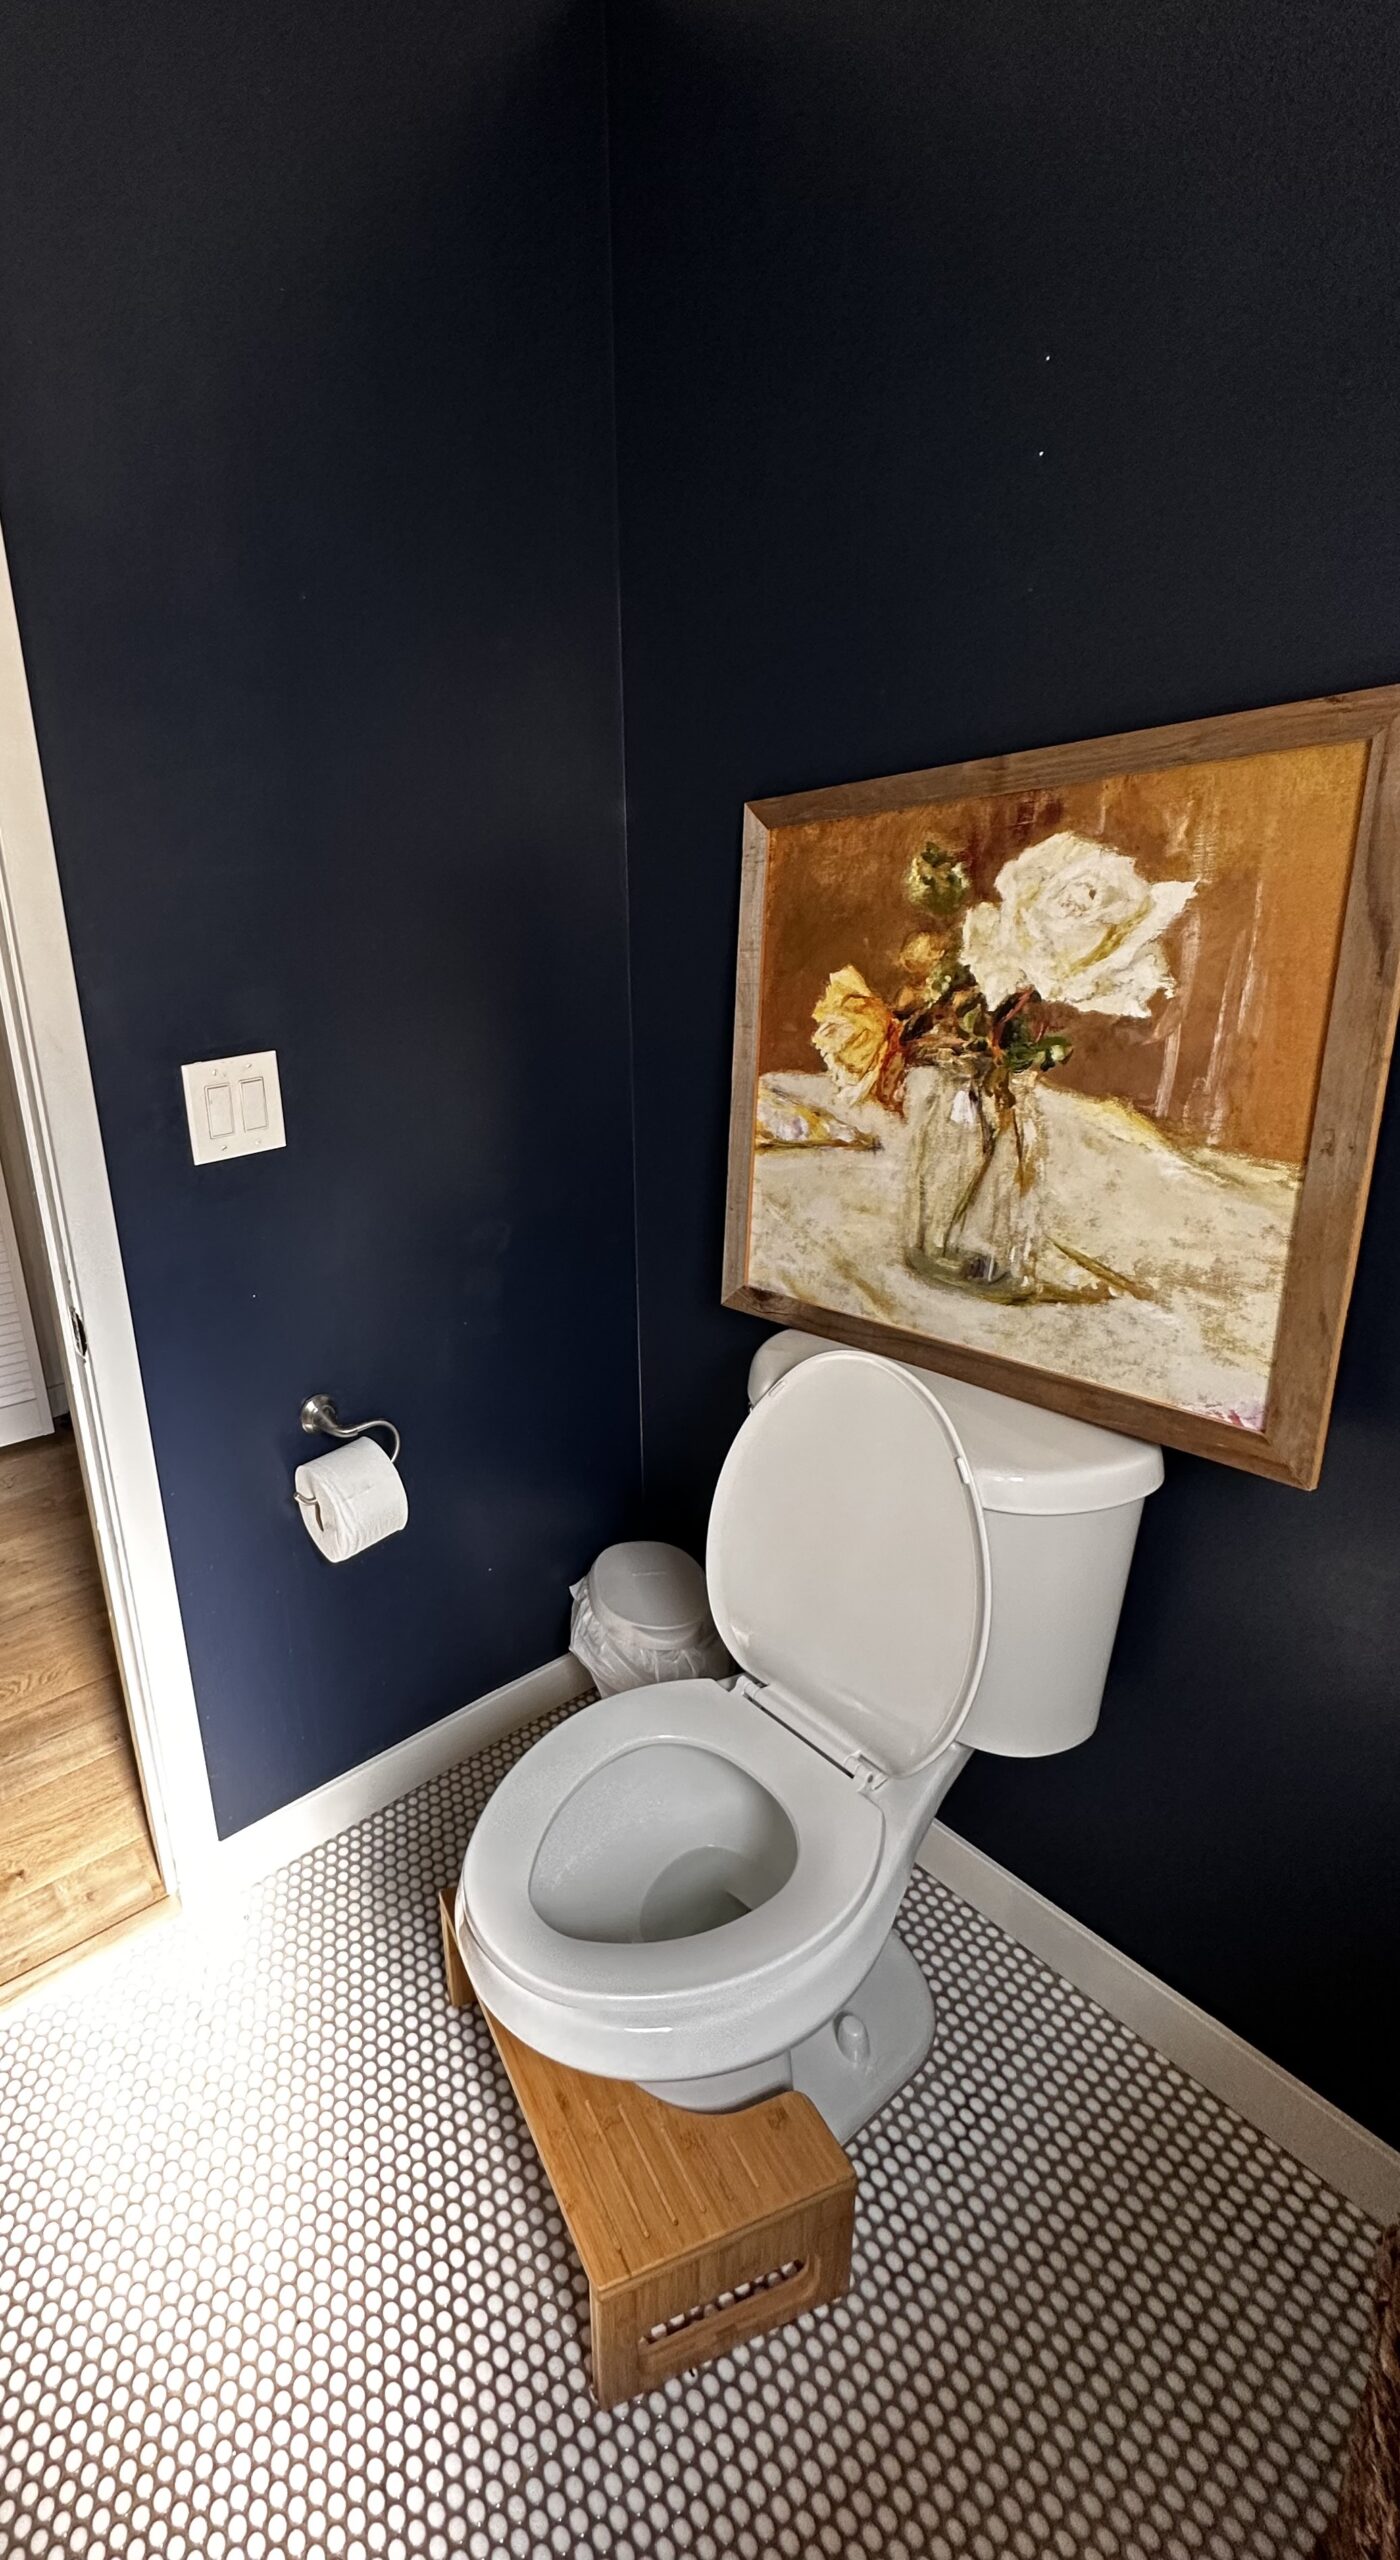
I painted our powder bathroom a dark color awhile back, and I’ve been dying to change it for quite some time. I wanted something a bit lighter with some dimension. I’ve always loved stripes, and debated getting wallpaper, but I’ve seen friends paint stripes using Scotch® Painter’s Tape that turned out really well. Spoiler alert: I tried it, and it looks amazing. So if you’re looking for tips on how to paint stripes on a wall, keep reading.
*This post is sponsored by Scotch® Painter’s Tape.
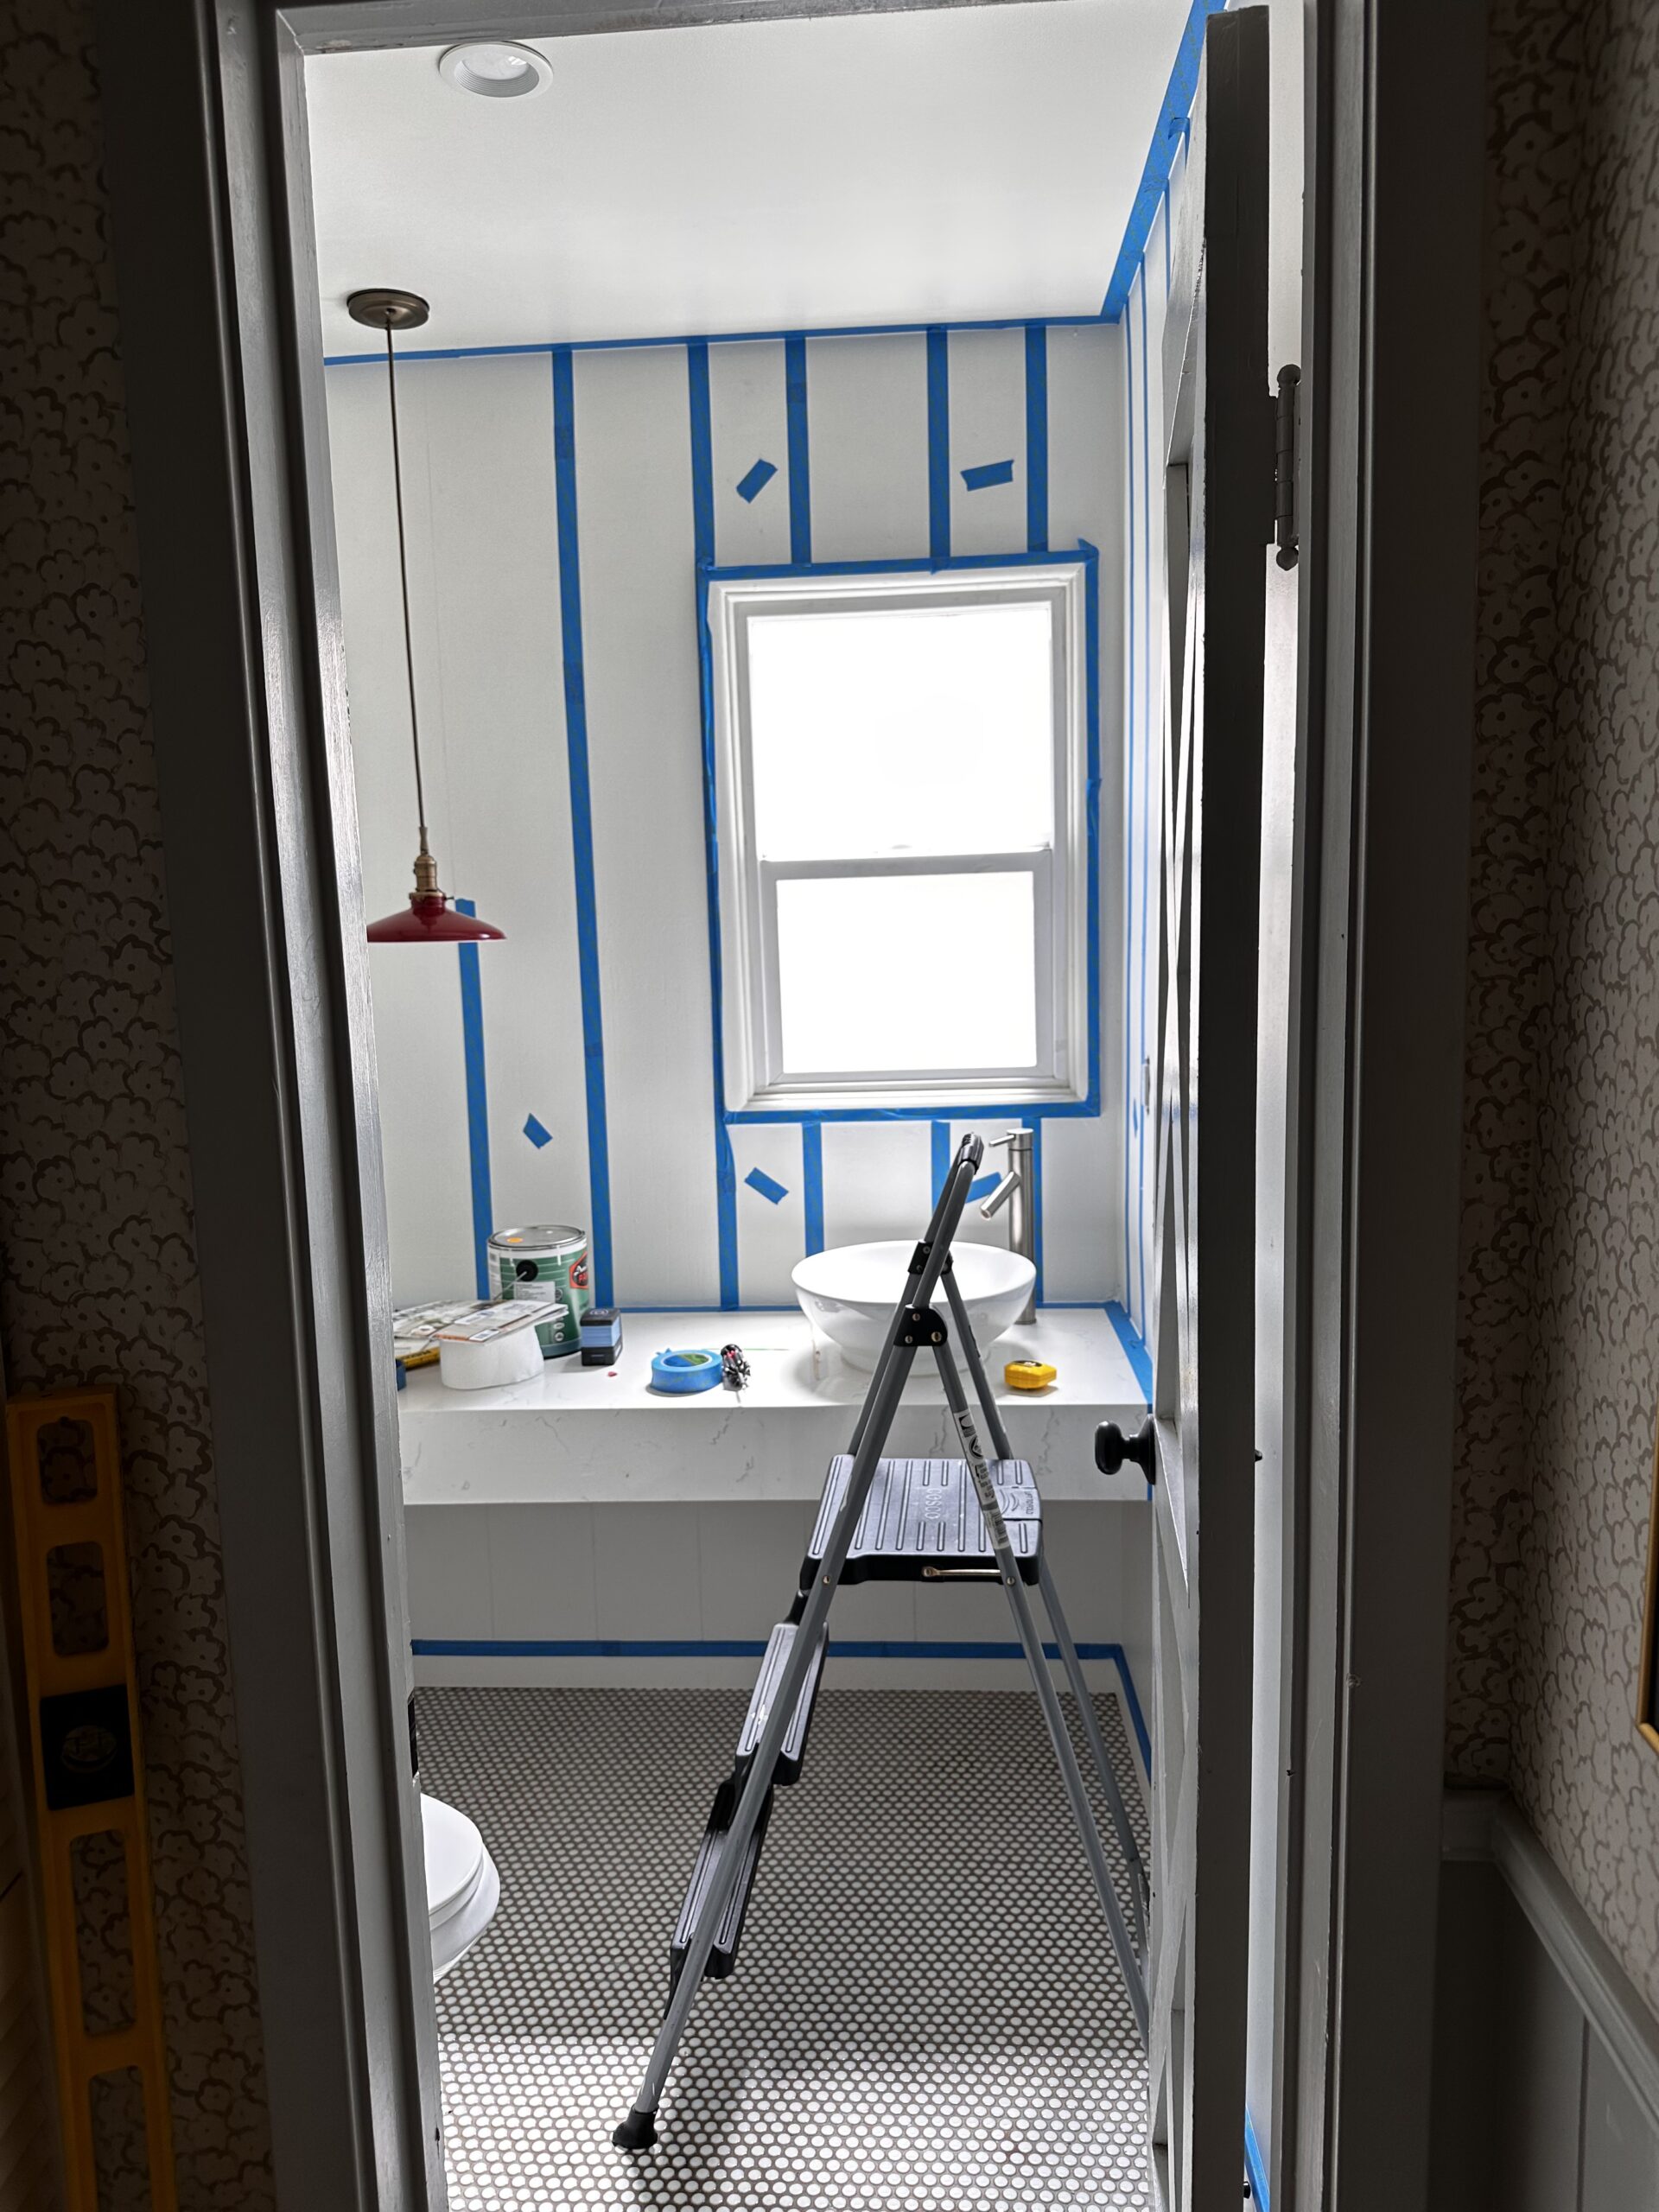
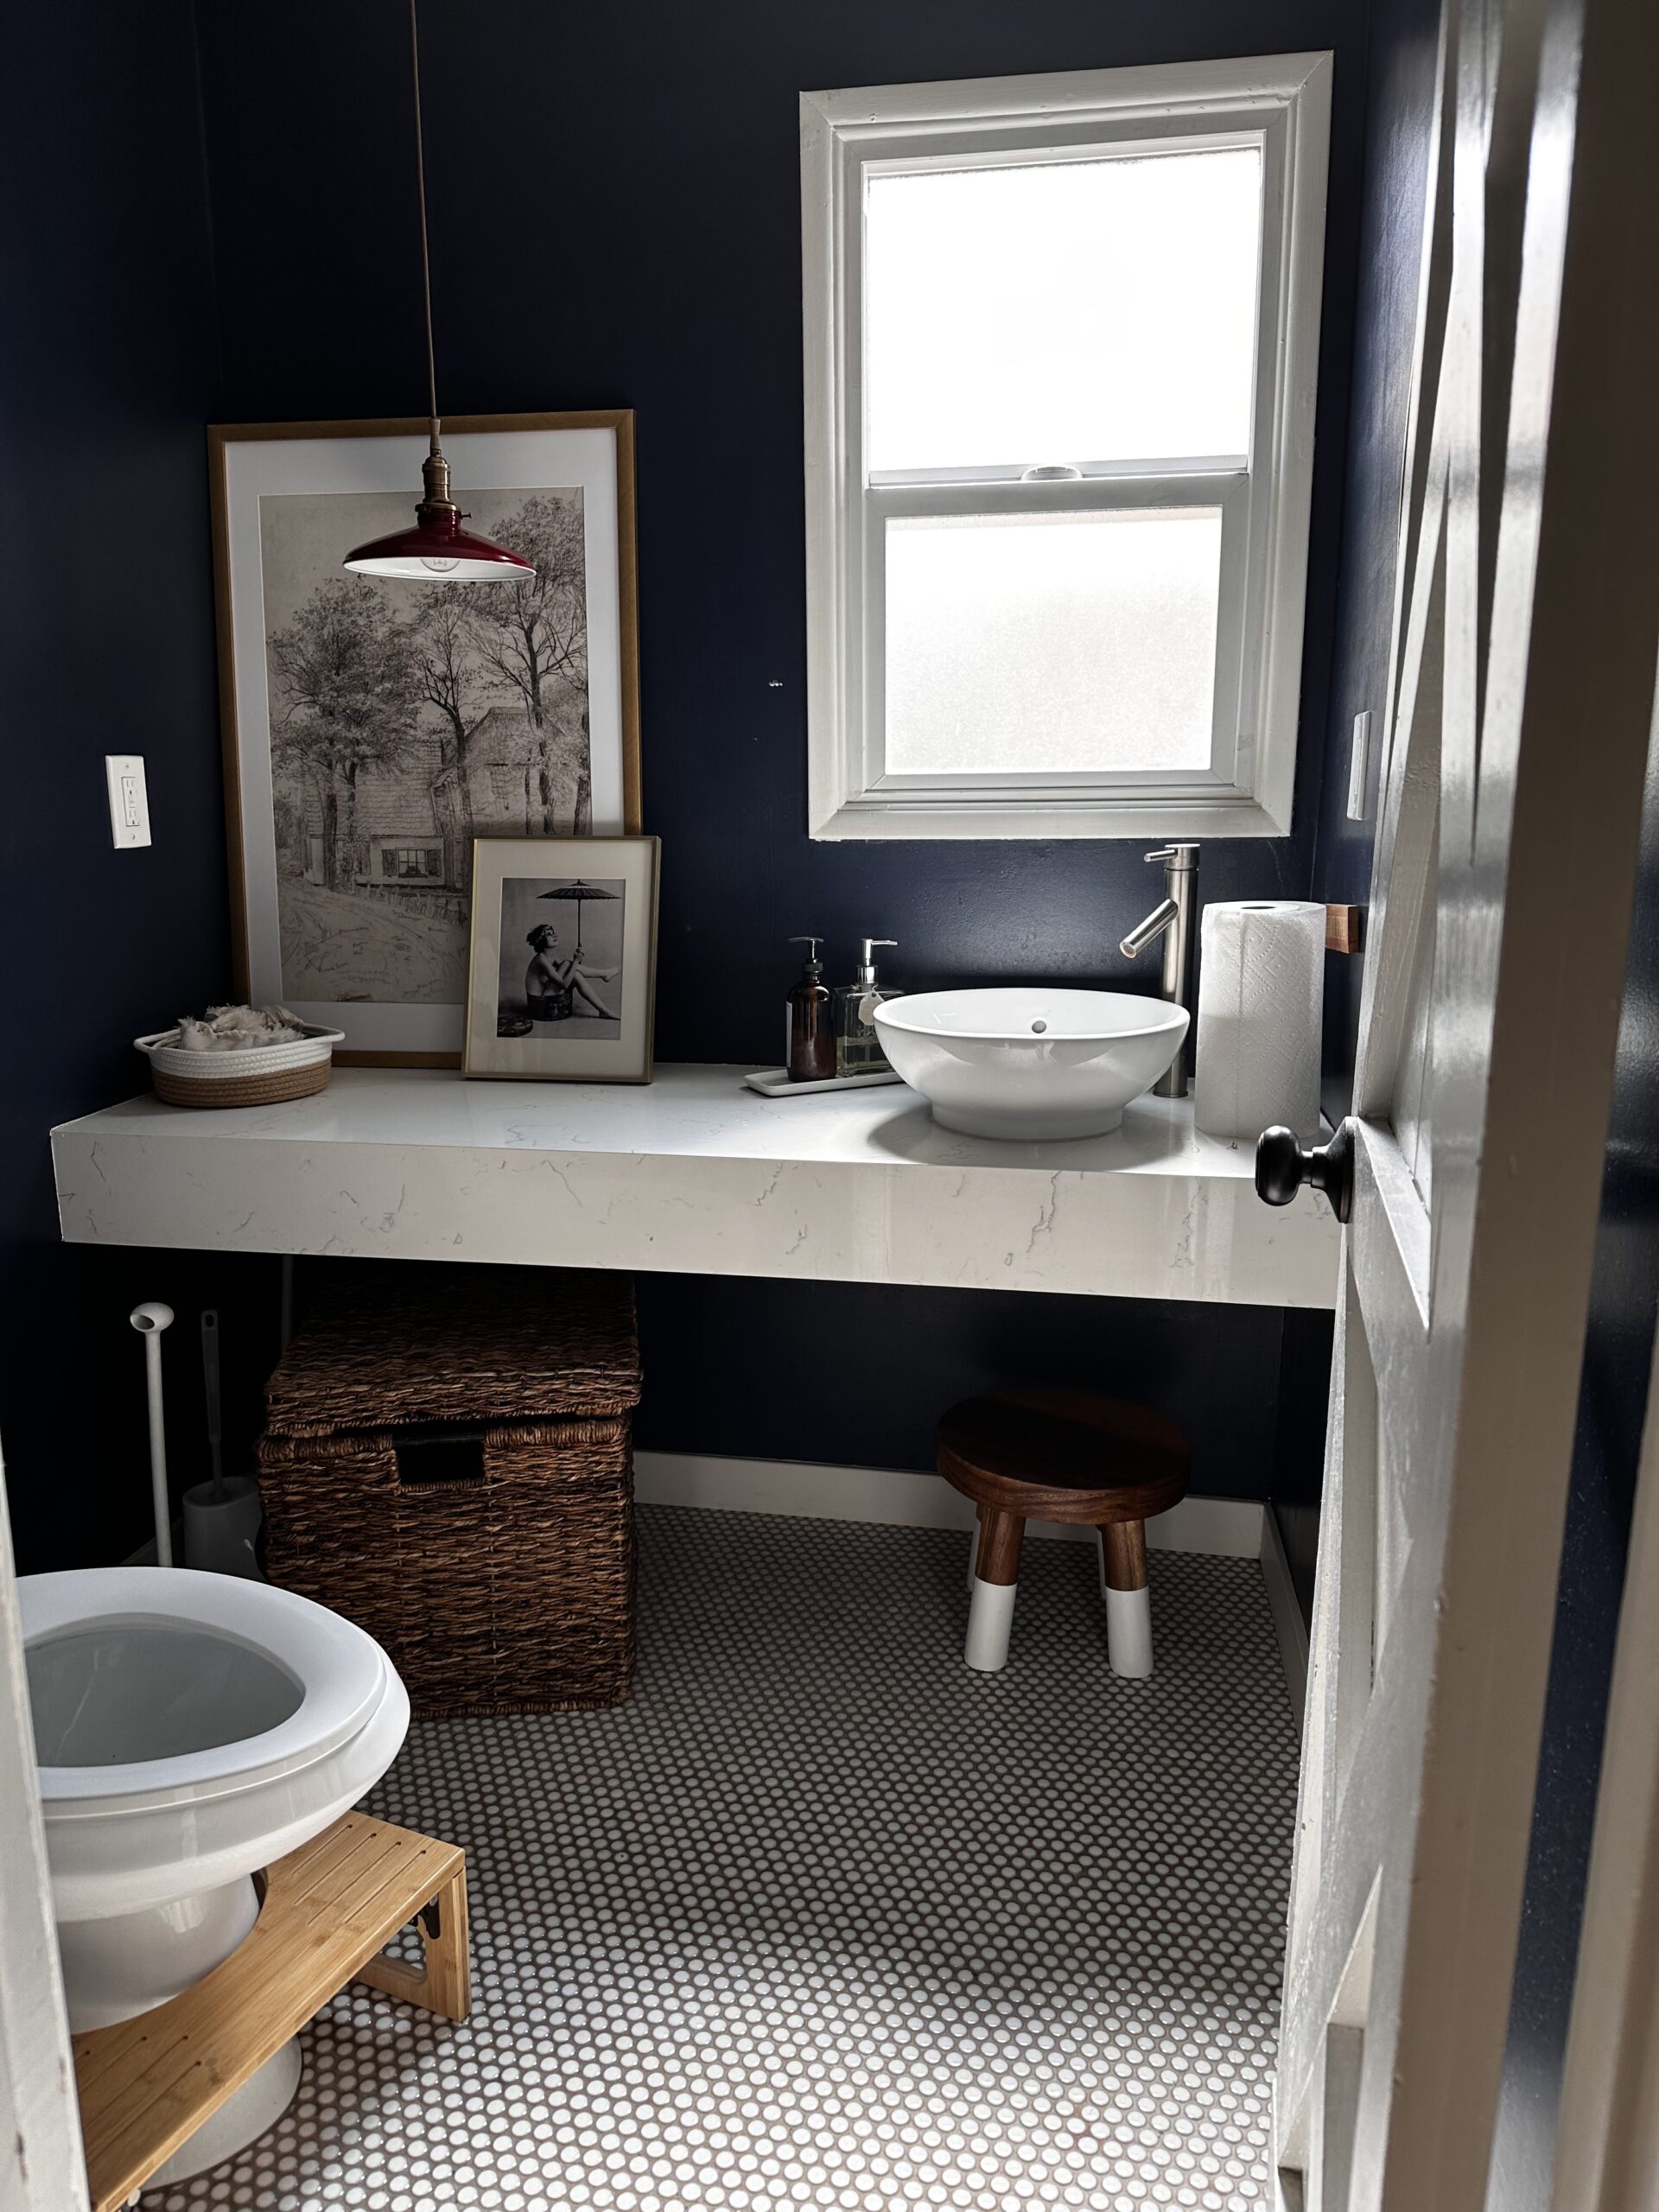
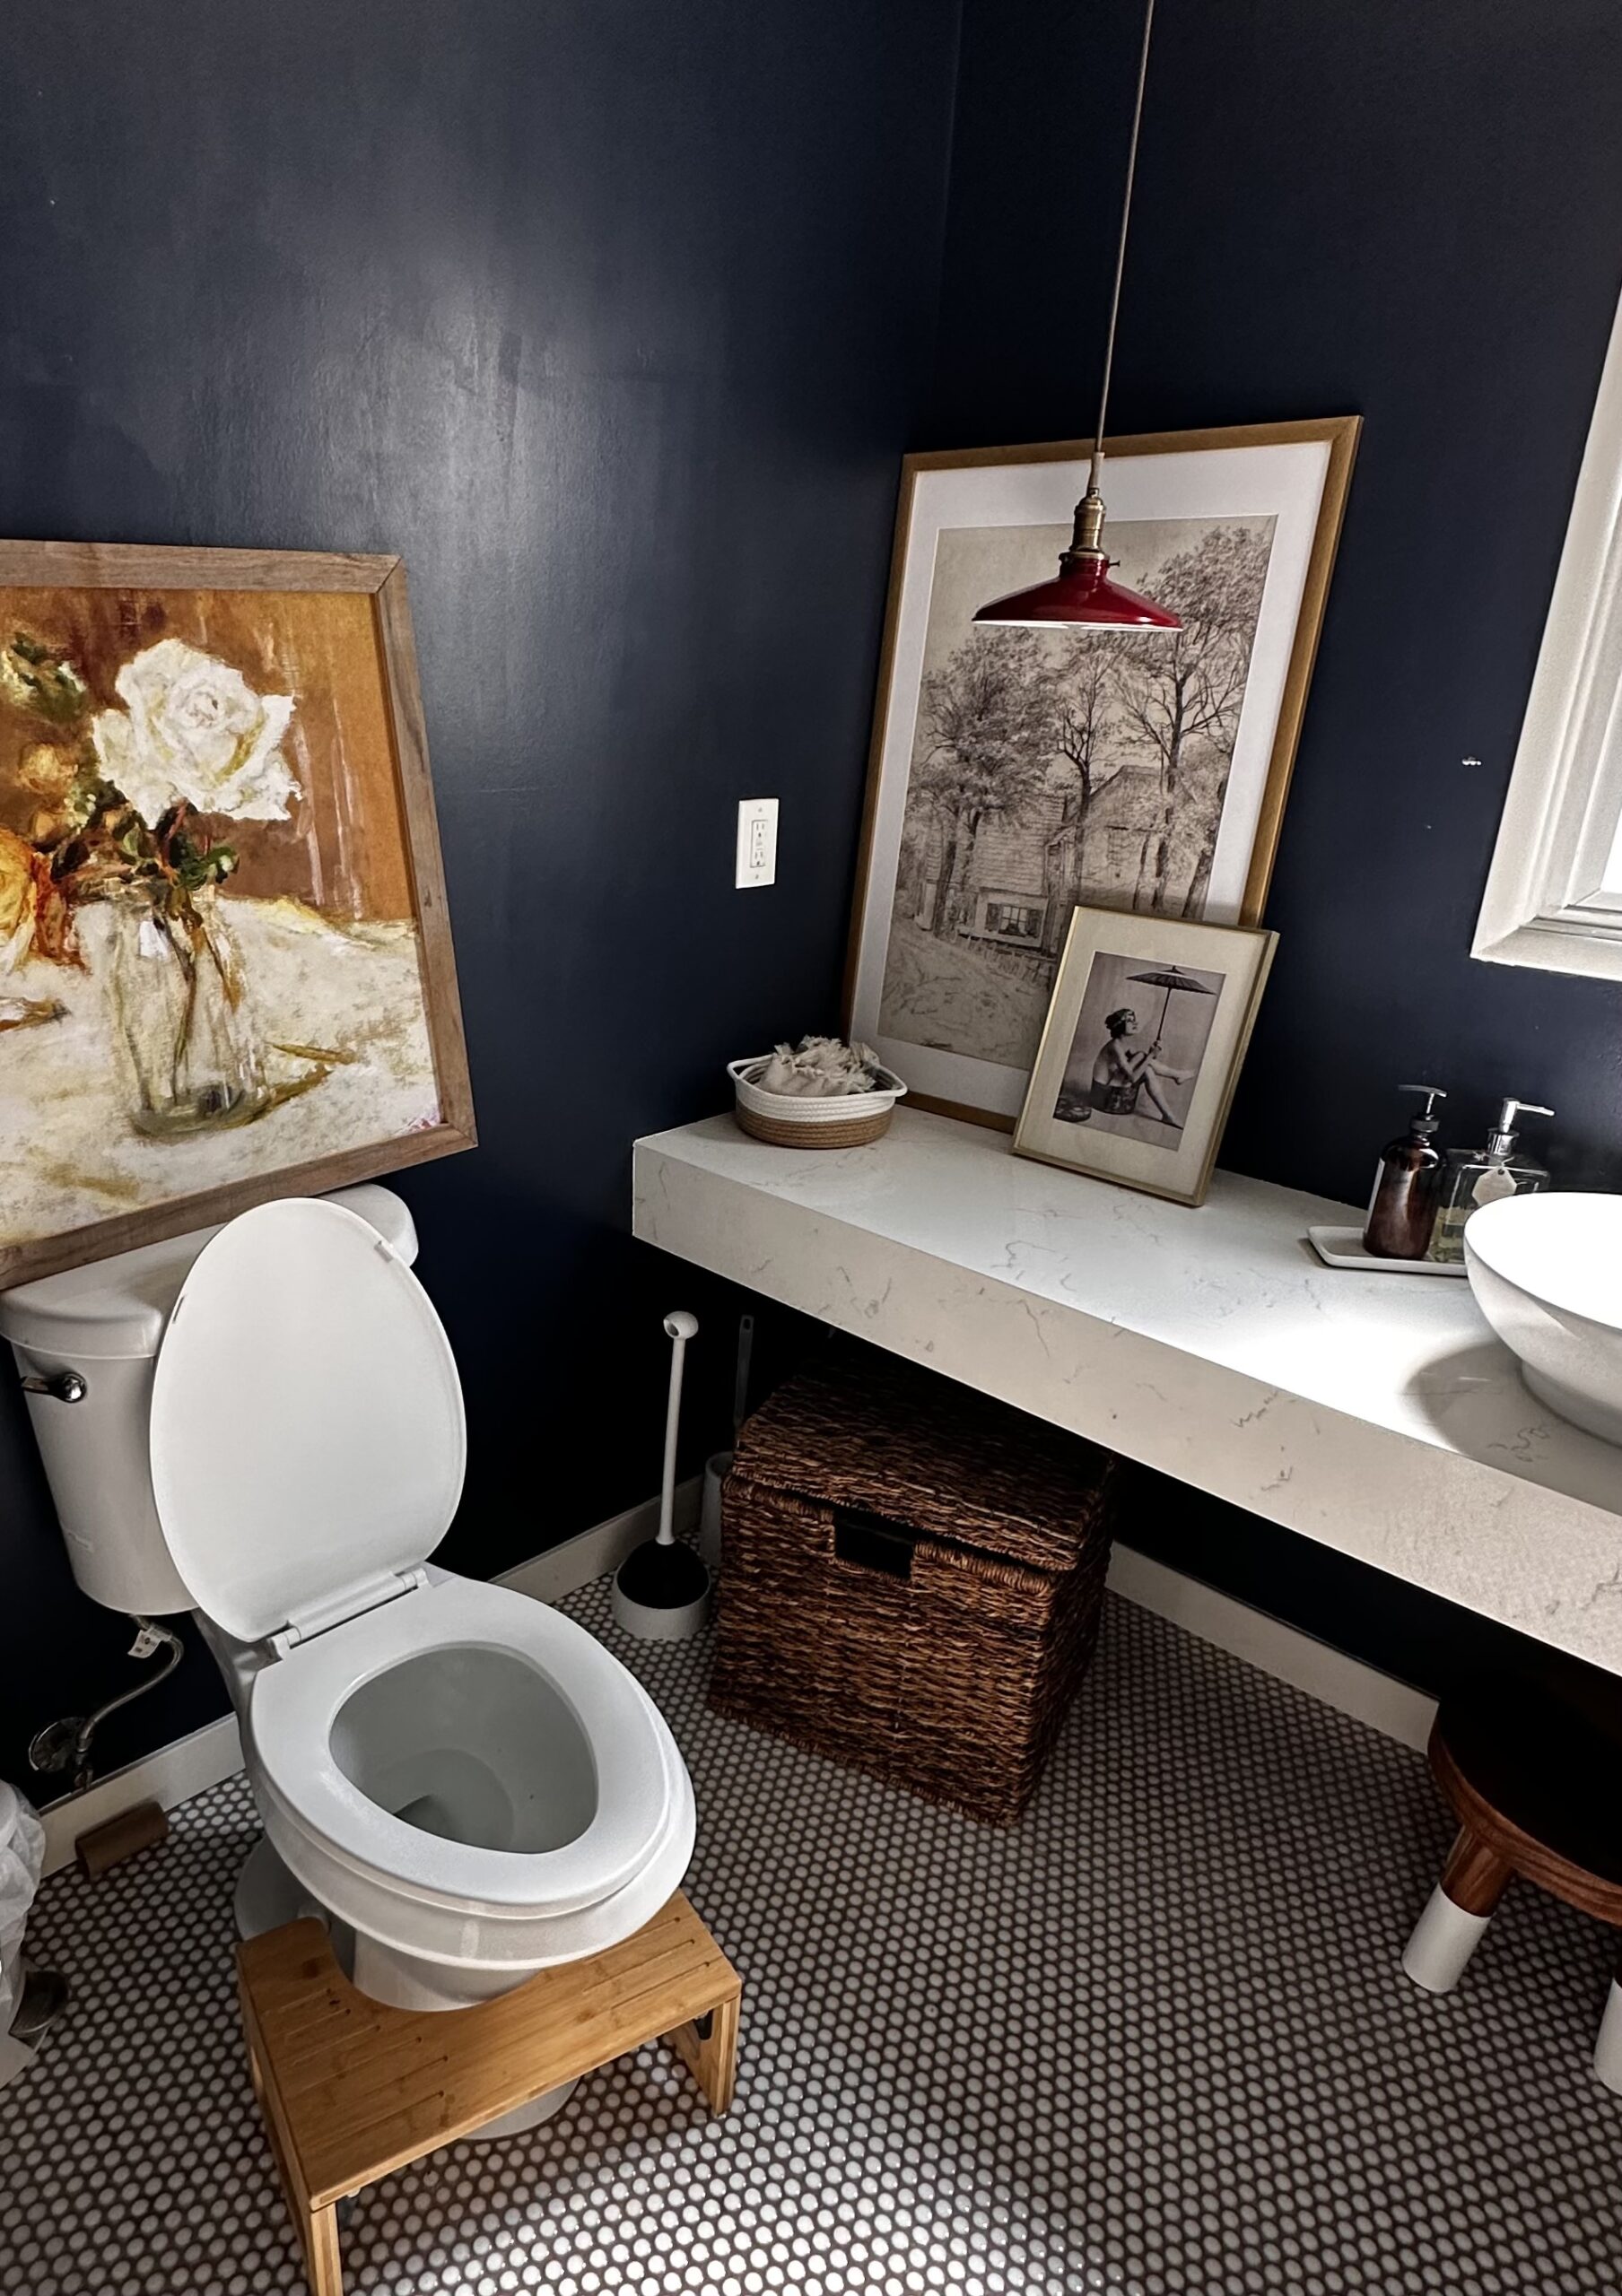
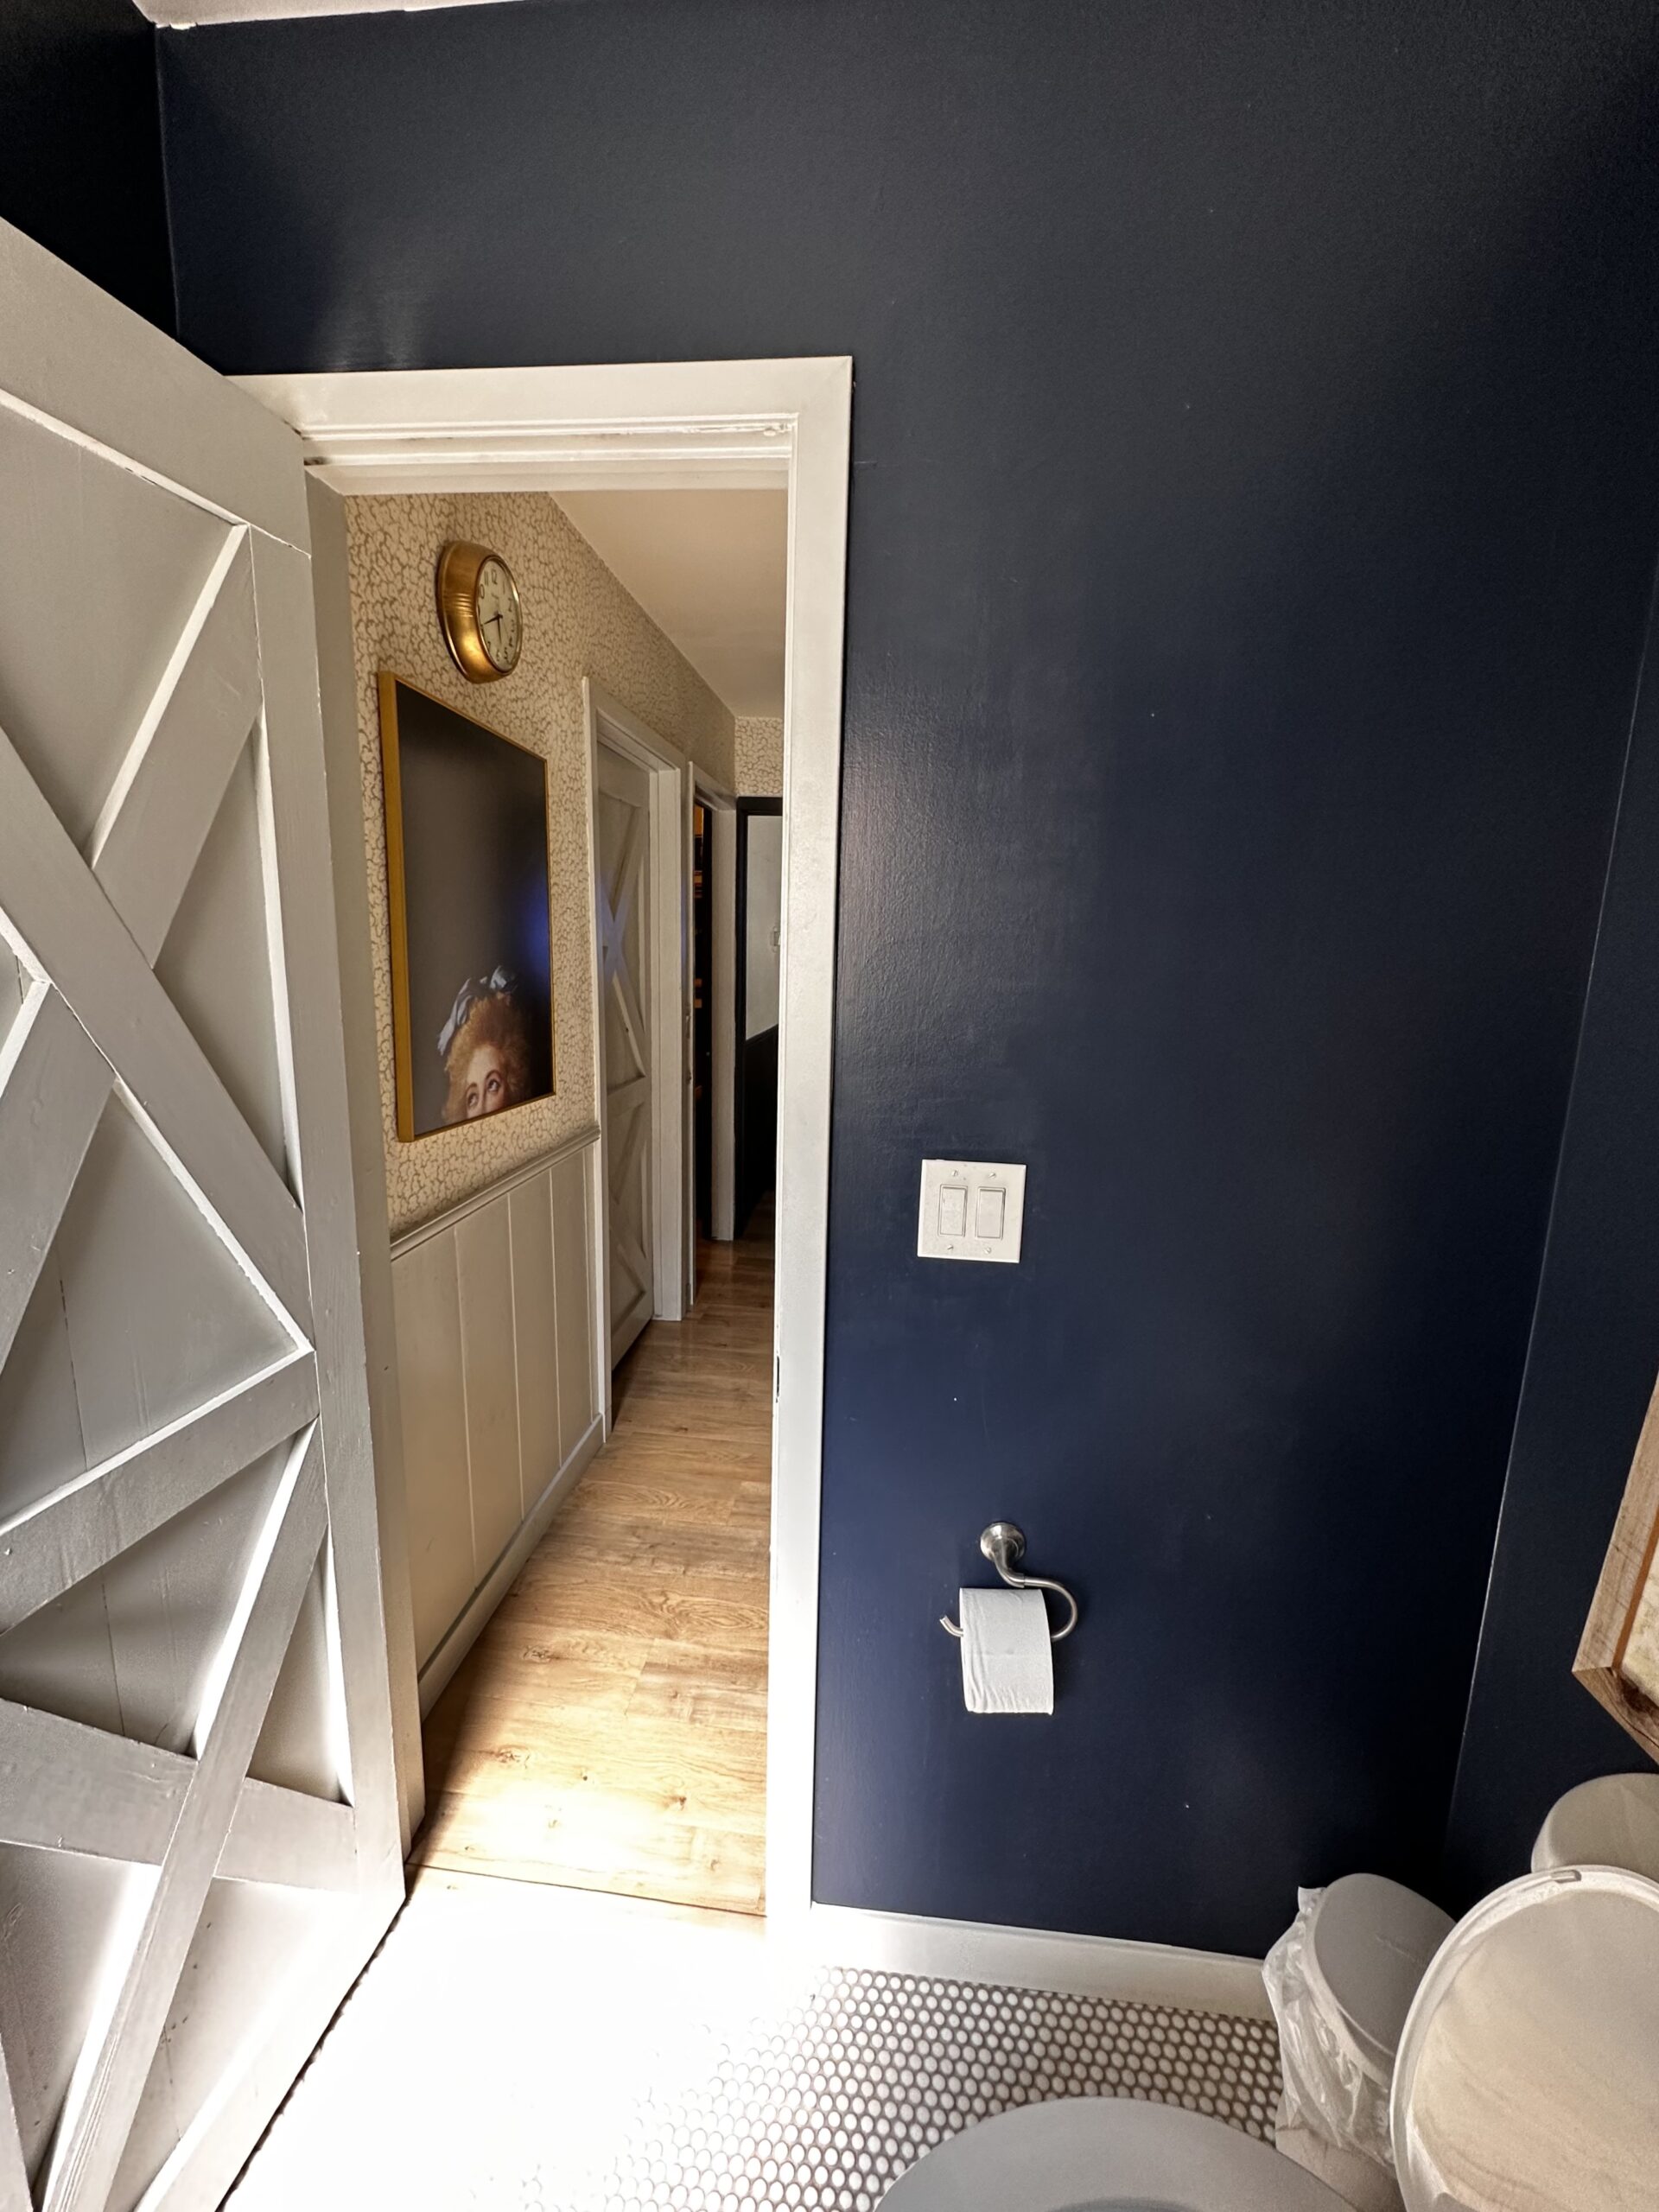
For context, here’s a pic of how the bathroom used to look:

I’ll skip the part where I had to prime and paint it back to white and get straight to the fun part: how to paint stripes on the wall using Scotch® Painter’s Tape. I specifically used ScotchBlue™ Sharp Lines Painter’s Tape.
First thing I did was use a level to draw out vertical lines. I spaced these 8 inches apart. You can definitely use a laser for this, I just prefer a level. And don’t worry about the pencil marks, we will paint over those later!
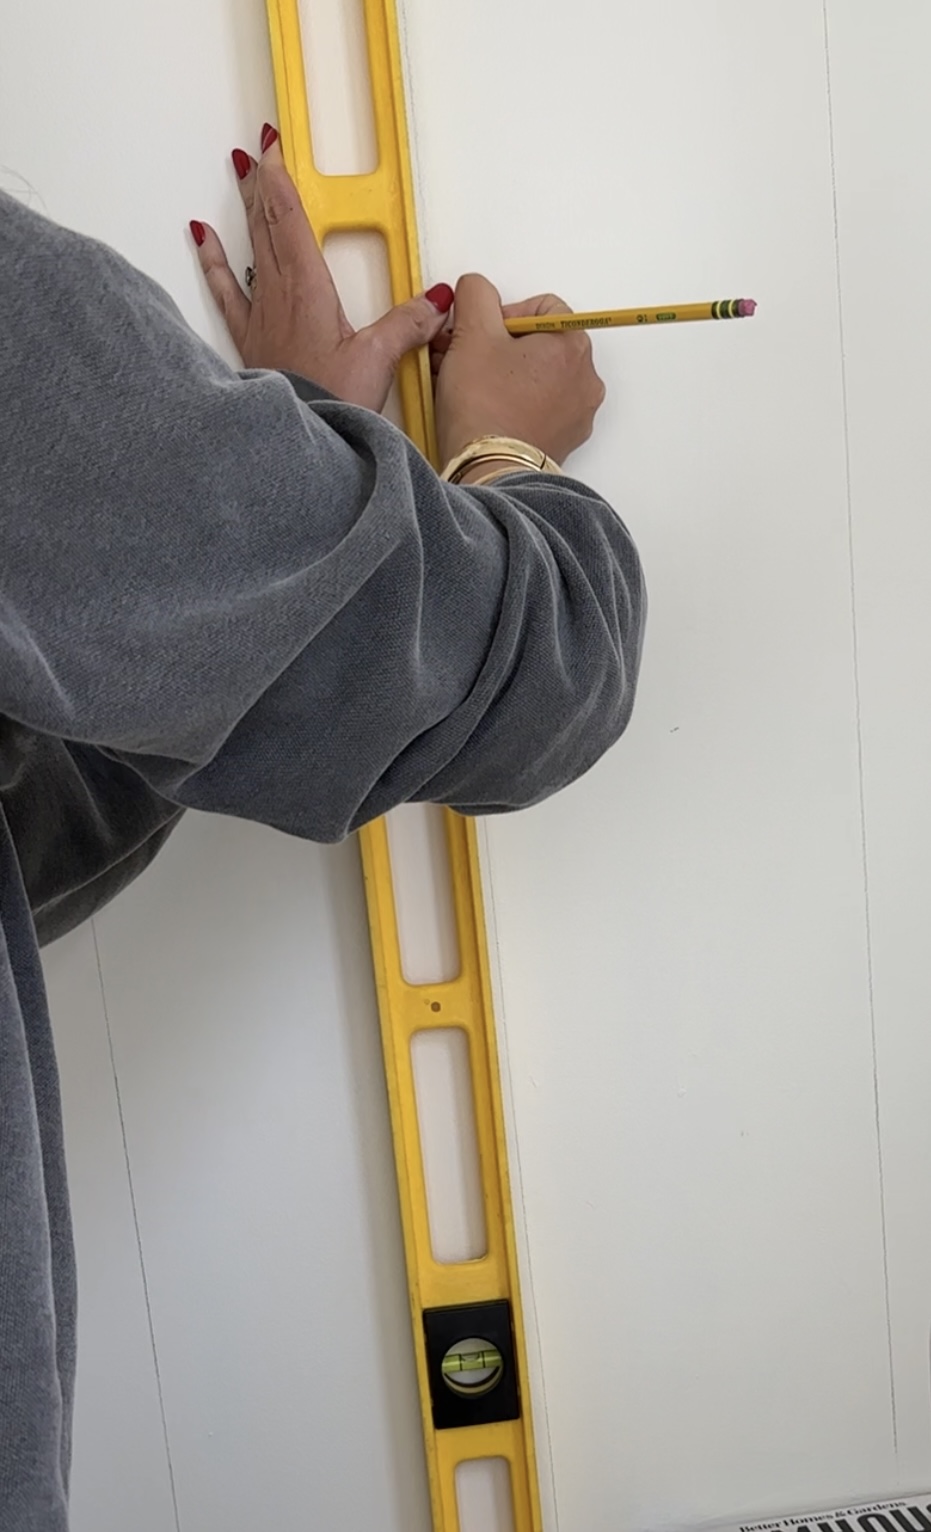
(Learn from my mistakes: be sure to double check your measurements before taping. I randomly had one 10 inch stripe and didn’t notice until it was too late)
Next thing I did was place the tape. I placed my Scotch® Painter’s Tape right before the pencil line so that the blue paint I chose would cover it up.
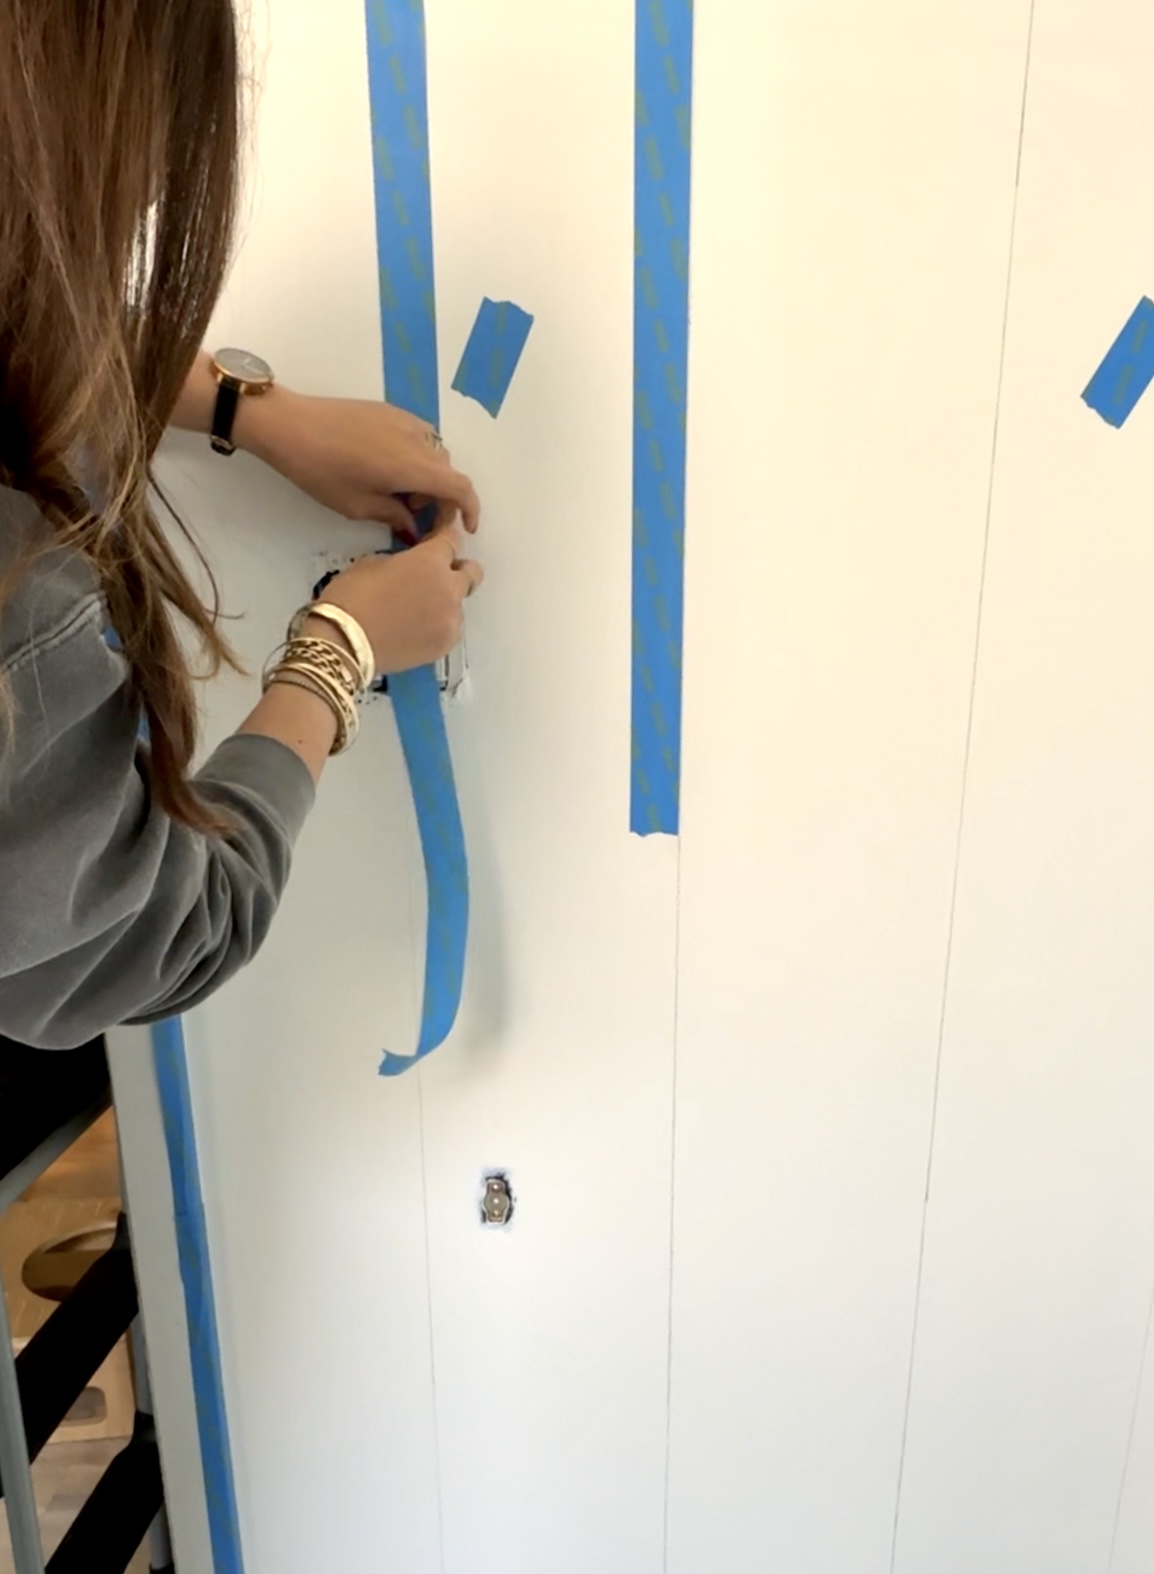
Be sure to press down firmly to remove any air bubbles as you place the tape. I placed a small piece of tape on the stripes that would remain white.
Can you spot the one random stripe that was 2 inches larger than the others? A reminder, DOUBLE CHECK YOUR MEASUREMENTS before taping.
Once everything is taped up, I did a quick line of base paint on the stripes that I planned to paint blue just to avoid any potential bleeding from air bubbles I may have neglected to flatten out. Mostly for user error, but hey, it happens.
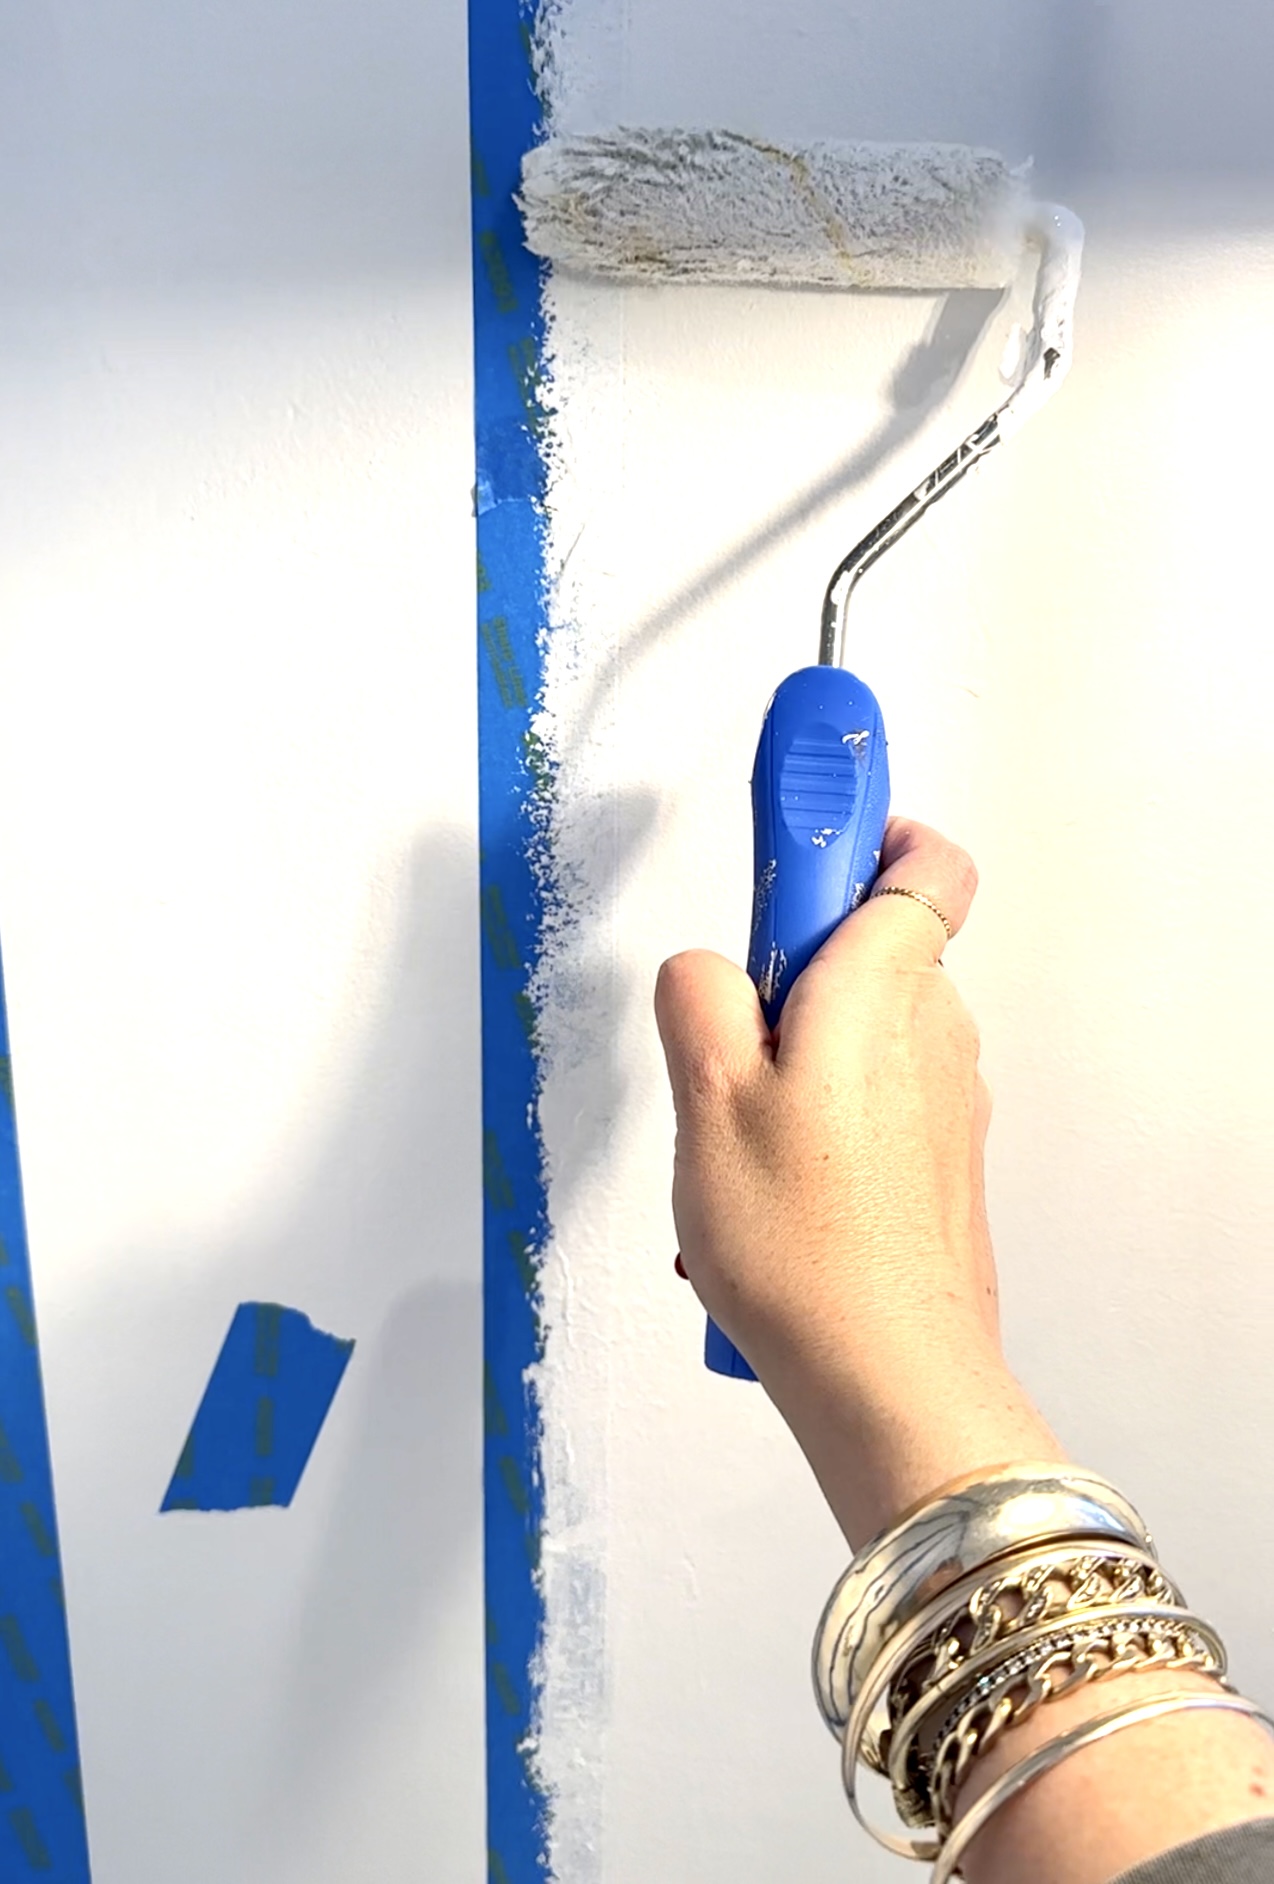
After that dried, I began painting my blue color.
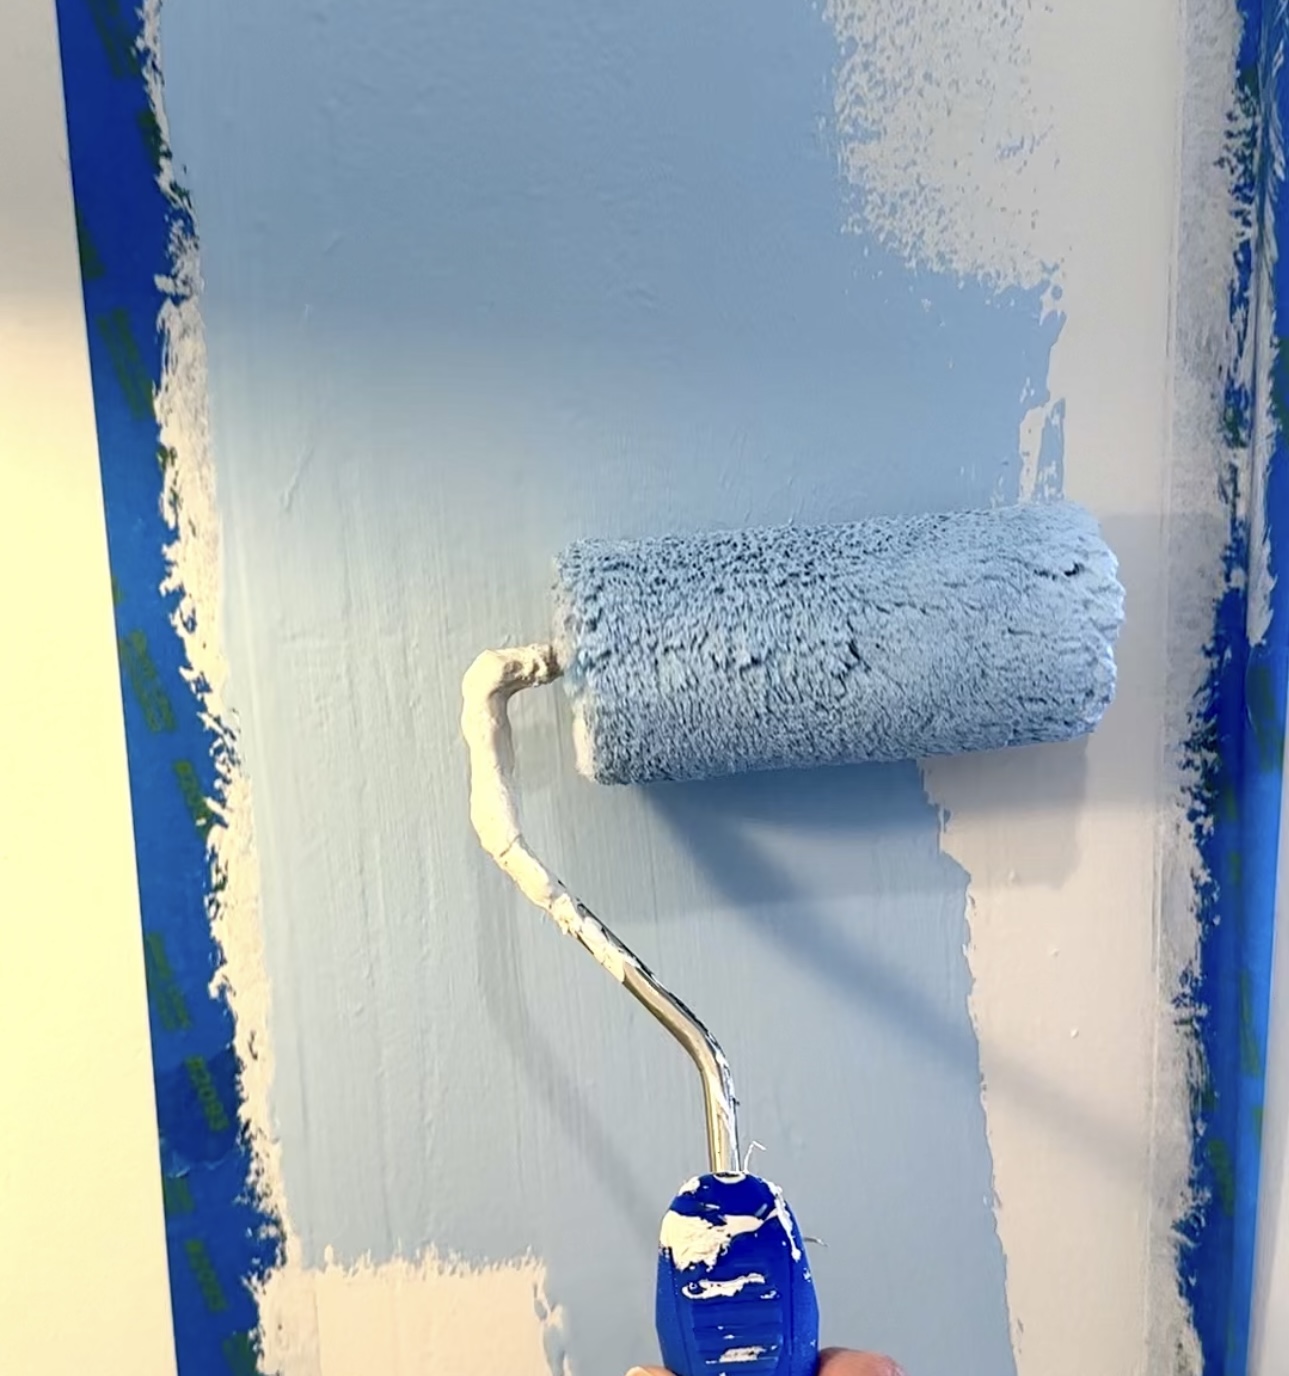
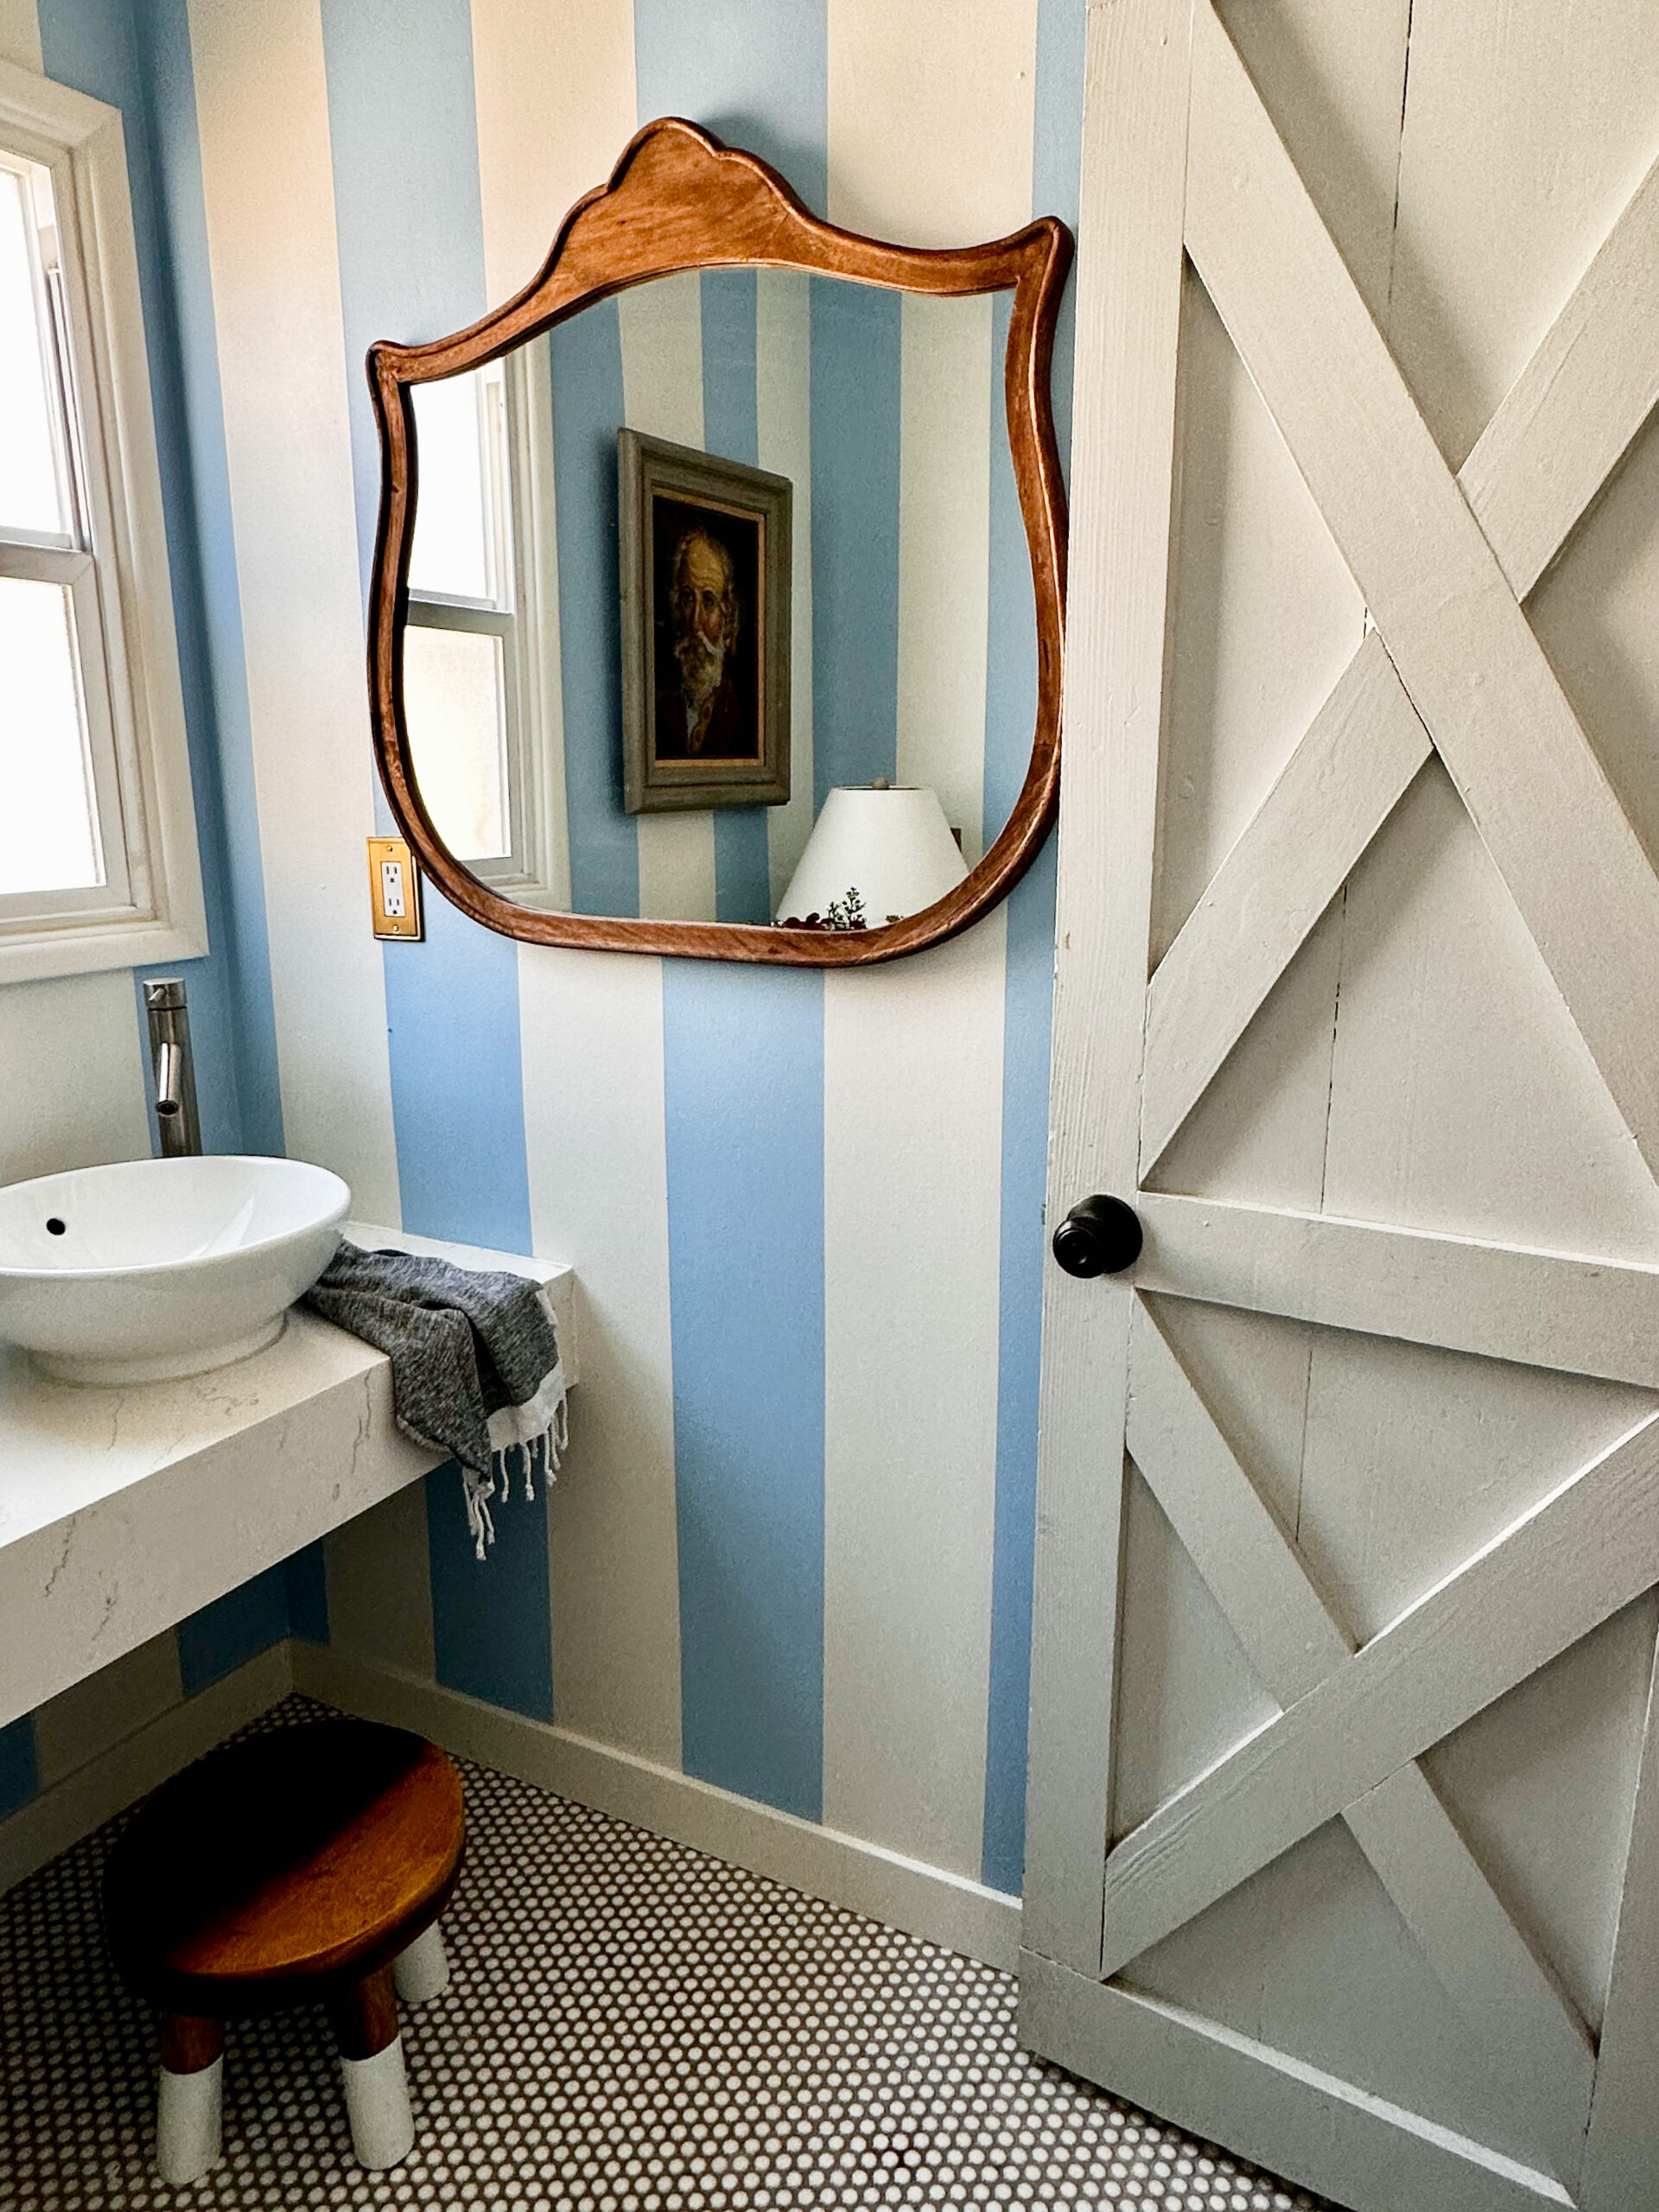
I did two coats, and when it was dry to touch, I began to remove the tape. Be sure to remove it upwards at an angle. JUST LOOK AT THOSE CRISP LINES.
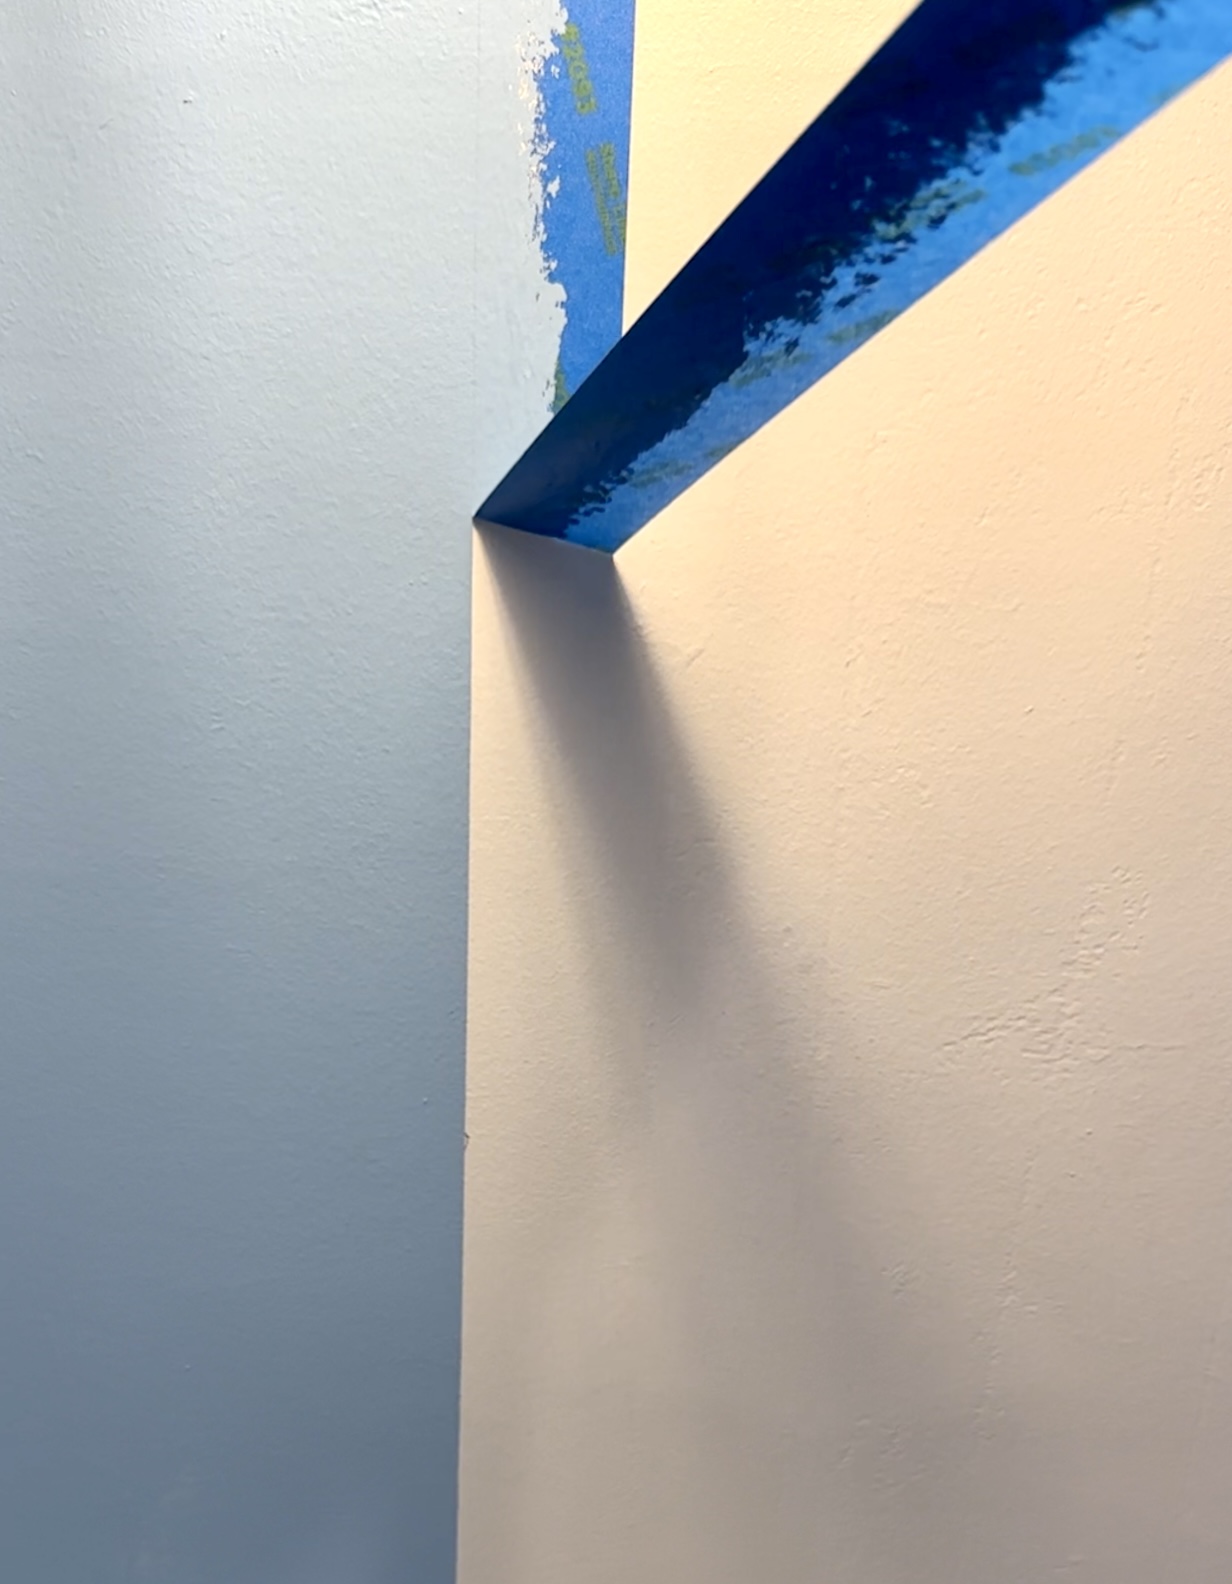
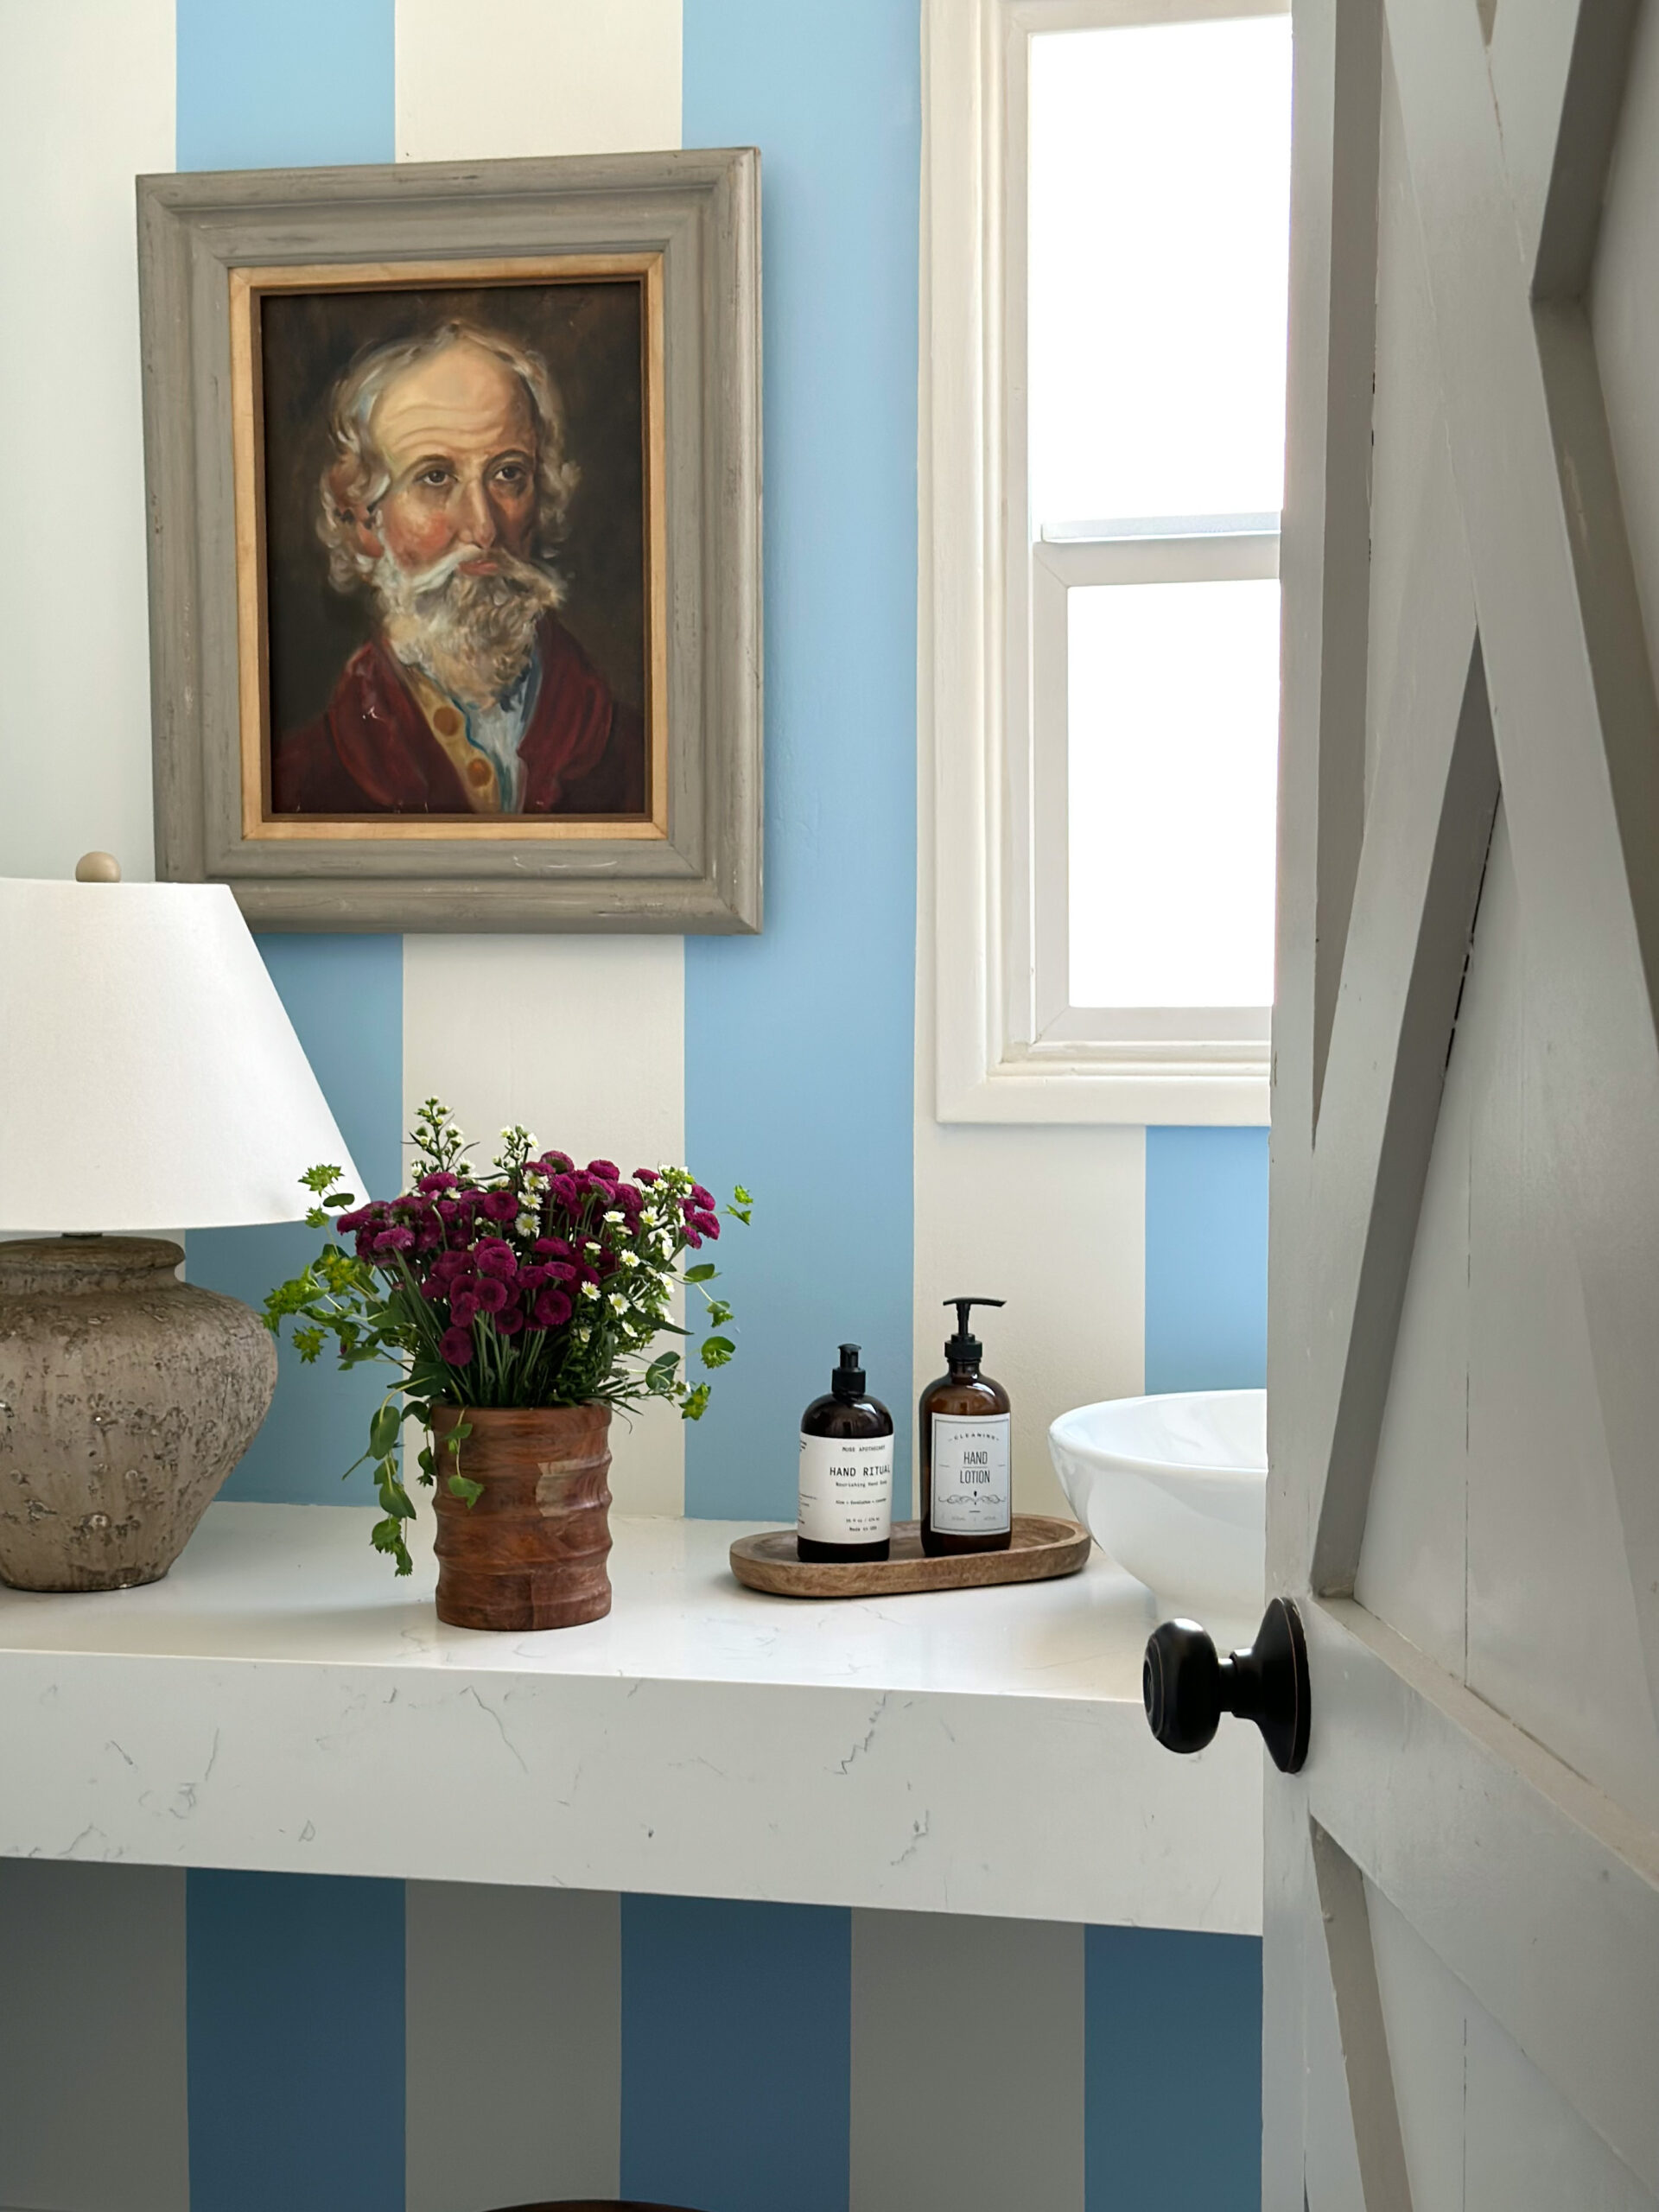
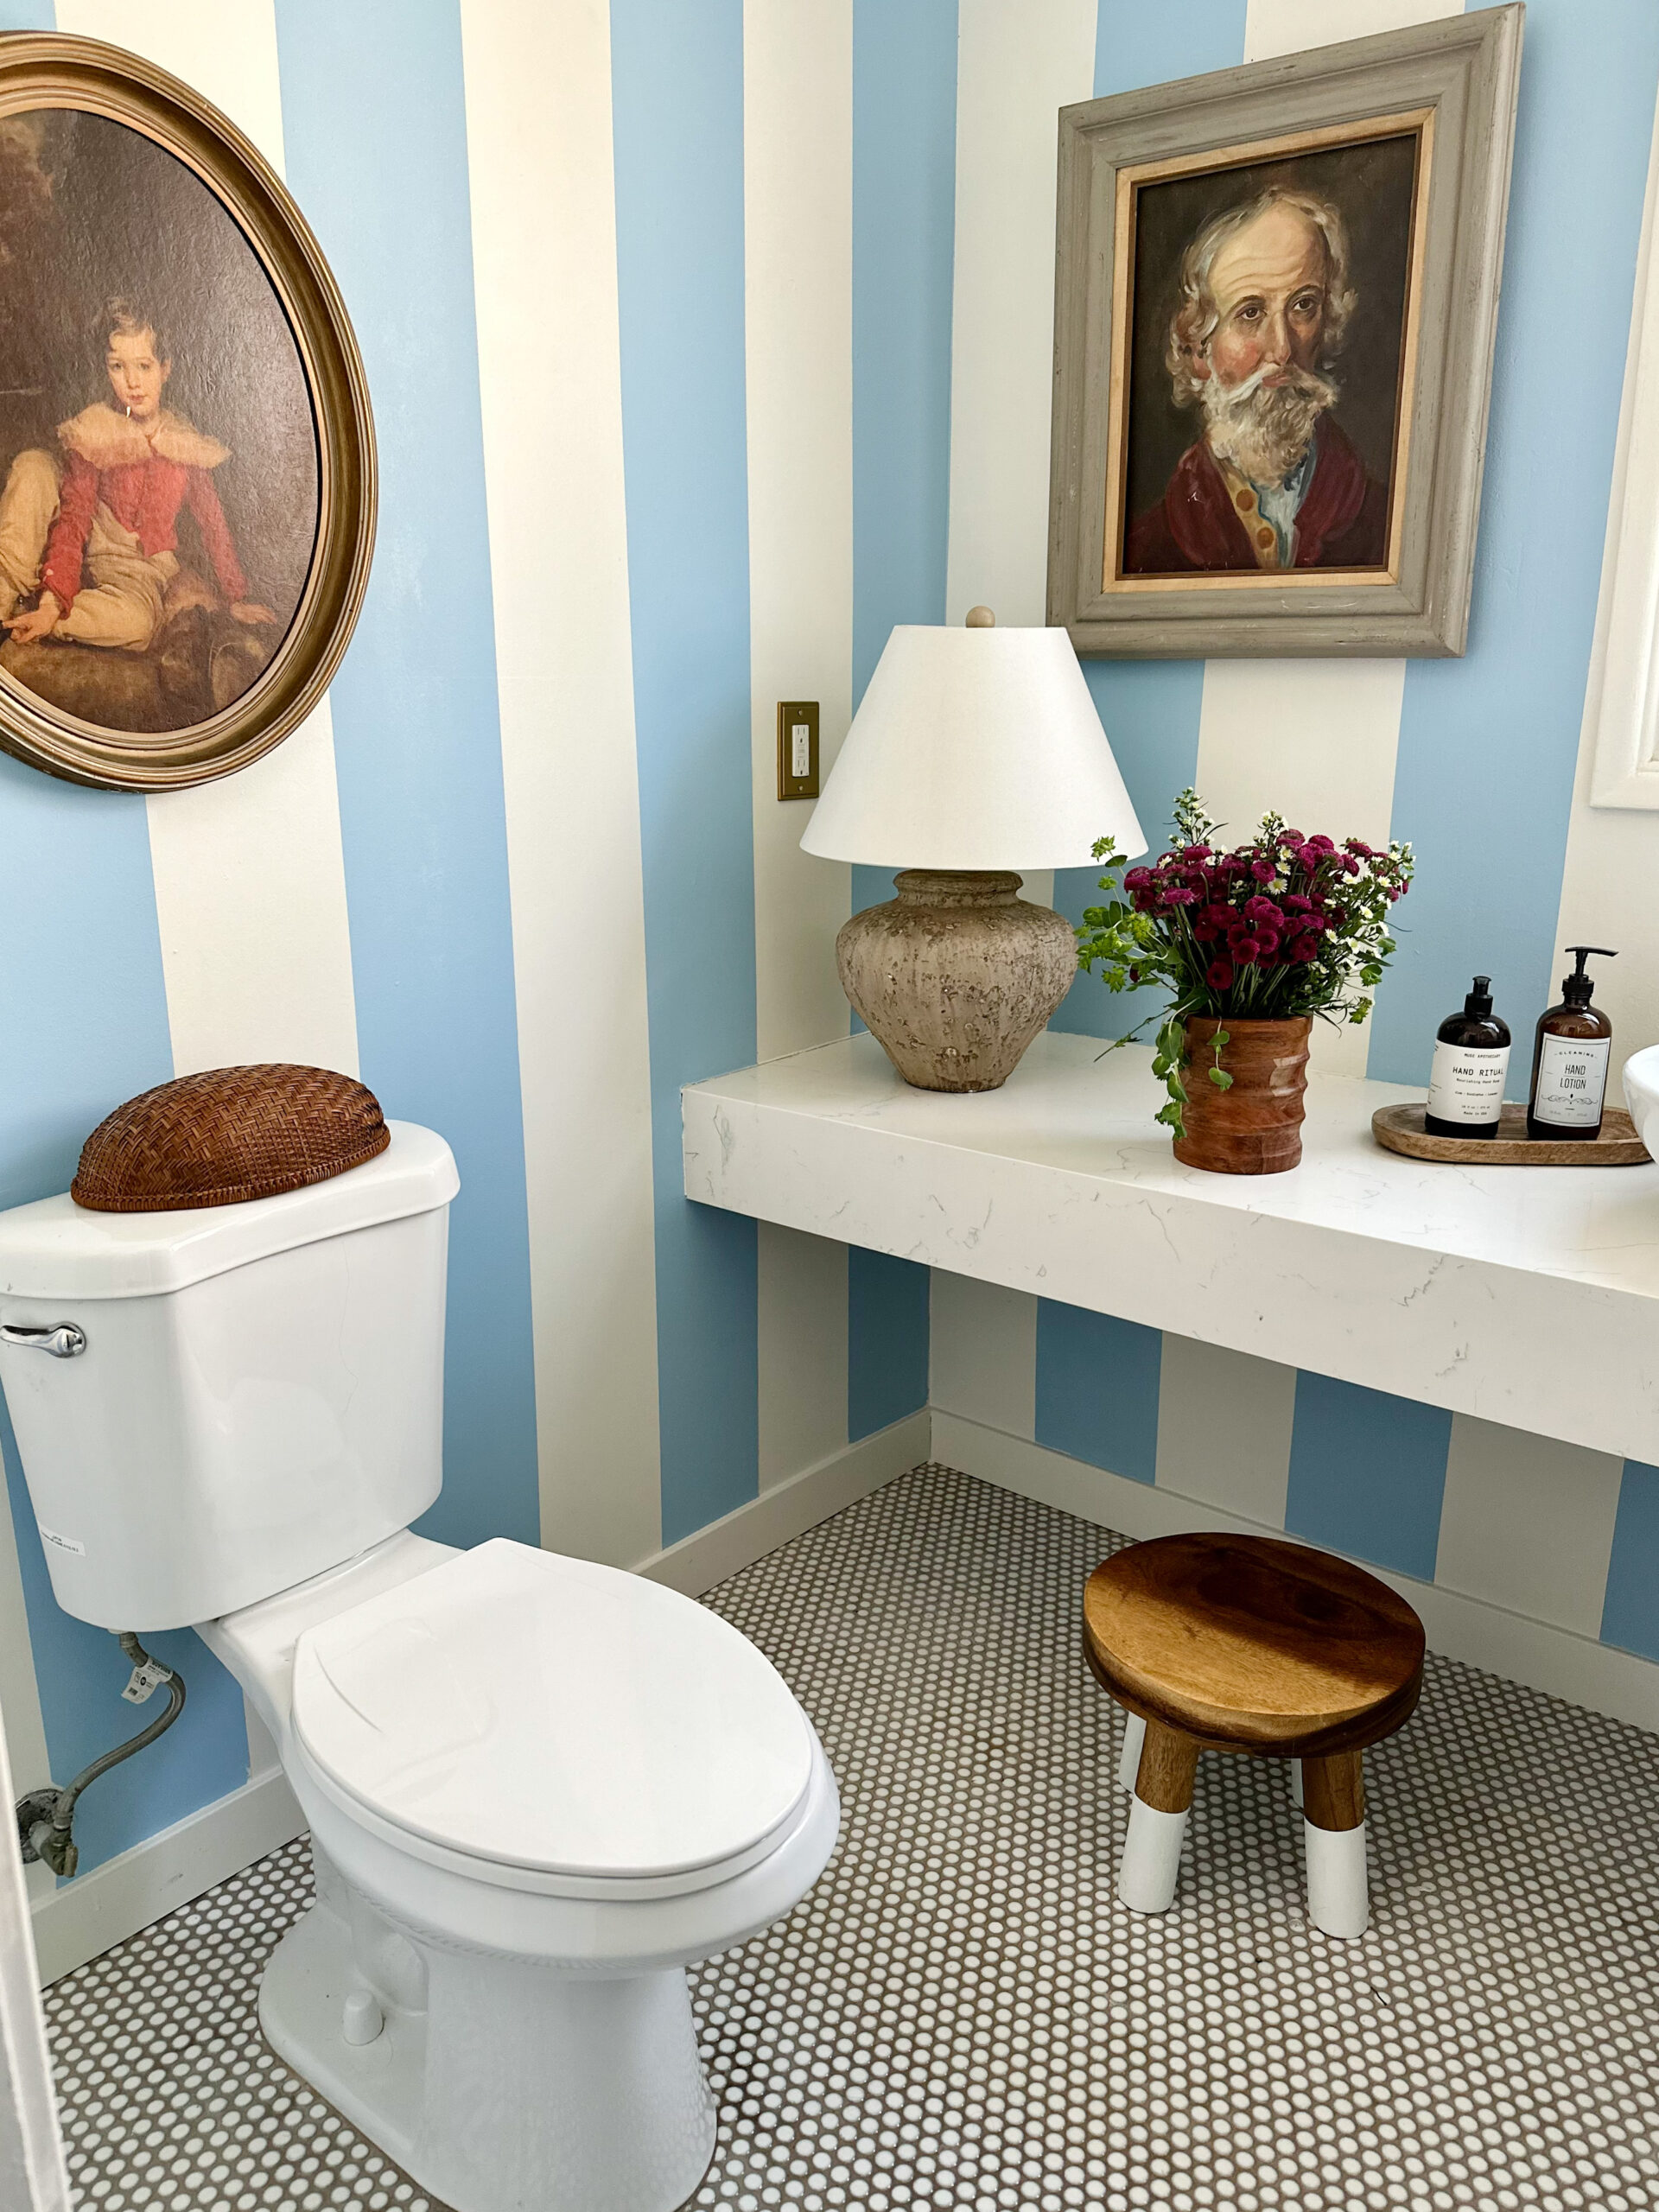
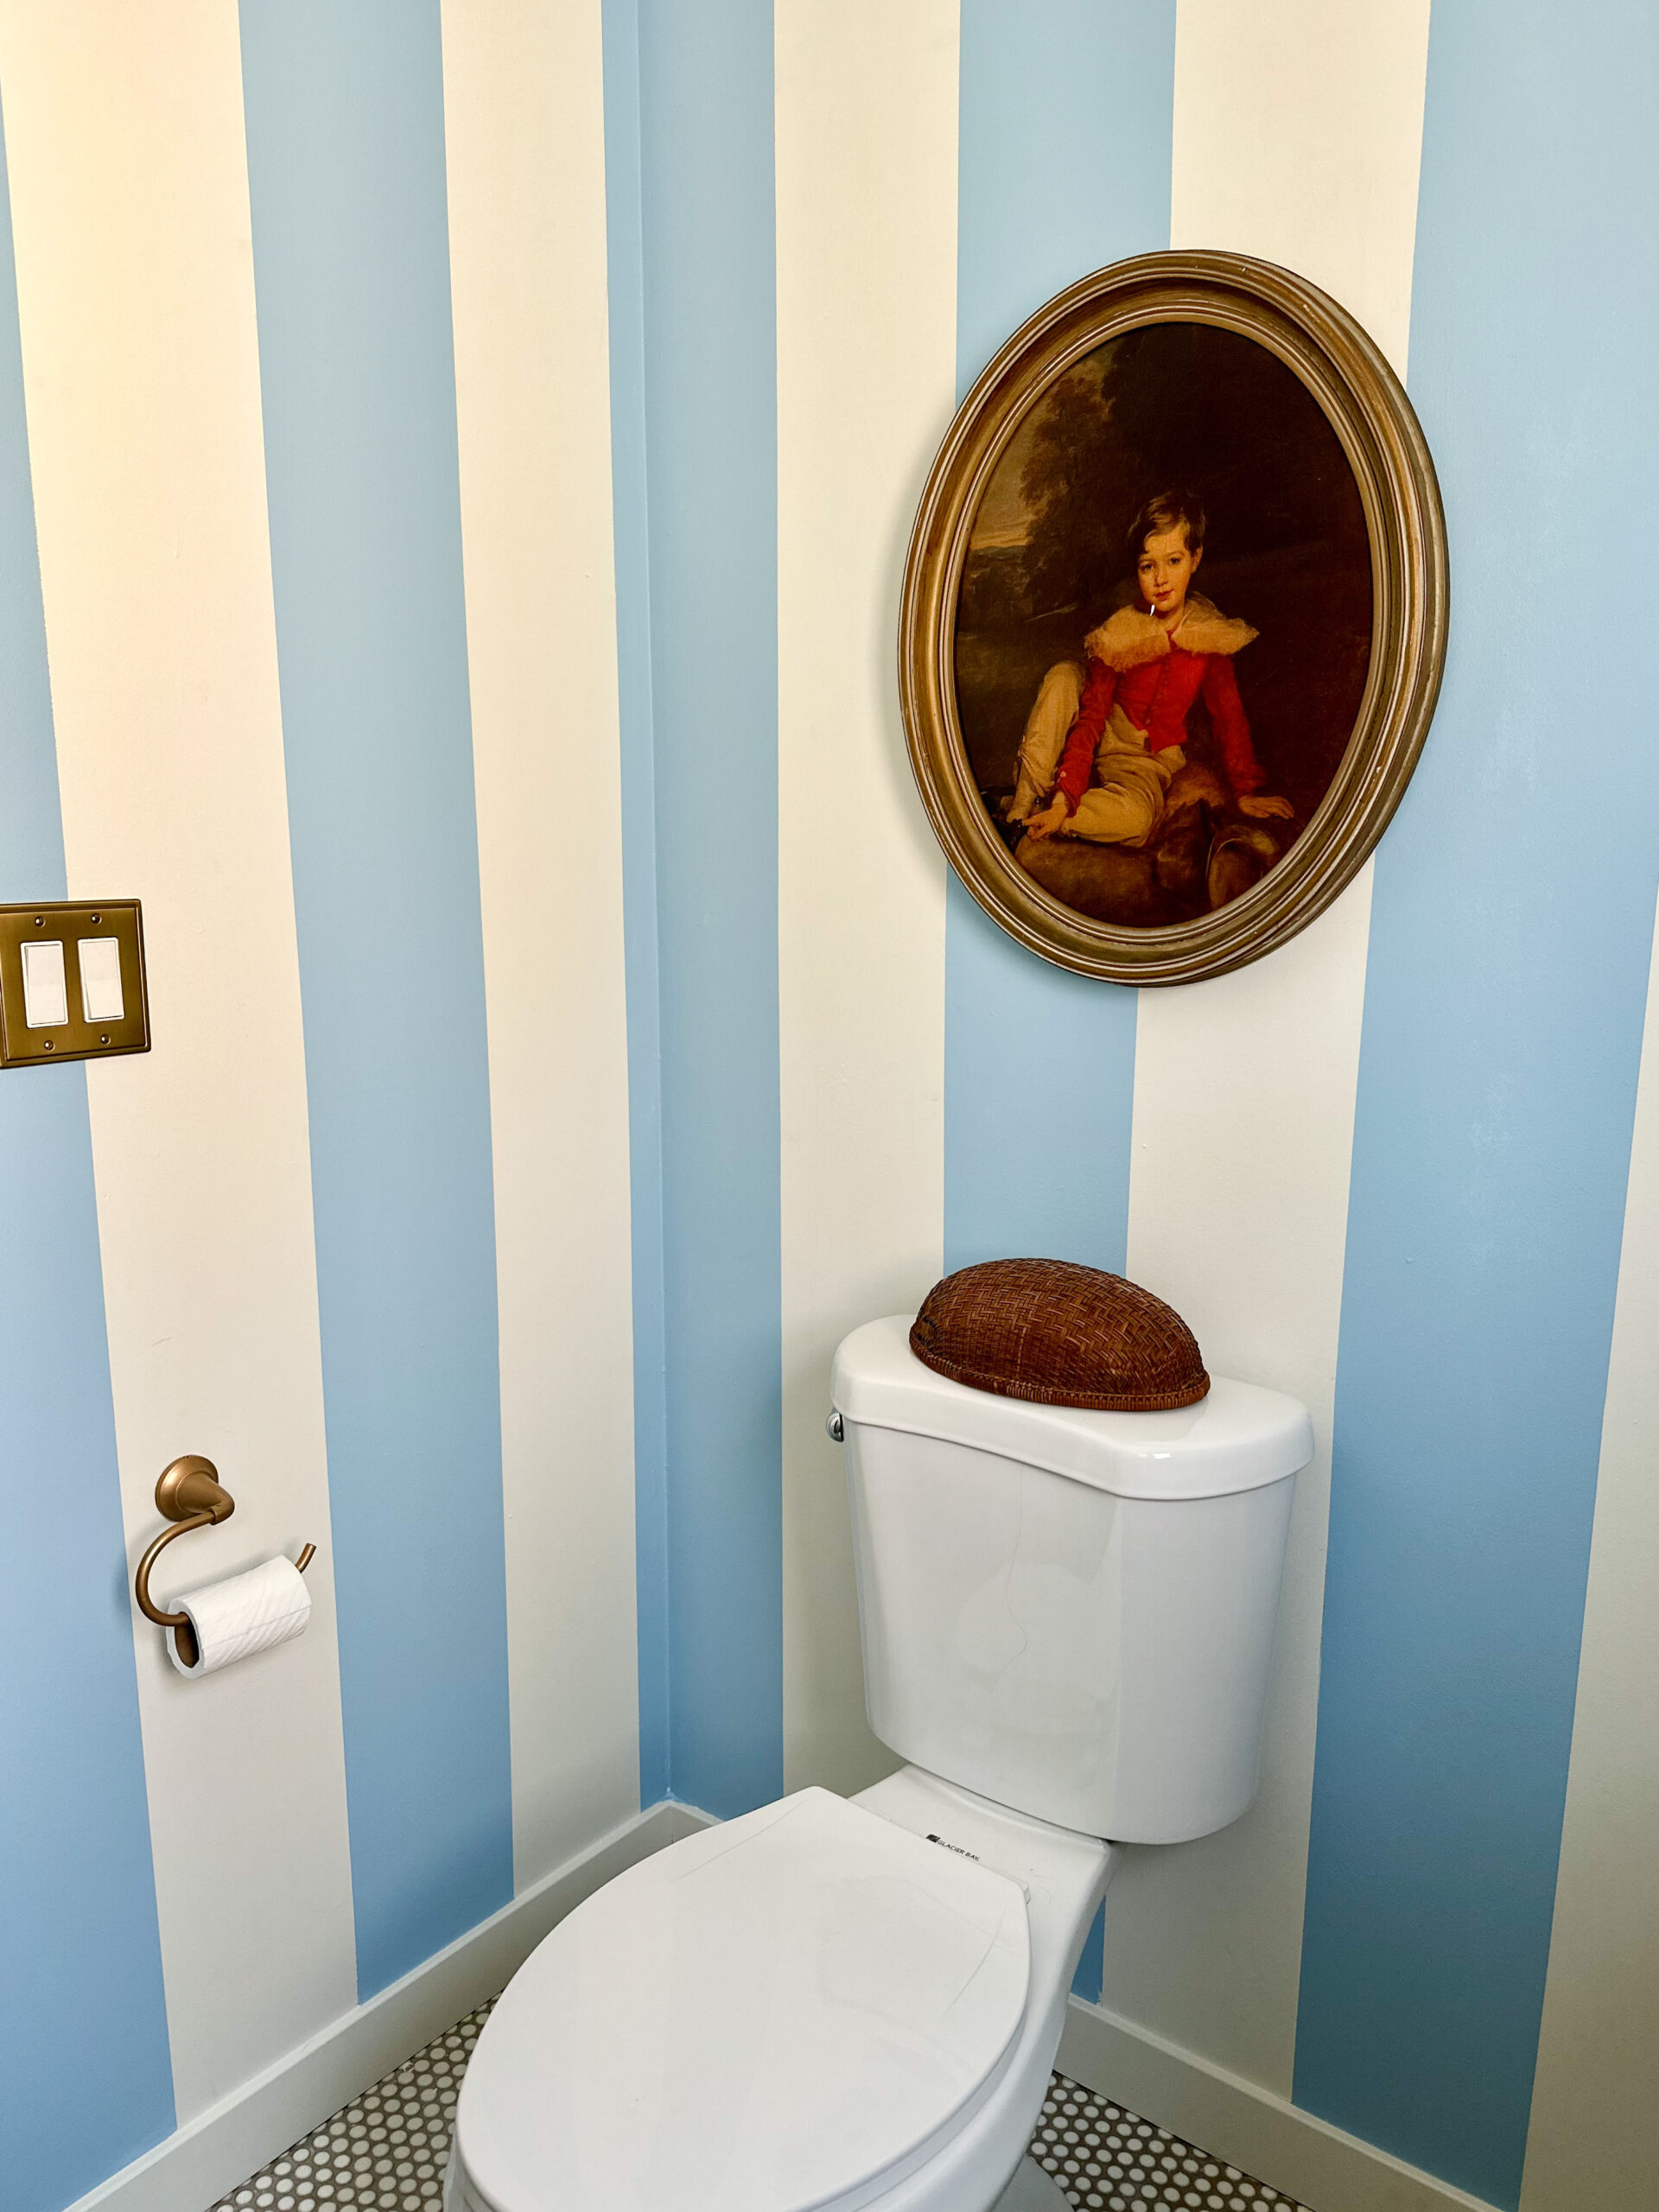
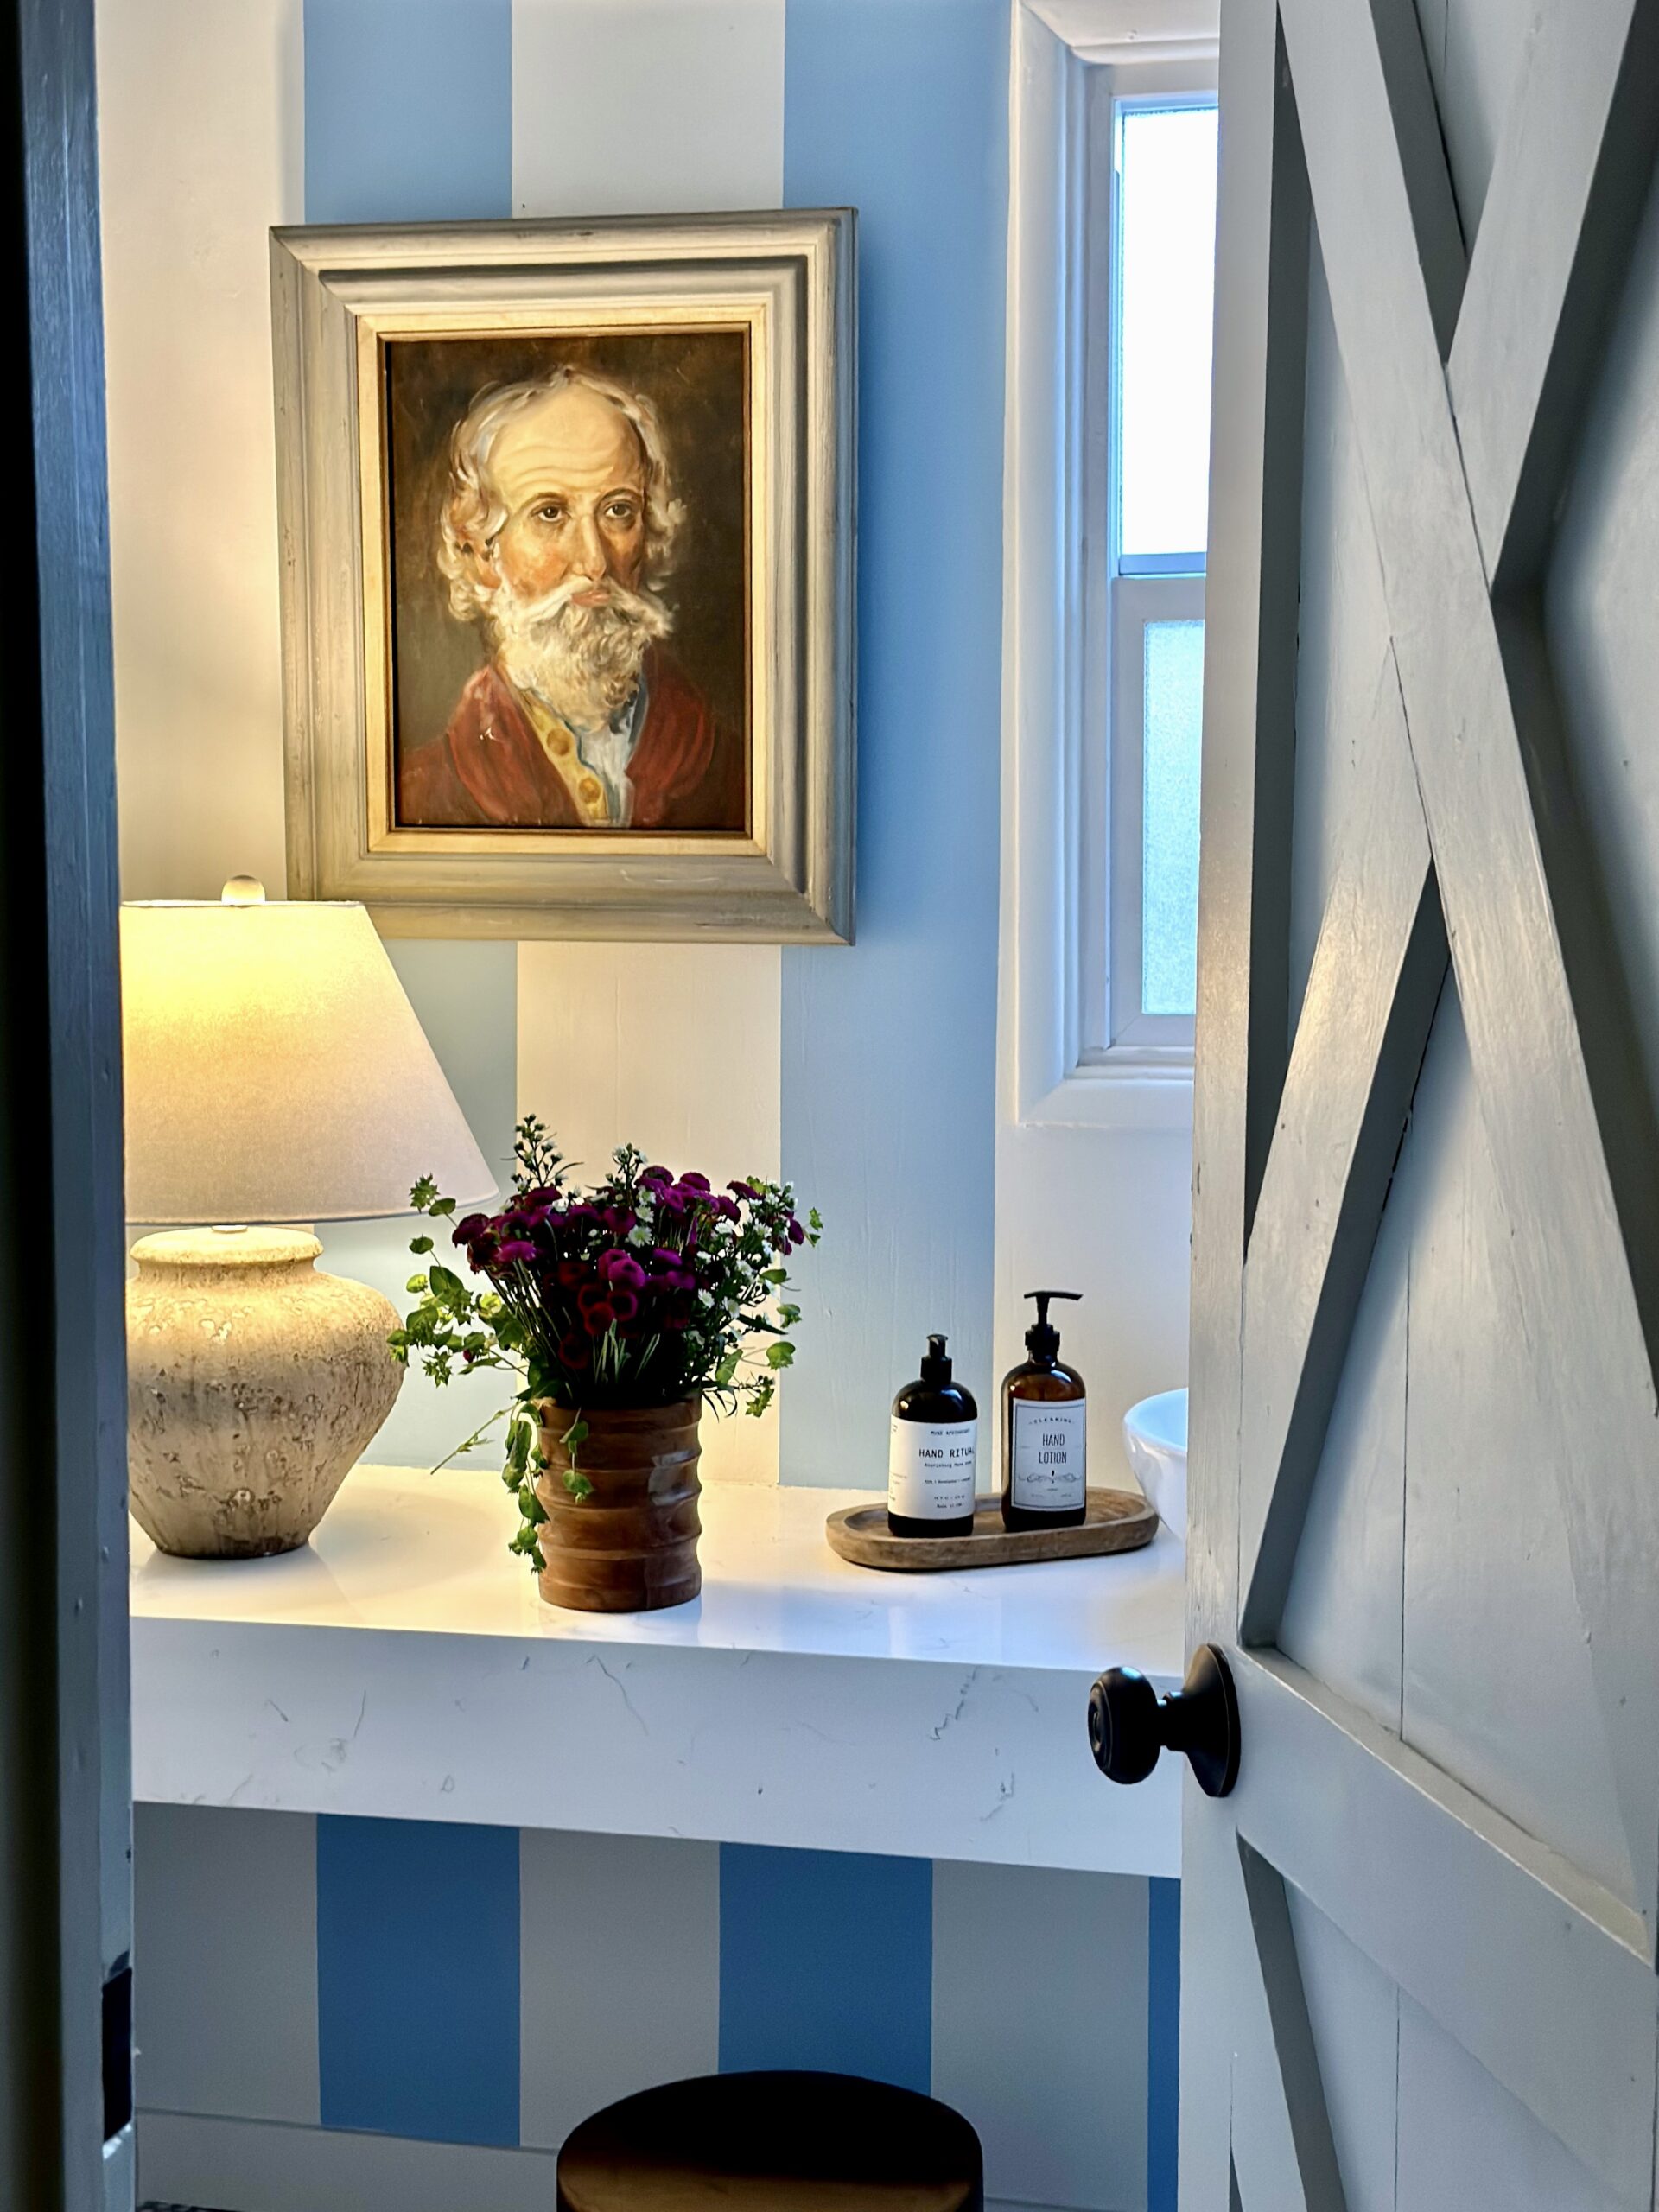
I could not be happier with the result.

A reminder what it looked like before..
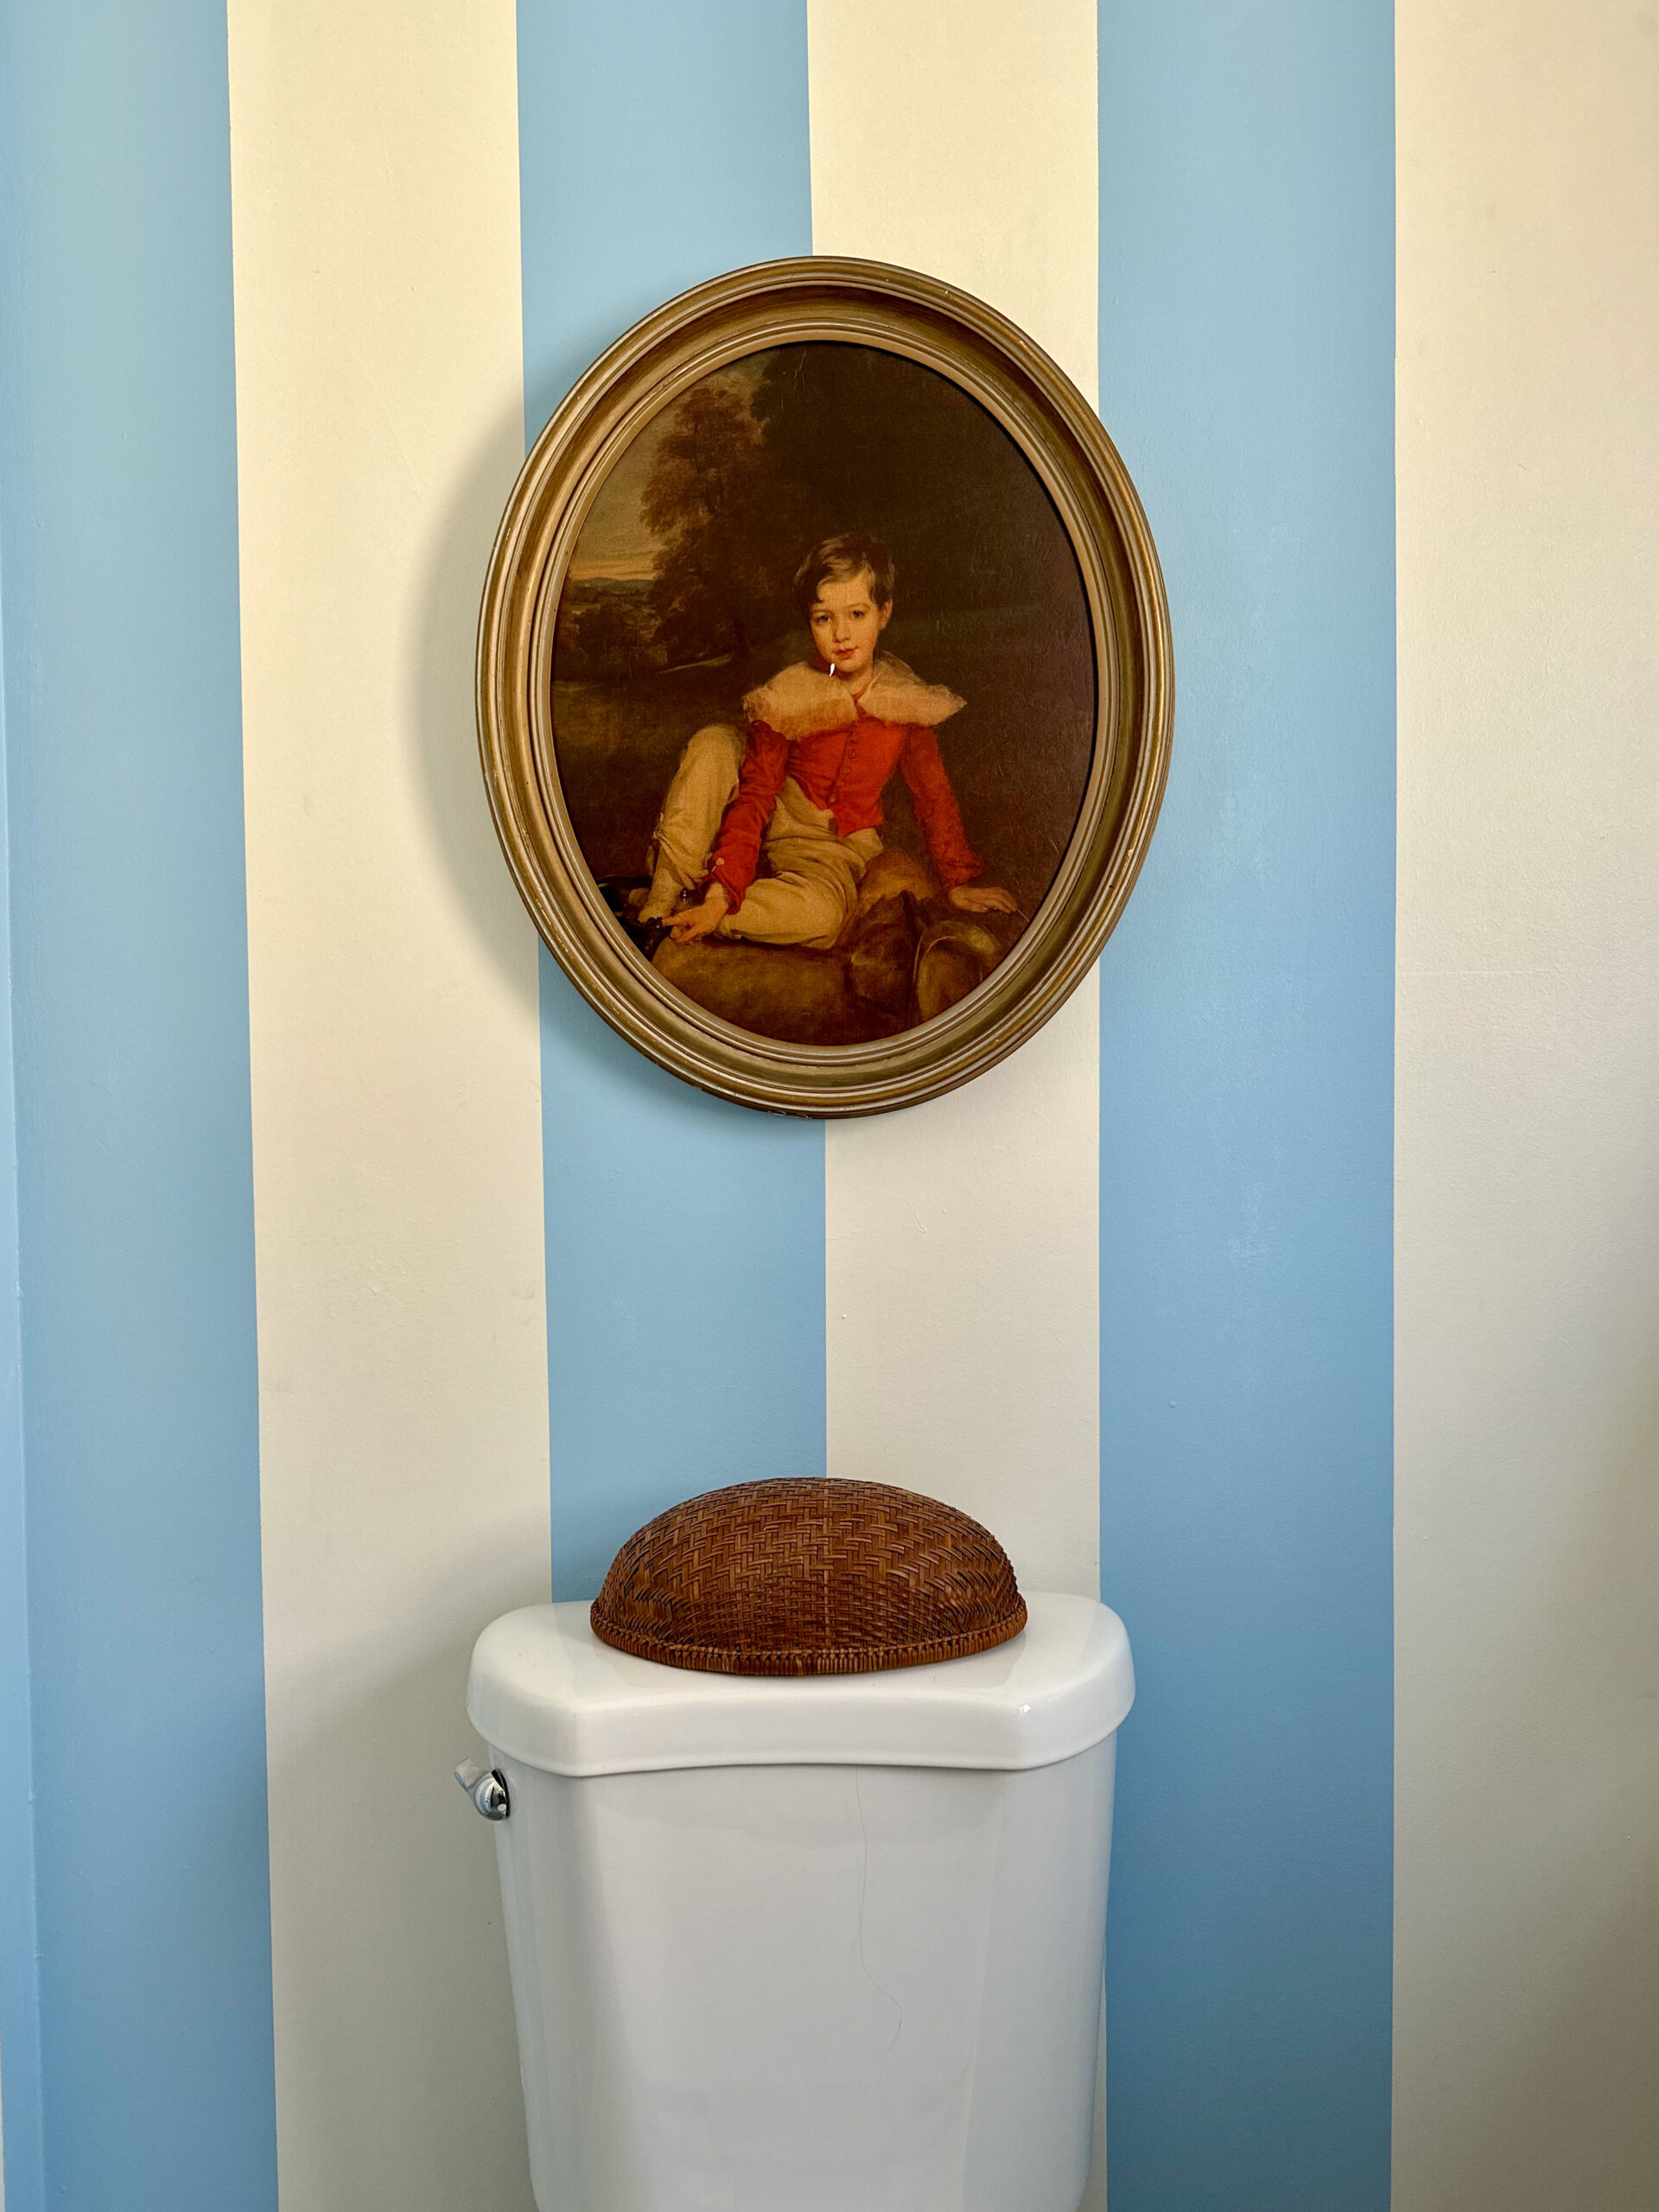
A couple more angles for ya..
BEFORE…
AFTER..
BEFORE..
AFTER…
BEFORE…
AFTER…
BEFORE..
AFTER…
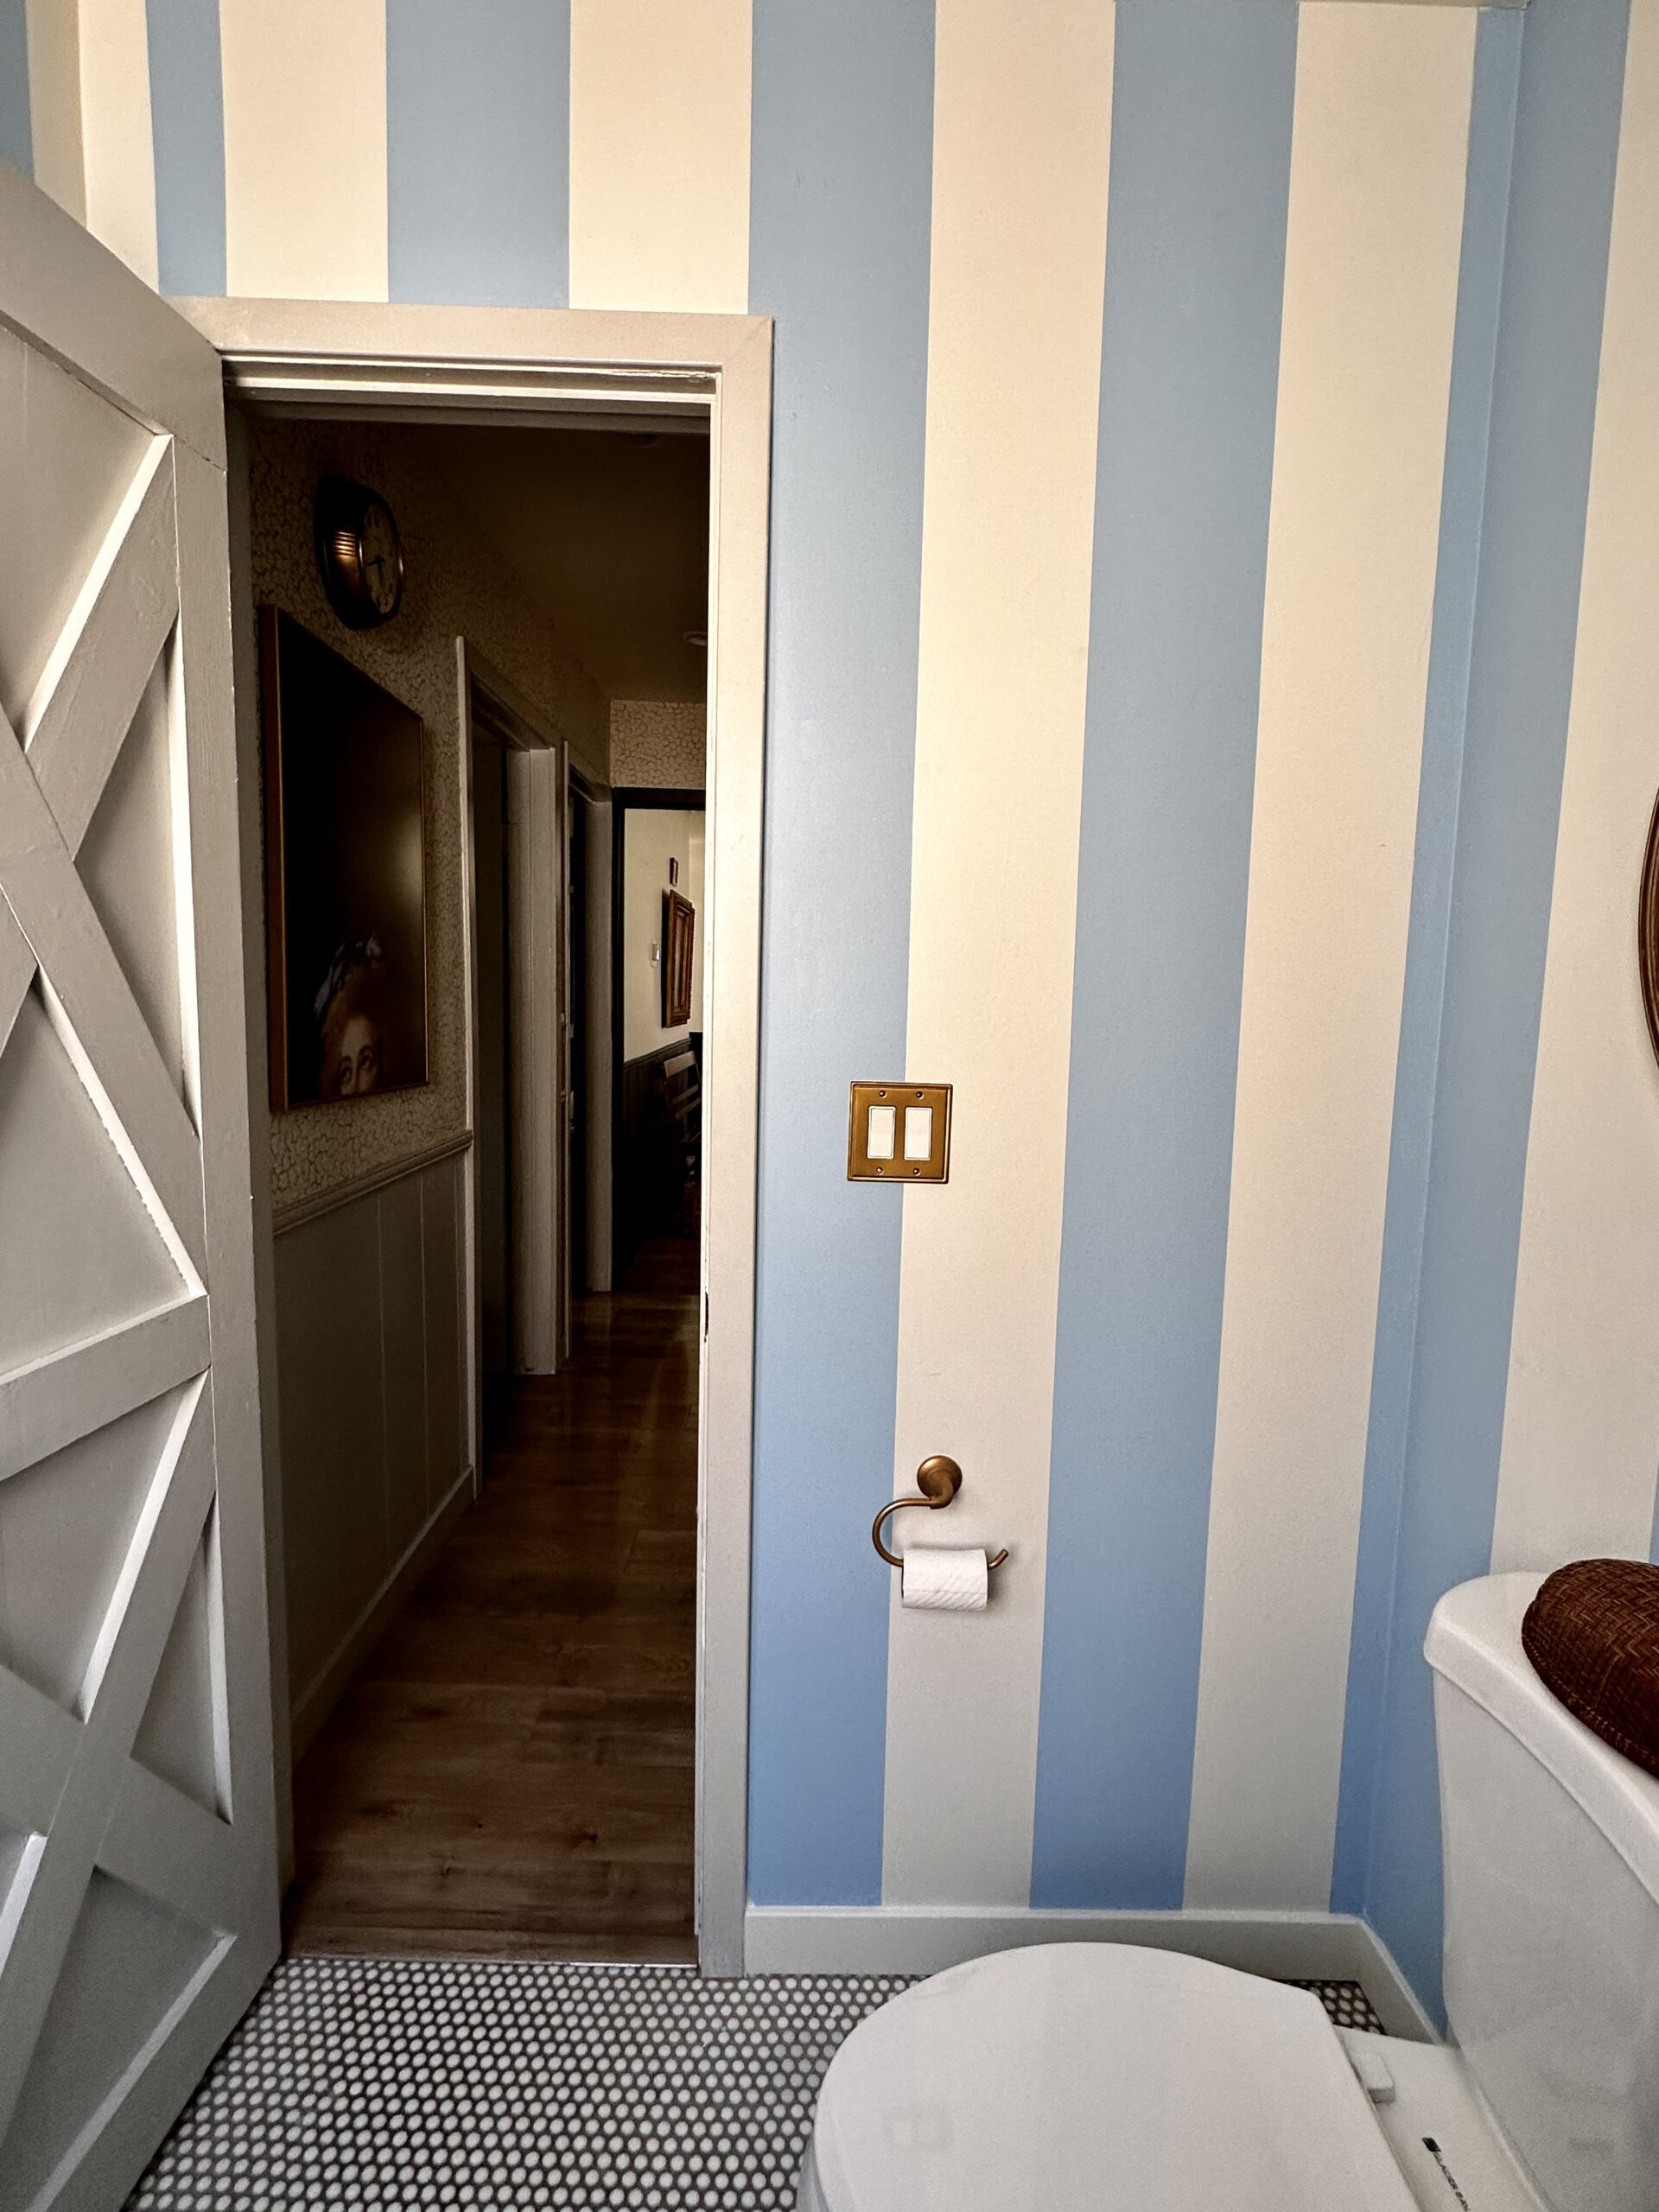
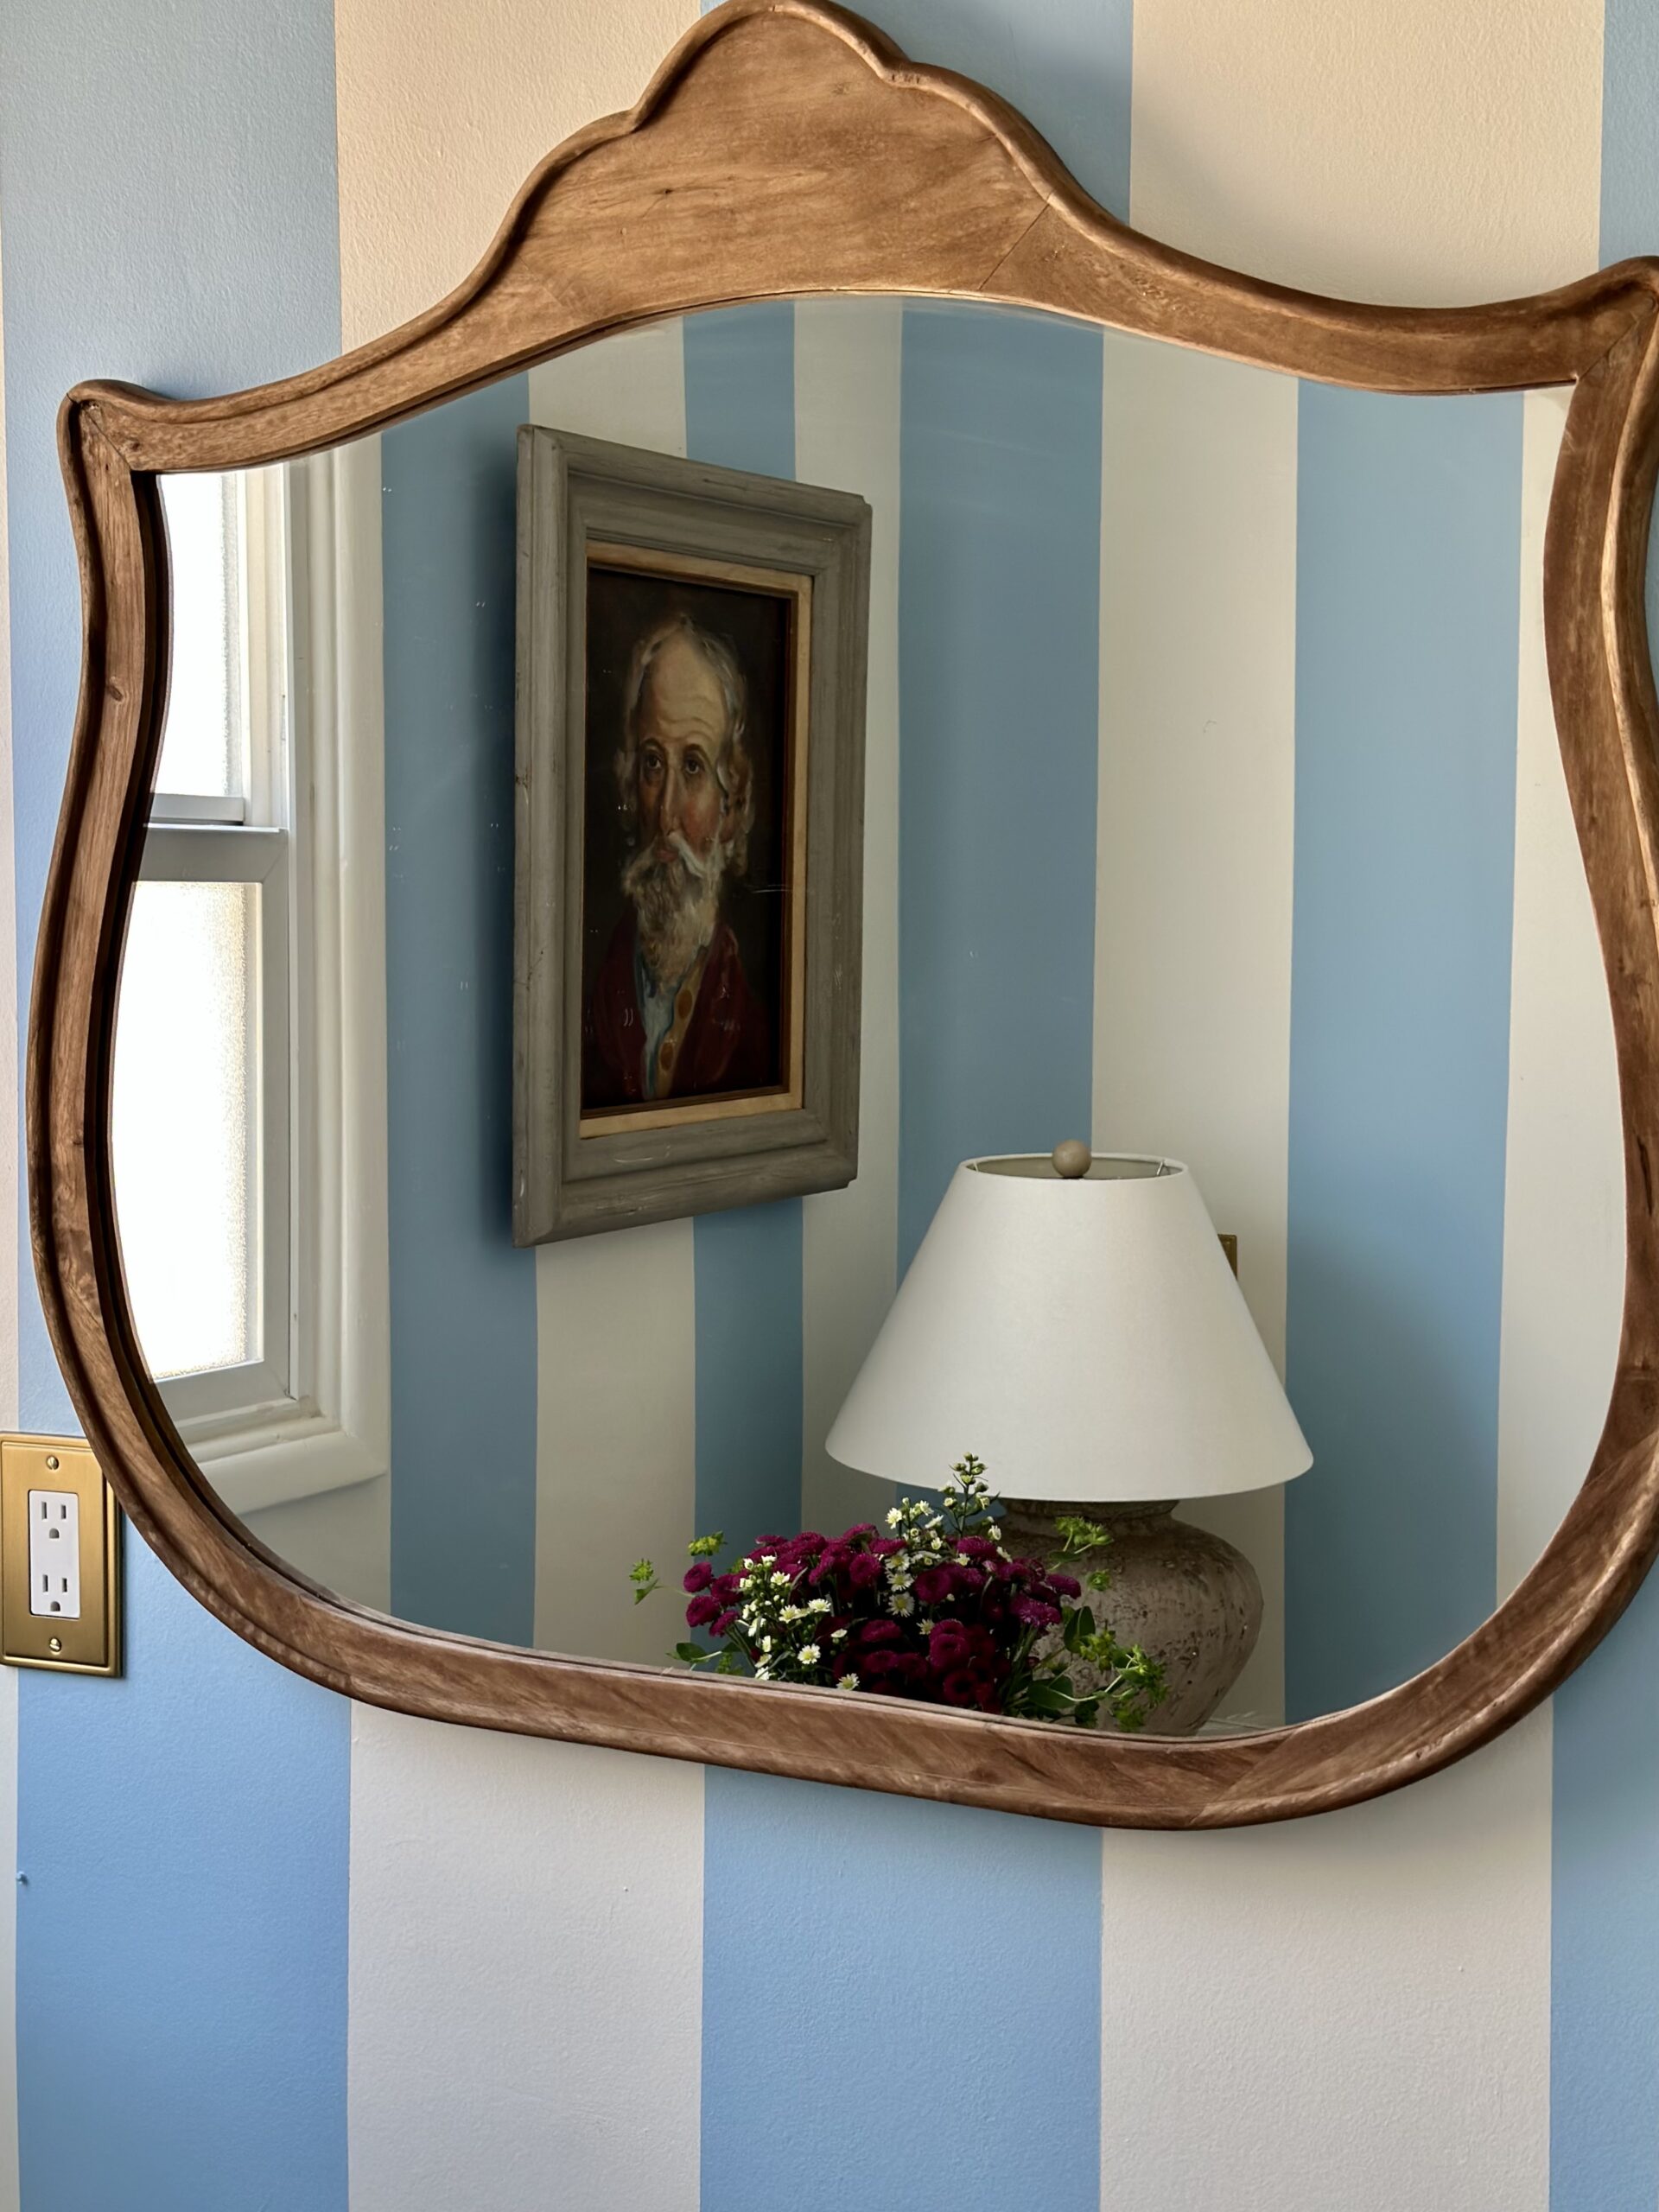
I just love how this turned out..
If you want to see a video of the space, check out this reel I made HERE. And if you want to try this project, grab yourself some Scotch® Painter’s Tape HERE.
Good luck, and have fun!
Love,
Deema